Elevate your apps with the latest graphics features in Jetpack Compose and Android
Speakers
-

-

Aayush Chaudhary
Software Engineer
-
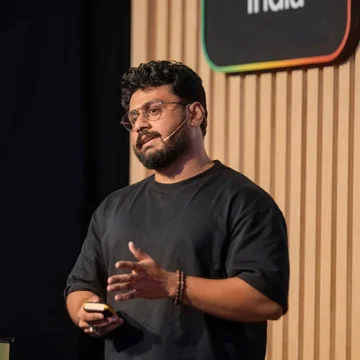
Rahul Ray
Developer Relations Engineer
About
About the talk
Ready to take your Android UI from "it works" to "it’s a work of art"?
Join us for a tour of the latest graphics capabilities in Jetpack Compose. We’ll show you how to build new visual effects, from delightful mesh gradients to progressive blurs, and using the powerful new graphics features in Android. We will also show you how to improve the performance of your graphics features, without sacrificing battery life or frame rates.
Summary
- Compose 1.12 introduces mesh gradients for rich multicolor blends across a 2D grid of vertices. On Android 14 and above, you can use the native drawMesh API to build custom geometry-driven visual effects.
- Compose supports wide color gamuts to provide smoother gradient blending on supported hardware. Enable wide color gamut mode on your activity or window only when displaying rich media.
- Compose 1.13 introduces native
PolygonShapeandMorphPolygonShapeAPIs for custom geometries.MorphPolygonShapereads progress during the outline resolution phase, updating shapes frame by frame without triggering recomposition. - Compose 1.13 adds progressive blur, while API level 37.2 introduces
RenderNode.setBackdropRenderEffectfor sampling background content. Developers can chain backdrop effects together to create frosted-glass or magnifying effects. - Optimize graphics performance by avoiding unnecessary work across frames. Decode only needed image pixels off the main thread and wrap animating effects in a
graphicsLayer.
Resources
- Resource Mesh Gradients Documentation
- Resource Understanding Color Guide
- Resource Install Android CLI
- Resource JetChat Sample App
Gemini Notebook
Topics
- jetpack-compose
- android-graphics
- mesh-gradients
- shaders
- blurring
- color-gamut
- performance
Transcript
Introduction to graphics features in Jetpack Compose
-
Hi, everyone, and welcome to our session, Elevating Your Apps with the Latest Graphics Features in Compose and Android.
-
My name is Rebecca Franks, and joining me on stage today is--
-
I am Aayush Chaudhary.
-
Hey, I am Rahul Ray.
-
We are seeing an emerging trend in how you are all pushing the boundaries of what's possible on Android and Compose, using AI to really bring your incredible ideas to life.
-
And we love seeing apps that feel premium, native, and delightful.
-
We know that apps that feel good and consistently get great ratings from users are ones that generally take advantage of the latest system-level API changes, have continuity between surfaces with shared elements and blurring, they adapt delightfully across form factors, and are performant, and don't leave users guessing, and push the boundaries of what's possible with your device.
-
In this talk today, we're going to show you some of the latest features that help you take advantage of Android, from delighting users with mesh gradients, enabling wide color gamut support, delightful transitions with polygon shapes, what's new in blurring, and, finally, we'll cover how you can think about performance when adding new graphics features into your apps.
-
But throughout the talk today, we'll be covering some of the new APIs at different levels of the stack.
-
While the legacy view UI toolkit is in maintenance mode now, we continue to invest in the underlying Android graphics hardware rendering engines that power Jetpack Compose.
-
You can think of graphics in Android in three different layers: the Compose APIs at the first layer, and this is where all high-level, new UI graphics APIs, like mesh gradient painters, polygon shapes, and progressive blur APIs live.
-
And then we have the intermediate layer, where Compose's DrawScope, draw modifier nodes, and AGSL let you build custom effects.
-
But, finally, we have the Android platform, and Compose can always access a native Canvas and use brand-new OS rendering primitives right inside your Compose modifiers.
-
And we'll show you some of the examples of doing this today.
-
So let's get into it.
Mesh gradients and custom mesh rendering
-
So first, let's look at mesh gradients, a new API introduced in Compose 1.12.
-
Previously, we have had linear gradients, previously, we have had linear, sweep, and radial gradients, which are great for simple transitions, but if you want rich multicolor blends like ambient backgrounds or floodlighting effects, you need 2D grid of system where, positions and colors can blend across space.
-
Now, to create a mesh gradient like this, first, specify how many rows and columns of patches you want.
val gradientPainter = remember { MeshGradientPainter(rows = 3, columns = 3) { } } -
And then inside the trailing lambda, call
setVertexand assign a normalized offset ranging from 0F to 1F, along with a color for each grid intersection.val gradientPainter = remember { MeshGradientPainter(rows = 3, columns = 3) { setVertex(0, 0, Offset(0.0f, 0.0f), indigo) } } -
And then to animate those vertices, add animated offsets for eight ver-- vertices.
val gradientPainter = remember { MeshGradientPainter(rows = 3, columns = 3) { setVertex(0, 0, Offset(0.0f, 0.0f), indigo) // .... setVertex(1, 1, Offset(0.2f, 0.4f) + Offset(animatedOffset, animatedOffset), coral) // .... setVertex(3, 0, Offset(0.0f, 1.0f), sunshine) // .... } } Box( modifier = modifier.padding(32.dp) .safeContentPadding() .aspectRatio(16 / 9f) .fillMaxWidth() .paint(gradientPainter) ) -
Once your painter is defined, simply call it with any composable via a paint modifier.
-
Now, in the JetChat app, we added a feature to like a message when you double-tap on it.
-
To build this, we set up a 2 by 3 mesh and place our color stops across the component.
MeshGradientPainter( rows = 2, columns = 3, hasBicubicColor = true, ) { // Row 0 (top edge, y = 0.0f) setVertex(0, 0, Offset(0.0000f, 0.0000f), Color(0xFFFF6B6B)) setVertex(0, 1, Offset(0.3300f, 0.0000f), Color(0xFFFFD6D6)) setVertex(0, 2, Offset(0.6700f, 0.0000f), Color(0xFFE8C3FF)) setVertex(0, 3, Offset(1.0000f, 0.0000f), Color(0xFFE396FF)) // ... remaining vertices for Rows 0, 1, and 2 } -
Notice that we set
hasBicubicColorto true over here. -
By default, colors interpolate linearly across triangles, which can sometimes leave visible patches.
-
Turning this on switches the shader to smooth bicubic interpolation so that colors can melt seamlessly into one another.
-
Now, what if you want to build an animated ambient glow like this behind the input box?
-
To approach an effect like this with mesh gradient, you need two things.
-
First, a smooth organic motion for the interior vertices and a way to soften the outer edges so that you don't end up getting a hard rectangle around the card.
-
So we start by setting up a
rememberInfiniteTransitionwith two phase angles running slightly at different durations so that the motion feels organic rather than mechanical.val transition = rememberInfiniteTransition(label = "userInputGlowMesh") val phase1 by transition.animateFloat( initialValue = 0f, targetValue = (2 * PI).toFloat(), animationSpec = infiniteRepeatable( animation = tween(durationMillis = 2800, easing = LinearEasing), repeatMode = RepeatMode.Restart, ), label = "glowPhase1", ) val phase2 by transition.animateFloat( initialValue = 0f, targetValue = (2 * PI).toFloat(), animationSpec = infiniteRepeatable( animation = tween(durationMillis = 4200, easing = LinearEasing), repeatMode = RepeatMode.Restart, ), label = "glowPhase2", ) -
Here, we animate the interior vertices and we pin the outer rings, outer ring of the vertices with edges with 0 alpha.
-
Because the outer boundary is stationary and transparent, the glow naturally feathers out.
-
And, finally, we feed those animated offsets to our
MeshGradientPainter.MeshGradientPainter( rows = 6, columns = 5, hasBicubicColor = true, ) { for (r in 0..6) { for (c in 0..5) { val offset = if (r in 1..5 && c in 1..4) { val ampX = when (r) { 1, 2 -> 0.048f 3 -> 0.042f 4 -> 0.028f else -> 0.036f } val ampY = when (r) { 1, 2 -> 0.028f 3 -> 0.020f 4 -> 0.022f else -> 0.016f } val d = orbit(c, r, ampX, ampY) Offset( x = (baseU + d.x).coerceIn(0.04f, 0.96f), y = (baseV + d.y).coerceIn(0.05f, 0.95f), ) } else { Offset(baseU, baseV) } setVertex(r, c, offset, gridColors[r][c]) } } } -
The mesh gradient you just saw is drawn using
drawMeshAPI on Android 14 and above. -
So let's take a closer look at this API by building an effect from scratch.
-
For JetChat welcome screen, we want to draw a path that looks like a ribbon.
-
Notice two things here: the stroke width is not constant and the color runs along each stroke of the path.
-
Let's break this down and understand what we actually need to build this effect.
-
For each pixel, we need to decide whether to draw it or not and which color to use.
-
To figure that out, we need two distances.
-
The first value is how far a pixel is from center of the stroke.
-
The second distance is how far along the path a pixel is, from start to end.
-
This tells us which color to pick from the gradient and mixing in a little of the first value makes the color curve across the width.
-
So can we draw a gradient along a path using just path and paint?
-
So, yeah, we can.
-
That requires flattening a path into a list of short straight lines, which also gives distance along the path.
val lines = remember { path.asAndroidPath().flatten(0.5f) } //... inside draw scope lines.forEach { line -> //... drawLine( brush = Brush.linearGradient(...), start = Offset(line.start.x, line.start.y), end = Offset(line.end.x, line.end.y), strokeWidth = 30f, ) //... } -
Then we draw each line with its own gradient.
-
It works, but each line requires a separate draw call and a paint object and the whole path still have a single width.
-
The other option is a runtime shader, but it only gets the pixels's position within the container bound.
-
It doesn't tell us what we need to draw this ribbon.
-
And like, we can't easily calculate it from pixels's position either.
-
Draw mesh gives us vertex shader for that.
-
So, what is a mesh?
-
A mesh is made of triangles with data at each corner and each corner is called a vertex.
-
Each vertex carries a small record of data.
-
Usually that record is it holds a position, but it doesn't have to.
-
The vertex shader read that record and computes the position from it.
-
Here, here's the path one triangle takes: The vertex shader runs for each corner, it calculates the corners' position, and any value we want to pass for pass along for each pixels.
-
Then the rasterizer find every pixel covered by that triangle and interpolates values from those three corners for each pixel.
-
Finally, the fragment shader runs for those pixels, use those interpolated values and calculated the calculate pixels's color.
-
That Let's see how we can write vertex and fragment shader with a simpler example, a straight line up with a pulse moving along it.
LineShaders.VERTEX uniform float2 uStart; uniform float2 uEnd; uniform float uHalfWidth; uniform float uTime; Varyings main(const Attributes a) { Varyings v; float2 dir = uEnd - uStart; float2 normal = normalize(float2(-dir.y, dir.x)); float along = a.corner.x * length(dir); float pulse = (a.corner.x - uTime) / 0.18; float radius = uHalfWidth * (1.0 + 0.6 * exp(-pulse * pulse)); float across = a.corner.y * (radius + 1.0); v.position = uStart + dir * a.corner.x + normal * across; v.stroke = float3(along, across, radius); return v; } -
The vertex shader takes a attribute as input and out returns a varyings.
-
Attributes are the data for single corner.
-
Here is just two numbers: its progress along the line, and which side of the line it is.
-
The varyings are then interpolated and passed to fragment shader.
-
We calculate the pixel distance from the start, and for stroke width, we use time to create a pulse pulse on the radius.
-
Then we multiply that radius by corner side, that gives us sign distance across the stroke.
-
As the GPU interpolate between those signs, the center lines become zero.
-
Finally, we calculate the corners' position, and we store all this value into a stroke varyings and pass them to the fragment shader.
-
Unlike runtime shader, a mesh fragment shader output a color via a parameter, and returns a position for sampling the paint if one is set.
LineShaders.FRAGMENT uniform float uLength; layout(color) uniform float4 uStartColor; layout(color) uniform float4 uEndColor; float2 main(const Varyings v, out float4 color) { float distance = abs(v.stroke.y); float coverage = 1.0 - smoothstep( v.stroke.z - 0.5, v.stroke.z + 0.5, distance); float side = distance / v.stroke.z; float4 ink = mix(uStartColor, uEndColor, clamp(v.stroke.x / uLength + 0.4 * side * side, 0.0, 1.0)); color = ink * coverage; return v.position; } -
Taking the absolute value of our across coordinate gives us pixel for pixel distance from center line.
-
We compare that distance to radius to get coverage, and for the color, we blend along the path of the line, and bend the gradient slightly towards the edge.
-
Multiply that coverage by multiply by that by a coverage, that's our final color.
-
On Compose side, we tie our shaders and data layout together with MeshSpecification object.
val spec = remember { MeshSpecification.make( arrayOf(Attribute(TYPE_FLOAT2, 0, "corner")), vertexStride = 8, arrayOf(Varying(TYPE_FLOAT3, "stroke")), LineShaders.VERTEX, LineShaders.FRAGMENT) } -
First, we declare our corner attribute as two floats starting at byte 0.
-
Since two float take 8 bytes, each corner stride in the buffer is 8.
-
Next, we declare our stroke stroke varyings as three floats, and we pass in the vertex and fragment shader we just wrote.
-
We build the ver- vertex buffer.
fun lineCorners(segments: Int): ByteBuffer { val buffer = ByteBuffer.allocateDirect((segments + 1) * 2 * 8) .order(ByteOrder.nativeOrder()) for (i in 0..segments) { val t = i / segments.toFloat() buffer.putFloat(t).putFloat(-1f) // one side buffer.putFloat(t).putFloat(1f) // the other side } return buffer.rewind() as ByteBuffer } -
At each step along the line, we complete the progress, we compute the progress from 0 to 1, and write two corners into the buffer.
-
Finally, we combine the spec and buffer into a mesh object.
val mesh = Mesh( spec, mode = Mesh.TRIANGLE_STRIP, vertexBuffer = corners, vertexCount = (segments + 1) * 2, bounds = RectF(0f, 0f, size.width, size.height) ) -
Compose canvas does not expose
drawMeshyet, so we drop down tonativeCanvasand draw the mesh.Box(Modifier.fillMaxSize().drawWithCache { val mesh = Mesh(...) onDrawBehind { mesh.setFloatUniform("uTime", time.value) drawIntoCanvas { it.nativeCanvas.drawMesh(mesh,android.graphics.BlendMode.DST, paint) } } }) -
Because you control the geometry and pixel, you can draw any geometry driven visual effect using draw mesh.
-
Learn more about this API from the do- documentation.
Wide color gamut support
-
In Compose 1.12, we introduced support for wide color gamuts.
-
Well, what does this actually mean?
-
Well, did you know that screens can reproduce a different range of colors than traditional sRGB color space?
-
For example, if you look at this image, you'll see the white triangle is the range of standard sRGB colors that most screens can display.
-
However, with newer screens, some of them actually support a wider array of colors, like what's depicted by the yellow triangle, some more saturated and vibrant.
-
But when we represent a color, we are actually representing it with the description of each vertex of that triangle.
-
When you look at this gradient comparison, it's important to distinguish between display gamut and gradients interpolation.
-
On a standard sRGB display or this projector probably, the screen cannot actually physically render the colors outside of this sRGB gamut.
-
So, this is actually really difficult to demo to you on stage right now.
-
So, you're going to have to trust me that colors look better on Android with wide color gamut support.
-
In this example, what you're actually seeing here is this effect of interpolating color stops in a wider color space.
-
Blending colors in a wide or linear color space changes the actual mathematical path of this gradient, preventing this mid-graying that can and harsh banding that can happen when you do it without wide color gamut.
-
With Compose 1.12, you get the benefit of smoother gradient blending on any display, as well as true wide color gamut support when you're running on a supported hardware.
-
To enable correct support on device, you should make sure your activity or window is set to enable wide color gamut mode.
-
And this can be done on in your AndroidManifest.
<!-- AndroidManifest.xml --> <activity android:name=".NavActivity" android:colorMode="wideColorGamut" android:exported="true"> </activity> -
Or programmatically in your composable.
// Dynamic toggle in code DisposableEffect(window) { window?.colorMode = ActivityInfo.COLOR_MODE_WIDE_COLOR_GAMUT onDispose { window?.colorMode = ActivityInfo.COLOR_MODE_DEFAULT } } -
Without setting the
colorMode, the window remains in standard 8-bit sRGB, and any wide color gamut colors rendered by the GPU will be clipped. -
So, it's important to avoid using wide color gamut colors if the display actually can't support it.
-
You should only enable wide color gamuts on activities or code paths that actually display media, photos, or rich graphics to save on battery and performance.
-
This means that you can create colors in different color spaces in Compose, and these are now respected.
// 1. Display P3 Color (Wider gamut: greens & reds are more saturated) colorMode=wideColorGamut val VividP3Red = Color( red = 1.0f, green = 0.05f, blue = 0.05f, alpha = 1.0f, colorSpace = ColorSpaces.DisplayP3 ) // 2. Extended sRGB (Enables HDR values > 1.0f) use colorMode=hdr val HdrNeonCyan = Color( red = 0.0f, green = 1.8f, // Peak brightness > 1.0 in extended gamut blue = 2.0f, alpha = 1.0f, colorSpace = ColorSpaces.ExtendedSrgb ) // 3. BT.2020 HLG (Broadcast HDR standard, supported API 34+) - use colorMode=hdr val HdrSunsetOrange = Color( red = 1.0f, green = 0.45f, blue = 0.1f, alpha = 1.0f, colorSpace = ColorSpaces.Bt2020Hlg ) -
You can pass in the type of
colorSpacethat you want your color to be created in, and if you don't pass in anycolorSpace, standard sRGB will be used. -
For Bitmaps specifically, you can check what the source of the Bitmap is using getColorSpace, and popular image loading libraries will automatically handle the correct Bitmap color spaces for you.
-
You should use
Bitmap.Config.HARDWAREto preserve color information, as a config like 565 will actually lose precision and have visible banding to users. -
To learn more about colors, you can go back in time to 2017 to watch Romain Guy talk all about color in Compose, or about color in Android.
Polygon shapes and morphing
-
With Compose 1.13, we are introducing native support for polygon shape.
-
This is going to make building custom shape and organic looking UI elements much easier.
-
Previously, if you wanted to draw a complex geometry like this, you had to use
RoundedPolygonto describe a geometry which will out- output a path and then map that path to a Compose shape API.fun cookiePolygon(): RoundedPolygon { val vertices = FloatArray(32) for (i in 0 until 16) { val radius = if (i % 2 == 0) 1f else 0.84f // … } return RoundedPolygon( vertices, rounding = CornerRounding(0.12f) ) } -
For example, first, you define the proportions using a
RoundedPolygon, and we set In this snippet, we set our inner points to be at 84% from the center as compared to our outer points. -
You can also apply corner rounding of in here, but this only describes the mathematical curves.
-
To actually use this polygon for clipping or backgrounds in Compose, you're needed to write a custom Shape wrapper like this.
class RoundedPolygonShape( polygon: RoundedPolygonShape ) : Shape { // … override fun createOutline(size: Size, layoutDirection: LayoutDirection, density: Density, ): Outline { path = polygon.toPath().asComposePath() // … matrix.scale(size.width / maxDimension, size.height / maxDimension) matrix.translate(-bounds.left, -bounds.top) // … return Outline.Generic(path) } } -
And inside this
createOutlinesnippet, you can see that you have to create the get the path and manually scale and translate them yourself. -
Now, with the new
PolygonShapeAPI, you no longer need that custom Shape wrapper.private val AvatarShape = PolygonShape { val vertices = List(16) { i -> val radius = size.minDimension / 2f * if (i % 2 == 0) 1f else 0.86f val angle = i * PI.toFloat() / 8f size.center + Offset(cos(angle), sin(angle)) * radius } polygon(vertices, rounding = CornerRounding(radius = 8.dp)) } // … Modifier.clip(AvatarShape) -
Because this is the dedicated Compose Shape builder, it receives the density and size directly out-of-the-box.
-
This means that you can calculate your vertices dynamically and specify your corner rounding directly in dp or even as percentage.
-
Once defined, you just pass it to any API that takes a Shape.
-
We're also introducing
MorphPolygonShapeAPI, which allows you to seamlessly transition between different polygon shapes.val recordShape = remember { MorphPolygonShape( start = PolygonShape.circle(), end = PolygonShape.star( numPoints = 9, innerRadiusRatio = 0.8f, outerRounding = CornerRounding(percent = 50), ), ) { shapeProgress.value } } -
In this example, we have a record button that morphs from a circle and to into a star when you interact with it.
-
You simply provide the starting shape, the ending shape, and the progress value.
-
The
MorphPolygonShapeAPI reads the progress value during the outline resolution phase, it means, and not during the recom- not during the composition. -
This means that your as your shape is morphing between frame by frame, it simply resolves into a new outline without ever triggering a recomposition.
Blurring and backdrop render effects
-
Next, let's talk about blurring.
-
Over the past few releases, we are trying to make implementing blurs much more easier and expressive.
-
Whenever we talked about blurring, this is the commonly used modifier that we see.
Modifier .blur( radiusX = 10.dp, radiusY = 10.dp, edgeTreatment = BlurredEdgeTreatment( shape = RoundedCornerShape(8.dp), ), ) -
Compose had had this modifier since Android 12.
-
It works great when when you want a uniform blur, where the exact same blur radius is applied throughout a composable.
-
But modern UI designs often call for a smooth transition from a sharp to blurred regions rather than a hard cutoff.
-
And that brings us to Progressive Blur, which is now an official API starting with Compose 1.13.
-
Instead of a single constant radius across the whole composable, now you can vary the blur intensity across the space.
-
Here's the example from our JetChat app from the user profile screen.
-
The new blur modifier takes a blur radius spec.
Modifier.blur { blurRadiusSpec = BlurRadiusSpec.verticalGradient( listOf( BlurStop(0.5f, 0.dp), BlurStop(1.0f, 32.dp), ) ) edgeTreatment = BlurredEdgeTreatment.Unbounded } -
Here we use vertical gradient with two blur stops, keeping top half of the photo completely sharp at 0 dp, and ramping up to a 32 dp blur at the bottom edge.
-
Notice, we also set
edgeTreatmentas unbounded, which basically tells blur to sample transparent pixel outside the composable bounds as well. -
Beyond vertical fade-outs, this blur radius spec gives you several built-in ways to drive progressive blur.
-
For example, on the left you can see horizontal gradient, where the starting radius is 0 dp, and ending radius is drive by a slider value.
BlurRadiusSpec.horizontalGradient( startRadius = 0.dp, endRadius = sliderValue.dp, ) -
And on the right, we have a radial gradient, where at the center, the blur radius is 0 dp, and as you move towards the
fallOffRadius, which is 300 dp in this case, the blur smoothly ramp ramps up up to 24 dp.BlurRadiusSpec.radialGradient( center = center, fallOffRadius = 300.dp, startRadius = 0.dp, endRadius = 24.dp, ) -
And if all of these vertical, radial, and horizontal gradients aren't enough for you can already always drive your progressive blur using custom shaders.
val customShader = remember { RuntimeShader( """ uniform float2 size; uniform float time; half4 main(float2 coords) { // Diagonal wave mask float normalizedX = coords.x / size.x; float normalizedY = coords.y / size.y; float wave = sin((normalizedX + normalizedY) * 6.0 + time) * 0.5 + 0.5; return half4(0.0, 0.0, 0.0, wave); } """.trimIndent() ) } val customBlurRadius = remember(customShader) { BlurRadiusSpec.shader(maxRadius = 24.dp) { customShader } } Modifier.blur { val w = size.width.toPx() val h = size.height.toPx() customShader.setFloatUniform("size", w, h) customShader.setFloatUniform("time", animatedTime) blurRadiusSpec = customBlurRadius }, -
Here we write a small fragment shader that computes an animated diagonal sine wave, and outputs that intensity into an alpha channel.
-
Then the shader spec maps that 0 to 1 mask directly to a 24 dp mask
maxRadius. -
Now before we talk about background blur, let's see a difference between the two.
-
Now on the left, we have a top app bar where we applied layer blur.
-
That is, it blurs the composable itself.
-
As you can see, the title and action action icons are blurry, but the chat component behind that aren't blurred at all.
-
On the right hand, we have background blur.
-
Here only the chat messages scrolling behind the top bar are sampled and blurred.
-
However, while the text and icons are completely sharp and readable.
-
From Android 37.2, you can achieve background blur using a new API called
RenderNode.setBackdropRenderEffect. -
But before diving into how blur is improving, let's understand how Android works under the hood to ensure blurring is performant.
-
Android uses RenderNodes under the hood, which are hardware-accelerated display list containers, which means that can compact and store a bunch of different drawing commands via begin recording and end recording.
-
The
RenderNodeholds information such as your 3D translations, rotations, alpha, scales, and position bounds. -
And Compose actually uses
RenderNodeunder the hood. -
So, to use the backdrop render effects in Compose, we can create a custom
Modifier.Nodeto be able to reuse this modifier.fun Modifier.backdropBlur(spec: BlurRadiusSpec, shape: Shape, tint: Color): Modifier = this then BackdropBlurElement(spec, shape, tint) private class BackdropBlurNode(...) : Modifier.Node(), DrawModifierNode { private var renderNode: RenderNode? = null override fun ContentDrawScope.draw() { val node = getOrCreateNode() if (isDirty || sizeChanged) { node.setPosition(0, 0, widthPx, heightPx) node.setBackdropRenderEffect(spec.createRenderEffect(this)) } drawIntoCanvas { it.nativeCanvas.drawRenderNode(node) } drawContent() } } -
We keep a reference to a
RenderNode, and theRenderNodeis configured with the effects that we want in another function. -
For example, we pass in blur a blur effect here.
-
Next, we call
drawIntoCanvas, callingdrawRenderNodeon our native canvas. -
And then finally, we call
drawContentto draw the actual unblurred content on top, too. -
To use this modifier that we've just created, we then call
Modifier.backdropBlur, and pass in a blur radius spec.JetchatAppBar( modifier = modifier .backdropBlur( tint = MaterialTheme.colorScheme .surface.copy(alpha = 0.5f), shape = RectangleShape, spec = BlurRadiusSpec.uniform(5.dp) ) ) -
Note that we don't need to place any anything on the underlying layer here with this approach.
-
RenderNode.setBackdropRenderEffectis automatically sampling the content that sits below the surface of the JetChat app bar. -
And the result is this delightful backdrop blurring.
-
We could also set a progressive blur radius spec instead of just a progressive and to get a vertical blur on the content, too.
JetchatAppBar( modifier = modifier .backdropBlur( tint = MaterialTheme.colorScheme .surface.copy(alpha = 0.5f), shape = RectangleShape, spec = BlurRadiusSpec.verticalGradient( listOf( BlurStop(0.5f, 32.dp), BlurStop(1f, 0.dp), ), ) ) ) -
Which with a vertical gradient shows the content underneath blurred with different radiuses at different fractions of the container.
-
We are working on a built-in backdrop blur modifier in Compose.
-
And this is simply just an example of the underlying technology on Android with Compose.
-
This example I've also shown you would only work on API level 37.2, but we are working on a backport for Compose, too, so stay tuned.
-
Another fun example with
RenderNodebackdrop effects is that we can also actually chain them together for to form really nice-looking UIs, and that perform multiple different effects on top of it. -
So to chain effects, we use we create these two effects.
val blur = RenderEffect.createBlurEffect(24f, 24f, Shader.TileMode.CLAMP) // Boost saturation by 30% and apply blur together val matrix = ColorMatrix().apply { setSaturation(1.3f) } val vibrancy = RenderEffect.createColorFilterEffect(ColorMatrixColorFilter(matrix)) val vibrantBlur = RenderEffect.createChainEffect(vibrancy, blur) -
In this example, we create a blur effect and a saturation of a 30%.
-
We call
createChainEffectwith the blur effect being applied first, and the saturation after. -
This is an example in JetChat.
val agslShader = RuntimeShader(CHROMATIC_ABERRATION) val noiseEffect = RenderEffect.createRuntimeShaderEffect(agslShader, "backdropInput") val finalEffect = RenderEffect.createChainEffect(noiseEffect, vibrantBlur) renderNode?.setBackdropRenderEffect(finalEffect) -
The jump-to button The jump to bottom button, which we can make look like a little magnifying glass by combining a few different effects together to make the edges of this composable round out like the magnifier.
-
But not only can you make apply magnifying effects, any kind of shader can be applied chained together to apply to a backdrop.
-
Here's some fun examples that we've implemented of what's possible when combining them together.
-
The traditional frosted-glass-type effect is now possible.
-
But we could also do other fun effects, like a kaleidoscope.
-
Or if we wanted to turn this Android mascot into like a kind of morphing UI element that transforms the content underneath, we could also apply these backdrop render effects to make it look like we are looking through this little droid.
-
And we can also do this with the backdrop Render Effects.
-
So, not only our backdrop blurring and frosted glass been unlocked with this new API, but now the only limit is your imagination.
-
Another new API that we've been introduced into the platform is
SurfaceView.setBlurRegions. -
Currently you're able to blur texture views and with any composable using
Modifier.blurandRenderNodeBackdrop Effects, but blurring parts of a SurfaceView is tricky, and it's not part of the app's view RenderNode tree, as it actually punches a hole through the window instead. -
So, Compose cannot actually sample the SurfaceView's backing buffer, making this previously impossible until API 37.2.
-
So, SurfaceView's
setBlurRegionsallows the app to declare blur regions directly. -
For example, on this video player in JetChat, we added surface blur SurfaceView blur when the controls show and hide.
-
To use this new API, you can access the
setBlurRegionson a SurfaceView method.val region = RoundedRectBlurRegion().apply { bounds = RectF(left, top, right, bottom) setCornerRadii(spec.cornerRadiusPx.coerceAtLeast(0f)) alpha = spec.alpha.coerceIn(0f, 1f) blurRadius = spec.blurRadiusPx.coerceAtLeast(0f) } surfaceView.setBlurRegions(listOf(region)) surfaceView.setBlurRegions(emptyList()) // Clear -
This takes the list of areas of bounds, blur radius, alpha, and a list of corner radii on it.
-
When passing in these bounds, they must be relative to the SurfaceView on the screen.
-
So, you would want to keep track of the SurfaceView's coordinates and the area that you want to blur.
RuntimeColorFilter
-
Another new piece from Android 16 and above is
RuntimeColorFilter. -
Previously, with images, you could only set a static matrix color filter and do effects like saturation.
-
However, with Android 16 and above, you can now pass in a shader that takes an in color, the input pixel for that particular content, and produces a new color.
-
For example, if we wanted to apply a cyberpunk filter for a for to a photo, we could define a small shader that's used as input into the
RuntimeColorFilter.@Language("AGSL") private const val CYBERPUNK_SHADER = """ vec4 main(half4 in_color) { float lum = dot(in_color.rgb, vec3(0.299, 0.587, 0.114)); vec3 shadow = vec3(0.06, 0.04, 0.25); vec3 mid = vec3(0.92, 0.12, 0.58); vec3 high = vec3(0.18, 0.94, 0.98); vec3 col = lum < 0.5 ? mix(shadow, mid, lum * 2.0) : mix(mid, high, (lum - 0.5) * 2.0); return vec4(mix(in_color.rgb, col, 0.7), in_color.a); } """ -
This shader produces a cyberpunk theme, but you can do any other different effect that you want.
-
So, to use the shader itself, we apply the
RuntimeColorFilterand convert it to a Compose color filter.AsyncImage( model = imageUri, contentDescription = filter.displayName, colorFilter = RuntimeColorFilter(CYBERPUNK_SHADER) .asComposeColorFilter(), contentScale = ContentScale.Crop, modifier = Modifier.fillMaxSize(), ) -
As you can see in this example, we can now create more dynamic effects than before without needing to dive deeper into OpenGL, SurfaceView setups, or anything of that sort.
-
And this can also be applied to any composable, so not just images, as well.
Graphics performance optimization
-
Thank you.
-
So, we have built some really nice effect, but let's make sure our app still feel fast and smooth.
-
When we scroll through the conversation, all of our effects are running together.
-
Let's start by measuring this scroll.
@Test fun scrollFling() = measureScroll(swipeSteps = 5) private fun measureScroll(swipeSteps: Int) = rule.measureRepeated( packageName = TARGET_PACKAGE, metrics = defaultComposeScrollingMetrics(), compilationMode = CompilationMode.Full(), iterations = 5, setupBlock = { killProcess() } //... -
We use a macro benchmark that launches an app in a fresh process and run the scroll through the conversation.
-
Then, we query the trace to count the frames that miss their deadlines.
select count(*) as late_frames from actual_frame_timeline_slice where upid = (select upid from process where name = 'com.example.compose.jetchat.perf') and jank_type like '%App Deadline Missed%' -
That gives us six late frame.
-
Let's open one of the late frame.
-
So, right before this frame, Compose is prefetching next message before it scrolls up into the view.
-
Prefetch is supposed to fit into the short gap between frames, but preparing this message also decodes its image right onto the main thread, running long without yielding.
-
Because the main thread is stuck decoding this image, no new frames can start.
-
Then, when that message actually scrolls into the view, RenderThread has to allocate memory and upload all those pixels to GPU, so the same exact same image delays a second frame.
-
Now, we see where our time went, but do we even need all this work to draw this frame?
-
And how can we tell?
-
The trace tells us.
-
Whenever a large bitmap is drawn into a much smaller area on screen, Android logs a marker right into the trace.
-
It shows two numbers in pixel: the full bitmap dimension, and the area it actually covers on the screen.
-
Divide that by screen density and you got that value in DP.
-
Then, we search our code with that DP value to find that image.
-
This is what we find.
-
The image is loaded with
painterResource, which doesn't know how big the container is, so it decodes the whole image at full resolution.Image( painter = painterResource(it), contentScale = ContentScale.Fit, modifier = Modifier.size(160.dp), contentDescription = stringResource(id = R.string.attached_image), ) -
So, we replace it with
AsyncImagefrom coil.AsyncImage( model = it, contentScale = ContentScale.Fit, modifier = Modifier.size(160.dp), contentDescription = stringResource(id = R.string.attached_image), ) -
It measures the container first, so it only decodes the pixel it needs, and it does that work on a different thread.
-
Running the same benchmark again, image decoding on main thread dropped to 0, and late frame dropped to 2.
-
We won't be debugging those two frames here, but the takeaway is simple: try not to compute pixel that will never reach the frame.
-
So, image decoding was big enough to make frames late, but not every cost shows up as a dropped frame, and there are still smaller costs which we can avoid while writing the code.
-
So, let's see two of those.
-
Whenever we use a
RuntimeShader, we should create it once because while it only compiles and get cached, it still parses its source string every time we create one. -
And whenever an effect animates every frame, we can wrap it in a
graphicsLayer, so the only animating element gets re-recorded, and instead of redrawing the UI around it. -
For Jump to bottom button, it appears whenever we scroll.
-
This uses two
RuntimeShaderto show that effect, and every time the button appears, we recreate both, both of these shaders from its, their source string.val lensShader = RuntimeShader(MAGNIFIER_LENS_SHADER).apply { setFloatUniform("size", size.width, size.height) setFloatUniform("zoom", zoom) // … val lensEffect = RenderEffect.createRuntimeShaderEffect(lensShader, "content") // … val glassShader = RuntimeShader(GLASS_FINISH_SHADER).apply { -
Parsing those two shader and building the effect takes hundreds of microsecond on main thread every time the button shows up.
-
Instead, we create the shader once for whole process, or we can remember it, and then updates its uniform.
val lensShader = MagnifierShaders.lens.apply { setFloatUniform("size", size.width, size.height) setFloatUniform("zoom", zoom) // … private object MagnifierShaders { val lens: RuntimeShader by lazy(LazyThreadSafetyMode.NONE) { RuntimeShader(MAGNIFIER_LENS_SHADER) } val glassFinish: RuntimeShader by lazy(LazyThreadSafetyMode.NONE) { RuntimeShader(GLASS_FINISH_SHADER) } -
With that change, building that effect is nearly 40 times faster, and the cost when button appears drop by 20 times.
-
In the mesh gradient glow we saw earlier, the glow animates every frame inside the
drawBehind.Box( modifier = Modifier .matchParentSize() .drawBehind { // Behind the card, scaled past its bounds. translate(top = -58.dp.toPx()) { scale(scaleX = 1.38f, scaleY = 2.85f) { with(glowMeshPainter) { draw(size, alpha = glowAlpha) } -
So reading state in draw phase keeps composition and layout, but the display list cannot update a single draw command in place.
-
So Compose walks up the tree to find the nearest node with graphics layer, which here, is the red outline, which is whole screen, and re-records that entire layer every frame.
-
By putting a
graphicsLayerright onto the box, the travel stops at the green outline, so the, so only glow box is re-recorded, and main thread drawing slice dropped by two-tenth of a millisecond.Box( modifier = Modifier .matchParentSize() .graphicsLayer() .drawBehind { // Behind the card, scaled past its bounds. translate(top = -58.dp.toPx()) { scale(scaleX = 1.38f, scaleY = 2.85f) { with(glowMeshPainter) { draw(size, alpha = glowAlpha) } -
With Perfetto, analyzing what goes wrong in trace can be difficult, so you can use trace analysis skill to help you gather some insights.
-
And if you'd like more assistant in writing performant Compose code, be sure to install Android CLI and use Compose performance skill to get started.
android skills add perfetto-trace-analysis
android skills add jetpack-compose-performance
Summary and resources
Code
Code snippets
val gradientPainter = remember {
MeshGradientPainter(rows = 3, columns = 3) {
}
}val gradientPainter = remember {
MeshGradientPainter(rows = 3, columns = 3) {
setVertex(0, 0, Offset(0.0f, 0.0f), indigo)
}
}val gradientPainter = remember {
MeshGradientPainter(rows = 3, columns = 3) {
setVertex(0, 0, Offset(0.0f, 0.0f), indigo)
// ....
setVertex(1, 1, Offset(0.2f, 0.4f) + Offset(animatedOffset, animatedOffset), coral)
// ....
setVertex(3, 0, Offset(0.0f, 1.0f), sunshine)
// ....
}
}
Box(
modifier = modifier.padding(32.dp)
.safeContentPadding()
.aspectRatio(16 / 9f)
.fillMaxWidth()
.paint(gradientPainter)
)MeshGradientPainter(
rows = 2,
columns = 3,
hasBicubicColor = true,
) {
// Row 0 (top edge, y = 0.0f)
setVertex(0, 0, Offset(0.0000f, 0.0000f), Color(0xFFFF6B6B))
setVertex(0, 1, Offset(0.3300f, 0.0000f), Color(0xFFFFD6D6))
setVertex(0, 2, Offset(0.6700f, 0.0000f), Color(0xFFE8C3FF))
setVertex(0, 3, Offset(1.0000f, 0.0000f), Color(0xFFE396FF))
// ... remaining vertices for Rows 0, 1, and 2
}val transition = rememberInfiniteTransition(label = "userInputGlowMesh")
val phase1 by transition.animateFloat(
initialValue = 0f,
targetValue = (2 * PI).toFloat(),
animationSpec = infiniteRepeatable(
animation = tween(durationMillis = 2800, easing = LinearEasing),
repeatMode = RepeatMode.Restart,
),
label = "glowPhase1",
)
val phase2 by transition.animateFloat(
initialValue = 0f,
targetValue = (2 * PI).toFloat(),
animationSpec = infiniteRepeatable(
animation = tween(durationMillis = 4200, easing = LinearEasing),
repeatMode = RepeatMode.Restart,
),
label = "glowPhase2",
)MeshGradientPainter(
rows = 6,
columns = 5,
hasBicubicColor = true,
) {
for (r in 0..6) {
for (c in 0..5) {
val offset = if (r in 1..5 && c in 1..4) {
val ampX = when (r) {
1, 2 -> 0.048f
3 -> 0.042f
4 -> 0.028f
else -> 0.036f
}
val ampY = when (r) {
1, 2 -> 0.028f
3 -> 0.020f
4 -> 0.022f
else -> 0.016f
}
val d = orbit(c, r, ampX, ampY)
Offset(
x = (baseU + d.x).coerceIn(0.04f, 0.96f),
y = (baseV + d.y).coerceIn(0.05f, 0.95f),
)
} else {
Offset(baseU, baseV)
}
setVertex(r, c, offset, gridColors[r][c])
}
}
}val lines = remember {
path.asAndroidPath().flatten(0.5f)
}
//... inside draw scope
lines.forEach { line ->
//...
drawLine(
brush = Brush.linearGradient(...),
start = Offset(line.start.x,
line.start.y),
end = Offset(line.end.x, line.end.y),
strokeWidth = 30f,
)
//...
}LineShaders.VERTEX
uniform float2 uStart;
uniform float2 uEnd;
uniform float uHalfWidth;
uniform float uTime;
Varyings main(const Attributes a) {
Varyings v;
float2 dir = uEnd - uStart;
float2 normal = normalize(float2(-dir.y, dir.x));
float along = a.corner.x * length(dir);
float pulse = (a.corner.x - uTime) / 0.18;
float radius = uHalfWidth * (1.0 + 0.6 * exp(-pulse * pulse));
float across = a.corner.y * (radius + 1.0);
v.position = uStart + dir * a.corner.x + normal * across;
v.stroke = float3(along, across, radius);
return v;
}LineShaders.FRAGMENT
uniform float uLength;
layout(color) uniform float4 uStartColor;
layout(color) uniform float4 uEndColor;
float2 main(const Varyings v, out float4 color) {
float distance = abs(v.stroke.y);
float coverage = 1.0 - smoothstep(
v.stroke.z - 0.5, v.stroke.z + 0.5, distance);
float side = distance / v.stroke.z;
float4 ink = mix(uStartColor, uEndColor,
clamp(v.stroke.x / uLength + 0.4 * side * side, 0.0, 1.0));
color = ink * coverage;
return v.position;
}val spec = remember {
MeshSpecification.make(
arrayOf(Attribute(TYPE_FLOAT2, 0, "corner")),
vertexStride = 8,
arrayOf(Varying(TYPE_FLOAT3, "stroke")),
LineShaders.VERTEX, LineShaders.FRAGMENT)
}fun lineCorners(segments: Int): ByteBuffer {
val buffer = ByteBuffer.allocateDirect((segments + 1) * 2 * 8)
.order(ByteOrder.nativeOrder())
for (i in 0..segments) {
val t = i / segments.toFloat()
buffer.putFloat(t).putFloat(-1f) // one side
buffer.putFloat(t).putFloat(1f) // the other side
}
return buffer.rewind() as ByteBuffer
}val mesh = Mesh(
spec,
mode = Mesh.TRIANGLE_STRIP,
vertexBuffer = corners,
vertexCount = (segments + 1) * 2,
bounds = RectF(0f, 0f, size.width, size.height)
)Box(Modifier.fillMaxSize().drawWithCache {
val mesh = Mesh(...)
onDrawBehind {
mesh.setFloatUniform("uTime", time.value)
drawIntoCanvas {
it.nativeCanvas.drawMesh(mesh,android.graphics.BlendMode.DST, paint)
}
}
})<!-- AndroidManifest.xml -->
<activity
android:name=".NavActivity"
android:colorMode="wideColorGamut"
android:exported="true">
</activity>// Dynamic toggle in code
DisposableEffect(window) {
window?.colorMode = ActivityInfo.COLOR_MODE_WIDE_COLOR_GAMUT
onDispose {
window?.colorMode = ActivityInfo.COLOR_MODE_DEFAULT
}
}// 1. Display P3 Color (Wider gamut: greens & reds are more saturated) colorMode=wideColorGamut
val VividP3Red = Color(
red = 1.0f,
green = 0.05f,
blue = 0.05f,
alpha = 1.0f,
colorSpace = ColorSpaces.DisplayP3
)
// 2. Extended sRGB (Enables HDR values > 1.0f) use colorMode=hdr
val HdrNeonCyan = Color(
red = 0.0f,
green = 1.8f, // Peak brightness > 1.0 in extended gamut
blue = 2.0f,
alpha = 1.0f,
colorSpace = ColorSpaces.ExtendedSrgb
)
// 3. BT.2020 HLG (Broadcast HDR standard, supported API 34+) - use colorMode=hdr
val HdrSunsetOrange = Color(
red = 1.0f,
green = 0.45f,
blue = 0.1f,
alpha = 1.0f,
colorSpace = ColorSpaces.Bt2020Hlg
)fun cookiePolygon(): RoundedPolygon {
val vertices = FloatArray(32)
for (i in 0 until 16) {
val radius = if (i % 2 == 0) 1f else 0.84f
// …
}
return RoundedPolygon(
vertices,
rounding = CornerRounding(0.12f)
)
}class RoundedPolygonShape(
polygon: RoundedPolygonShape
) : Shape {
// …
override fun createOutline(size: Size, layoutDirection: LayoutDirection,
density: Density,
): Outline {
path = polygon.toPath().asComposePath()
// …
matrix.scale(size.width / maxDimension, size.height / maxDimension)
matrix.translate(-bounds.left, -bounds.top)
// …
return Outline.Generic(path)
}
}private val AvatarShape = PolygonShape {
val vertices = List(16) { i ->
val radius = size.minDimension / 2f * if (i % 2 == 0) 1f else 0.86f
val angle = i * PI.toFloat() / 8f
size.center + Offset(cos(angle), sin(angle)) * radius
}
polygon(vertices, rounding = CornerRounding(radius = 8.dp))
}
// …
Modifier.clip(AvatarShape)val recordShape = remember {
MorphPolygonShape(
start = PolygonShape.circle(),
end = PolygonShape.star(
numPoints = 9,
innerRadiusRatio = 0.8f,
outerRounding = CornerRounding(percent = 50),
),
) { shapeProgress.value }
}Modifier
.blur(
radiusX = 10.dp,
radiusY = 10.dp,
edgeTreatment = BlurredEdgeTreatment(
shape = RoundedCornerShape(8.dp),
),
)Modifier.blur {
blurRadiusSpec = BlurRadiusSpec.verticalGradient(
listOf(
BlurStop(0.5f, 0.dp),
BlurStop(1.0f, 32.dp),
)
)
edgeTreatment = BlurredEdgeTreatment.Unbounded
}BlurRadiusSpec.horizontalGradient(
startRadius = 0.dp,
endRadius = sliderValue.dp,
)BlurRadiusSpec.radialGradient(
center = center,
fallOffRadius = 300.dp,
startRadius = 0.dp,
endRadius = 24.dp,
)val customShader = remember {
RuntimeShader(
"""
uniform float2 size;
uniform float time;
half4 main(float2 coords) {
// Diagonal wave mask
float normalizedX = coords.x / size.x;
float normalizedY = coords.y / size.y;
float wave = sin((normalizedX + normalizedY) * 6.0 + time) * 0.5 + 0.5;
return half4(0.0, 0.0, 0.0, wave);
}
""".trimIndent()
)
}
val customBlurRadius = remember(customShader) {
BlurRadiusSpec.shader(maxRadius = 24.dp) { customShader }
}
Modifier.blur {
val w = size.width.toPx()
val h = size.height.toPx()
customShader.setFloatUniform("size", w, h)
customShader.setFloatUniform("time", animatedTime)
blurRadiusSpec = customBlurRadius
},fun Modifier.backdropBlur(spec: BlurRadiusSpec, shape: Shape, tint: Color): Modifier =
this then BackdropBlurElement(spec, shape, tint)
private class BackdropBlurNode(...) : Modifier.Node(), DrawModifierNode {
private var renderNode: RenderNode? = null
override fun ContentDrawScope.draw() {
val node = getOrCreateNode()
if (isDirty || sizeChanged) {
node.setPosition(0, 0, widthPx, heightPx)
node.setBackdropRenderEffect(spec.createRenderEffect(this))
}
drawIntoCanvas { it.nativeCanvas.drawRenderNode(node) }
drawContent()
}
}JetchatAppBar(
modifier = modifier
.backdropBlur(
tint = MaterialTheme.colorScheme
.surface.copy(alpha = 0.5f),
shape = RectangleShape,
spec = BlurRadiusSpec.uniform(5.dp)
)
)JetchatAppBar(
modifier = modifier
.backdropBlur(
tint = MaterialTheme.colorScheme
.surface.copy(alpha = 0.5f),
shape = RectangleShape,
spec = BlurRadiusSpec.verticalGradient(
listOf(
BlurStop(0.5f, 32.dp),
BlurStop(1f, 0.dp),
),
)
)
)val blur = RenderEffect.createBlurEffect(24f, 24f, Shader.TileMode.CLAMP)
// Boost saturation by 30% and apply blur together
val matrix = ColorMatrix().apply { setSaturation(1.3f) }
val vibrancy = RenderEffect.createColorFilterEffect(ColorMatrixColorFilter(matrix))
val vibrantBlur = RenderEffect.createChainEffect(vibrancy, blur)val agslShader = RuntimeShader(CHROMATIC_ABERRATION)
val noiseEffect = RenderEffect.createRuntimeShaderEffect(agslShader, "backdropInput")
val finalEffect = RenderEffect.createChainEffect(noiseEffect, vibrantBlur)
renderNode?.setBackdropRenderEffect(finalEffect)val region = RoundedRectBlurRegion().apply {
bounds = RectF(left, top, right, bottom)
setCornerRadii(spec.cornerRadiusPx.coerceAtLeast(0f))
alpha = spec.alpha.coerceIn(0f, 1f)
blurRadius = spec.blurRadiusPx.coerceAtLeast(0f)
}
surfaceView.setBlurRegions(listOf(region))
surfaceView.setBlurRegions(emptyList()) // Clear@Language("AGSL")
private const val CYBERPUNK_SHADER = """
vec4 main(half4 in_color) {
float lum = dot(in_color.rgb, vec3(0.299, 0.587, 0.114));
vec3 shadow = vec3(0.06, 0.04, 0.25);
vec3 mid = vec3(0.92, 0.12, 0.58);
vec3 high = vec3(0.18, 0.94, 0.98);
vec3 col = lum < 0.5 ? mix(shadow, mid, lum * 2.0) : mix(mid, high, (lum - 0.5) * 2.0);
return vec4(mix(in_color.rgb, col, 0.7), in_color.a);
}
"""AsyncImage(
model = imageUri,
contentDescription = filter.displayName,
colorFilter = RuntimeColorFilter(CYBERPUNK_SHADER)
.asComposeColorFilter(),
contentScale = ContentScale.Crop,
modifier = Modifier.fillMaxSize(),
)@Test
fun scrollFling() = measureScroll(swipeSteps = 5)
private fun measureScroll(swipeSteps: Int) = rule.measureRepeated(
packageName = TARGET_PACKAGE,
metrics = defaultComposeScrollingMetrics(),
compilationMode = CompilationMode.Full(),
iterations = 5,
setupBlock = {
killProcess()
}
//...select count(*) as late_frames
from actual_frame_timeline_slice
where upid = (select upid from process where name = 'com.example.compose.jetchat.perf')
and jank_type like '%App Deadline Missed%'Image(
painter = painterResource(it),
contentScale = ContentScale.Fit,
modifier = Modifier.size(160.dp),
contentDescription = stringResource(id = R.string.attached_image),
)AsyncImage(
model = it,
contentScale = ContentScale.Fit,
modifier = Modifier.size(160.dp),
contentDescription = stringResource(id = R.string.attached_image),
)val lensShader = RuntimeShader(MAGNIFIER_LENS_SHADER).apply {
setFloatUniform("size", size.width, size.height)
setFloatUniform("zoom", zoom)
// …
val lensEffect = RenderEffect.createRuntimeShaderEffect(lensShader, "content")
// …
val glassShader = RuntimeShader(GLASS_FINISH_SHADER).apply {val lensShader = MagnifierShaders.lens.apply {
setFloatUniform("size", size.width, size.height)
setFloatUniform("zoom", zoom)
// …
private object MagnifierShaders {
val lens: RuntimeShader by lazy(LazyThreadSafetyMode.NONE) { RuntimeShader(MAGNIFIER_LENS_SHADER) }
val glassFinish: RuntimeShader by lazy(LazyThreadSafetyMode.NONE) { RuntimeShader(GLASS_FINISH_SHADER) }Box(
modifier = Modifier
.matchParentSize()
.drawBehind {
// Behind the card, scaled past its bounds.
translate(top = -58.dp.toPx()) {
scale(scaleX = 1.38f, scaleY = 2.85f) {
with(glowMeshPainter) {
draw(size, alpha = glowAlpha)
}Box(
modifier = Modifier
.matchParentSize()
.graphicsLayer()
.drawBehind {
// Behind the card, scaled past its bounds.
translate(top = -58.dp.toPx()) {
scale(scaleX = 1.38f, scaleY = 2.85f) {
with(glowMeshPainter) {
draw(size, alpha = glowAlpha)
}android skills add perfetto-trace-analysis
android skills add jetpack-compose-performance