Inside the first wave on Googlebook with Notability and Logitech
Speakers
-
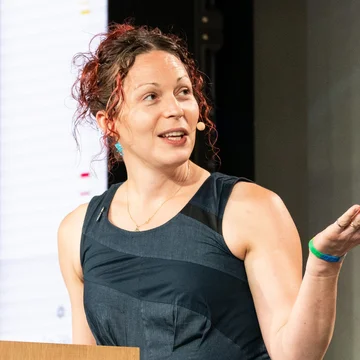
Emilie Roberts
Developer Relations Engineer
-

-

About
About the talk
The launch of Googlebook opens up a new frontier for high-fidelity, desktop-grade experiences. In this session, we go behind the scenes with two pioneering partners who built for this platform from the ground up.
Notability will share their journey creating a desktop-class Android app using Jetpack Compose. Learn about their journey moving from other app platforms with desktop top-of-mind. Second, Logitech will dive into the hardware side, discussing how they are building and customizing peripherals to integrate seamlessly with Googlebook. Join the session to get practical, real-world insights on optimizing inputs, leveraging large-screen APIs, and delivering a premium, cohesive user experience across hardware and software.
Summary
- Jetpack Compose and Navigation 3 make it easy to adapt layouts across devices based on available window size rather than device form factors.
- Desktop-class experiences require supporting multi-input models such as keyboards and trackpads. Features like Continue On in Android 17 also let users hand off tasks between devices.
- Jetpack Ink gives developers a low-latency drawing pipeline without having to manage custom rendering threads or complex layer handoffs.
- The allowlisted Peripheral Customization API lets developers map peripheral hardware triggers to OS actions using vendor and product IDs.
Gemini Notebook
Topics
- googlebook
- jetpack-compose
- jetpack-ink
- navigation-3
- large-screens
- peripheral-customization
- kotlin-multiplatform
Transcript
Introduction to building for Googlebook
-
Hi, I'm Emilie Roberts, a developer advocate that has been working with Android apps on laptops for about nine years now.
-
And the Googlebook launch happened.
-
Yay!
-
I'm And I'm super I think it's so cool, the innovation we're bringing to the laptop space.
-
And I'm super happy to be on stage here with two developers that have really invested in making their apps look great on Googlebook.
-
Hi there.
-
I'm Ryan with Notability.
-
I'm the Android manager, and it's a digital notebook app that we just launched on Android.
-
It's also available on iOS, desktop, and now Googlebooks.
-
Hello, there.
-
I'm Joe from Logitech, and we're known for our great hardware and peripherals.
-
And I will talk about how we brought them onto the new platforms.
Designing Android apps for large screens
-
I'm going to push them over.
-
And so, Googlebooks are here.
-
Yay!
-
Yay!
-
Yay!
-
I hope you had a chance to test them out, either on your own or pick one up or one floor down at the demo booth.
-
And don't forget to check how your app looks on them, of course.
-
I'm going to give my standard spiel, which is the Android ecosystem is growing.
-
I've been saying that for nine years, and it's still true.
-
And apps need to evolve to make sure you're meeting your users need across all needs across all those screen sizes and devices.
-
Having an app layout that performs well and behaves well is standard practice at this point.
-
And the best way to do that is with Jetpack Compose and Navigation 3.
-
And input, it's the same thing.
-
It should just work.
-
And of course, your apps' architecture and state management is all a part of layout and inputs.
-
And we have a bunch of talks at ADS about how to do that with the newest tooling and the best practices.
-
However, today, we thought it would be a great opportunity to make a little bit of space for developers who have been building for Googlebook right from the get-go and to hear their story.
-
Notability is a supercharged note-taking app built from the ground up for Googlebook.
-
And Logitech worked not just to make sure the keyboards and mice and their other peripherals worked, but worked super well on Googlebooks, including user customization.
-
Sorry to steal a bit of your thunder, Joe, but we'll get into the details.
-
So, that's enough for me.
-
No raps this time, sorry.
-
And definitely no more freestyling.
-
Anyway, we're super excited to have Notability on Googlebooks, and so I'm going to pass this clicker over to Ryan.
-
Thanks.
Bringing Notability to Android
-
Awesome.
-
Thank you so much, Em.
-
And we're super excited to be on Googlebooks.
-
Notability is where millions of students currently learn, and professionals take notes.
-
Like I mentioned earlier, it's now available on Android, and I'm going to give you a quick talk about how we built it, and how building for Android correctly actually builds pretty close to Googlebooks optimally right out the gate.
-
To start, when we started this project about two years ago, we really wanted to make sure that we weren't just porting our iOS app and dumping it on the users and calling that good enough.
-
We wanted something that felt truly native to user expectations, but still delivered full feature parity.
-
To get there, we used Material Design and components to customize all of the screens from the ground up.
-
And, we made sure that we were living on top of Jetpack Compose.
-
Being a native Android application fully on Jetpack Compose makes it so that we can support a full range of hardware, not only like small phones and lower-end devices, but high-end, powerful tablets with large screens, computers, XR, car or cars, and everything else in between.
-
Jetpack Compose makes it really easy to support these natively, without having to build a lot of extra features in UI interfaces.
-
So, going on to Notability.
-
Everything in Notability is built on Jetpack Compose.
-
The UI is consistent across the platform, and it's all built basically one time with no real changes between what's shown on a phone and what's eventually shown on the larger devices, such as the tablet and the Googlebooks.
-
To do this, Navigation 3 is a huge unlock for us.
-
The way Navigation 3 works in Google built in Notability is that, based on a screen size, we can actually customize the layout without actually having the feature worry about how it's going to be presented.
-
In this demo, you can kind of see if something has room for a side panel to open, it will open.
-
But, if it doesn't, it'll just pop up as a bottom sheet instead.
-
So, how does that look in code?
-
In code here that we have up, you can kind of see that there's one entry point here for the actual summary panel on the side, and we're adding that to the back stack.
-
Then, our custom scene strategy goes and chooses a layout for that side panel, depending on if there's space or not.
-
So on a tablet or a Googlebook device, it's going to find space available, and it's going to make room and just slide that panel in from the right-hand side.
-
However, on something like a phone or a foldable, perhaps, there might not be enough room to actually properly display that panel, so it'll pop it up as a bottom sheet instead.
-
Because Notability adapts to the size of the window rather than worrying about what type of device it is, a phone, a Googlebook, a tablet, a foldable, whatever, it's really easy for our UI to automatically adapt to what's needed by the users.
-
You can see here on a phone, all of the buttons and tools reposition to be within easy reach of the thumb.
-
On a tablet, we have navigation panels displayed side displayed to the side next to all of the main content because you have more room and easier screens to interact with.
-
On foldables, we take advantage of the fold to offer unique layouts and UIs for things like our study quiz, where users can have their answers in the bottom half and the actual quiz progress in the top half.
-
And lastly now, on Googlebooks, we actually have a smooth resizing of the window.
-
So just like you would in any other normal windowed application on a desktop, Notability will adapt as you resize the window for whatever side-by-side needs you need.
-
When we were building, Adaptive UI, that works for almost the entire full desktop experience on Googlebooks, as I mentioned.
-
It's going to get you really close.
-
But if you want a desktop-class experience, something that's truly out of this world, there's a couple of things that we recommend doing.
-
First, be keyboard first.
-
Users are not going to be as touch-sensitive as they are on a normal tablet or phone device, and having the keyboard shortcuts and an easy way to get to the Android shortcut list is super important.
-
Next, you can sometimes design your features such that they layout differently depending on the type of device and the input peripherals available.
-
When we detect something like a lap yeah, a laptop with a keyboard attached or a mouse, we actually offer a slightly different UI on the home screen, so that users are redirected towards tools we think that those type of users would prefer over something like a tablet, where a stylus and automatic handwriting pen notes are going to be the primary option.
-
The other thing you want to start thinking about is how do multiple different devices interact.
-
So, Continue On is a new feature in Android 17 that allows you to seamlessly hand off your app from a lower from one device to another.
-
So in this example, for example, we're handing off a note from your phone to your larger desktop device.
-
This is easily done with just a quick sync on the note ID and a quick progress through where you are on our end.
-
So it's really easy for us to send just a quick app intent to the Googlebook device, and then Continue On exactly where you left off.
-
The other thing to consider for desktop-class devices is going to be the multi-input support models.
-
So, you're not only going to have things like keyboard shortcuts, as mentioned earlier, you're going to have trackpads with different types of zooms and scroll behaviors than you might have before.
-
You're also going to have right-click menus that might need to be made available to users that weren't there previously.
-
Additionally, because a lot of the Googlebook devices are still a touchscreen device, you want to make sure that when a user interacts with that device, you have a different input recognition for not only the stylus and the finger, but also for the trackpad cursor, because all three should be treated differently.
Low-latency drawing with Jetpack Ink
-
If you're in the interest of ink and writing notes like Notability is, we recommend using Jetpack Ink.
-
So this is something that we use to provide a low-latency building system for our ink without requiring us to manage a hefty, convoluted stack of threads and rendering and buffer readers and different things that I'll show you a little bit later.
-
But if if it works right now, I actually, thanks to Logitech, can show you guys a live demo of the Notability app.
-
Yes, perfect.
-
So, oop, come on.
-
There we go, perfect.
-
So, there is my test from earlier.
-
But as you can see, I'm using my finger, so here it recognizes the finger input still, which is great.
-
I could also use the mouse if I wanted.
-
But we've been able to actually build some custom, Android-exclusive brushes at the moment.
-
So, you can see here, I have this rainbow and glitter effect selected, so that our input or our ink effects are going to be affected by the Jetpack library Jetpack Ink library underneath.
-
So here, let me write out my message one more time.
-
So, hello.
-
And then, let's choose Android green for the last part here.
-
It's hard to touch correctly.
-
There we go, Android green.
-
And then, we can see that the actual colors change depending on which color you have as your base model here.
-
Yay, perfect.
-
So, when building these type of brushes in the past, it would actually take us months potentially to get all of the custom shaders and the interface and everything correct and looking good.
-
Now, thankfully, due to Jetpack Ink, it actually can be less than a week with AI and their custom brush builder.
-
So if you're in the market for any type of inking, let, you know, let them know.
-
It's a great, great API that saved us a lot of time.
-
Perfect.
-
And here as I mentioned earlier, is sort of what that looks like.
-
So we have what's called a wet ink layer.
-
That's our ink that's in progress, still being drawn, needs to be super, super responsive, you know, versus a dry ink layer.
-
It makes sense from a physical thing, you can think of that.
-
That's the saved ink, already already finished.
-
So the handoff used to be entirely on us.
-
So we had to do this threading, we had to do a redraw and clean up, we got to hand it off to a dry layer and make sure that those synced and didn't flicker, and there were all these complications.
-
And then at the very end, we had to apply what is Notability's uniqueness, right?
-
We have our own curve fitting models, we have ways that really make your handwriting stick out.
-
So, you know, that was the old model.
-
Thanks to Jetpack Ink, all we have to do is feed our curve fitting into their custom progress shapes view, and it all works magically for us right away on Android.
-
The other thing we're thinking about, as we discuss both Jetpack Ink and other Google libraries, is KMP.
-
So this is actually something where we started out looking at the iOS code, which was already built, and thinking to ourselves, "Okay, we would like to share some of the logic between Android and iOS.
-
We've got models, we've got changes, we've got complicated math.
-
It makes sense to share."
-
And we thought, "Hey, C++, you know, Apple's Objective-C, let's go that route."
-
It turned out, not only was Kotlin Multiplatform easier for our iOS engineers to implement, it was actually faster.
-
So not only did we get a better performance out of using Kotlin, and we could copy a lot of the Android code, but it was easier for iOS in the long run too.
-
So if you're looking to share code, I recommend, you know, looking into Kotlin Multiplatform.
-
At the moment, we're still in the process of evaluating it.
-
It's not, you know, 100% supported or anything yet, as you know, different AI models do make it a little easier now to cheat with just having code living in multiple places, but it's still something that we're pretty actively investigating, and I think really highly of.
-
Okay, now for some special sauce from just Notability.
-
So one thing that you may notice, if you ever try to build a working text editor on Android, is that there's not really a good way to build a large, huge document text editor at the moment.
-
The basic Android, you know, edit input fields are all about smaller little UIs, little EditTexts, little short-form things.
-
What we ended up having to build was this very complicated system that basically lives on top of the existing Android APIs, but then is able to handle much, much larger documents, you know, thousands and thousands of pages of text, all at the same time, that can be co-edited, so you can have a user somewhere else editing 500 pages away from you, which is causing shifts that are, you know, affecting your your work as you're going.
-
And the way we found to do that is basically that our keystrokes take two paths.
-
So there's the first path, which is, hey, this is our best effort, this key should appear, you know, here.
-
We think this is good, based on everything that we can tell right now with how everything looks underneath.
-
And then we do a quick sync, right?
-
We go to the backend, we check our co-operators, we say, "Hey, is everything good?
-
Does this make sense?
-
Are we solid?"
-
And if things have to change, it readjusts at that point.
-
You can imagine if two users are on the same line mashing keys, it's going to be a little bit of a garble for who gets what.
-
But for the most part, this works really well.
-
The reason I'm mentioning it here is this is a huge amount of work that we've been putting into, and we're considering making it open source.
-
So if anyone at the conference here or online in the future would like to collaborate on this, and think this is a good idea, let us know.
-
We're debating whether it's really worth the effort to invest in it, but you know, it's been a huge undertaking on our part, and we're pretty proud of the results.
-
Okay, and then this is how ink works.
-
So, in terms of collaboration model, this is a little bit more of a direct how does it work on our end.
-
So you can see here, there's kind of three steps.
-
There's the touchdown, where we say, "Hey, by the way, we're starting an ink event" to any of our connected devices, so in this case, it's an iPad.
-
Then there's the actual drawing, so there can be one to millions of these depending on how long the user keeps their device, you know, their pen swirling.
-
Hopefully, not too, too long.
-
I do think there's a limit at some point, but, you know, for normal use cases, it's pretty fine.
-
And then there's a lift-up event.
-
And so the way we manage that is we actually have a transient object that we keep in our model.
-
So that means that on iPad, we say, "Okay, there's kind of a stroke that's coming in, but it's not here yet.
-
We can't interact with it.
-
It's ephemeral."
-
And only once that finish event launches do we actually go in and say, "Okay, cool.
-
Now replace the whole thing with one object that iOS or any other clients can just grab and interact with."
-
And this is also something that we're toying with open sourcing a little bit.
-
This is, you know, not our direct inking, but some of the transient stuff, especially in the text layer.
-
Great.
-
And then, yeah.
-
So some other things that we recommend using.
-
On-device AI is great.
-
We use it for document scanning, so you can scan in documents, you can analyze PDF texts, you can do some handwriting recognition.
-
We also use, you know, open cloud AI models like Gemini to help generate our Smart Notes here, where, you know, users' notes are categorized, summarized, and then fed back to them in ways that are better and more interactive for the learning model.
-
And all of that together really does make it so that Notability feels like a laptop application, right?
-
That's the goal at the end of the day.
-
We have all these interesting different models, different things, text you know, inputs, but the big thing is does this feel like a laptop application, or does this feel like you popped up a phone app on your big screen and you're kind of like mucking around with it?
-
The keyboard, the trackpad, the stylus, the window resizing, these are all key features to hit right, to make sure that it feels really good for users.
-
But, like I mentioned earlier, too, Jetpack Compose, Navigation 3, Material Design, all of this covers it.
-
So it's not actually a huge lift if you do things right.
-
It's pretty easy to get here.
-
So, yeah.
-
That's our key takeaways.
-
You know, when you're thinking about Android in the future, I wouldn't think about devices anymore.
-
I wouldn't think about, hey, this is a phone, this is a foldable, this is an XR device, this is a desktop or laptop, or a tablet, or a car, or a TV.
-
Instead, it's, hey, what is the screen size available to me, and what are the input modals available to my users?
-
And let's provide the best experience possible for those going forwards.
-
You know, and it like I had mentioned earlier in last slide, too, you know, Compose and Nav 3 really make it easy to support all that.
-
And then Google's, every day, coming out with new, really powerful APIs like Jetpack ink or Gemini on-device or all types of things that just make it easy for you to build your core experiences, and then focus on the magic sauce that makes you unique.
-
Okay.
-
So yeah.
-
Thank you very much.
-
That's my talk here.
-
I will be available later if you have questions, or you know, feel free to reach out to Notability.
-
The app is brand-new on Android as of like two months ago.
-
We finally came out of beta.
-
So, you know, feel free to try it.
-
Give us feedback.
-
It's available at the Googlebooks in the demo process behind you, too.
-
And now I'll hand it over to Joe from Logitech to continue.
-
Thank you.
Bringing Logitech Options+ to Googlebook
-
All right.
-
Thanks, Ryan.
-
Today, Okay, sorry.
-
Let's bring our slide, all right.
-
Thanks, Ryan.
-
And today, I will share how we brought Options+ which is a peripheral customization apps to the Googlebooks.
-
And what it means to build a peripheral experience?
-
I will cover what we've built, a few engineering spotlights behind it, no low lights, and where we're going next.
-
Now, Logitech devices worked with Android in the past, and most of users found they it the peripherals improve their accessibility, and especially with premium laptops and those phones docked phones with external monitors.
-
Talking about this, earlier downstairs, I saw at the Googlebook demoed booth, they hooked a Logitech gaming sequential gear onto the table, and they used that to shift between different, the screen on the tablet.
-
Here you go.
-
That's one way of using it.
-
Oh, by the way, Ferrari had to charge extra 50,000 euros for their sequen- Anyway.
-
Yeah.
-
So on the Googlebook, as Ryan mentioned quite quite comprehensively that we have a lot more space to work with.
-
As you can see, you can resize the screens, landscape, portrait, or square, if you fancy, and you have a lot more space to work between apps.
-
You can continue what you are working, different apps, and you know, shifting context, all that things.
-
And that certainly changed app design, and the layouts need to maintain useful throughout the entire procedures.
-
For us Logitech, this looks particularly interesting because here you go, we bring We are a company with a lot of experience in peripherals, right?
-
We bring a very strong foundation to this work.
-
So, for our point of view, for that kind of work environment, a mouse or keyboard is how our user interact throughout day of work.
-
They can very smoothly get into their work flow.
-
And I think it is not really a exaggeration to say Logitech brings decades of experience into this work.
-
I think we just had our 45 years anniversary early this month.
-
And we've been I think since building mouse from day two, year two of Logitech.
-
So, with that kind of experience, and we are very confident to get into this area.
-
Even better, we have a great legacy with ChromeOS.
-
We guaranteed a top notch compatibility with ChromeOS in the past.
-
Now, with these all being said, we have a very good experience practical experience breaking the boundary between between hardware where we built, software where we create create create, and then the platform, the OS, Googlebooks.
-
So, an example can be as simple as, a user press a button and they see a predictable results.
-
It's almost like something you people everyone take for granted.
-
But they actually require seamless com- components compatibilities.
-
Moreover, everyone loves compatibility to their peripherals.
-
For example, getting their sensibility tuned just right.
-
65 It is, not one more, not one less.
-
So, these things all require very good a seamless compatibility integration among all these three things.
-
Now, with launch of Googlebooks, we ship Options+ for Googlebooks.
-
So, with at very moment at this moment, we support a range of mice and keyboard with more to come.
-
And this is also a place we let user to configure their devices.
-
And as I mentioned before, like sensibility, all that kind of things.
-
Now, here is getting scene is getting interesting.
-
When we talk about config- configurability, we are talking about actually two sides.
-
One side is the hardware, firmware side, where the imple- the features implement in our firmware.
-
The other side is actually the key point of this demo and this presentation is the OS side.
-
I think everyone here knows in the past there's it's Android devices and most apps living in its own sandbox, user spaces.
-
There are certain limitation on what you can do and in many cases, what you cannot do and what you want.
-
For us, it is extremely important.
-
Now, here is a screenshot, we're going to have a demo later, but here screenshot.
-
We have a mouse right here, MX Master 4, and we have a lot of functions here.
-
And for people who knows the peripheral world, you can recognize certain features are very much implemented firmware features, device features.
-
And some others certainly not.
-
And for us, what we are doing is try to let the user have the capability of configure both sides.
-
And our job is to basically, for one, make these options understandable, and offer full capability to user, and we config- correctly configure these things toward OS and firmware.
-
Now, let's go have a quick demo.
-
Oh, this was a very impressive demo.
-
But next time, Ryan, use mouse.
Options+ live demo
-
All right, here we go.
-
Here is my device screen.
-
You see I have an MX Master 4 mouse on-boarded, this one.
-
So, let's go for it.
-
We are going to straight go to the configuration screen, as you saw earlier, and here is where magic happens.
-
Now, let's first pick Circle to Search to the thumb button.
-
And then let's use put Magic Pointer into the feature button.
-
Now, here we go.
-
Let's open a browser.
-
Get here.
-
Here, I press the thumb button which I just assigned Circle to Search to it.
-
As you see, I circle a keyboard.
-
Voila!
-
Google just display what it the information about this keyboard.
-
It's very handy, and very smooth.
-
Now, let's try something different.
-
Oh, sorry.
-
Let me go backwards.
-
Let's try Magic Pointer.
-
Here, let's toggle this.
-
And I can press feature button, tag this, and I press, "What is this device?"
-
And here you go.
-
Google start to do search, and display the results.
-
So, the nice thing about this is that you integrate entire workflow into just one hand operation.
-
You pre- you assign features, you press, you circle, you click, done.
-
So, this kind of operation we believe will greatly inc- imp- improve users' accessibility and their way for their work.
-
Now, let's go back to the slides.
Peripheral customization API overview
-
So you may ask what made that thing happen.
-
Because many things in the past simply cannot be done by apps.
-
Here, ta-da, the Peripheral Customization API, which is available on both Googlebooks and across Android devices.
-
However, here's the notes from Google.
-
At this moment, this API is behind allow list.
-
But it is planned to release along with Android updates to '26 Q4, which is this quarter.
-
So once it's released, I think the developer around the world will be able to use it.
-
Now, here let's get into a little bit technical side.
-
There are three key components of this whole thing: a device, understandable; a trigger, which can be a key, can be a button intended; and an action, which at app OS side.
-
Now, let's have a quick look at this code snippet.
-
And at the very top, we define a device by using its vendor ID and the product ID.
// Vendor and product Information const val VENDOR_ID = 1234 val pid = 123 // Use the mouse Middle Button as the trigger val trigger = ButtonCustomizationTrigger(MotionEvent.BUTTON_TERTIARY) // Set Voice Assistant as the action val actionBuilder = AppCustomizationAction.Builder(component, ACTION_MAIN) actionBuilder.setData(ActionId.ACTION_VOICE_ASSIST.actionId) // Action IDs are predefined val action = actionBuilder.build() val im = context.getSystemService(INPUT_SERVICE) as InputManager im.addPeripheralCustomization(VENDOR_ID, pid, trigger, action) -
We usually call it vid and pid.
-
Moving down, we start to define a trigger.
-
And here, as you can see, we want to use the middle button as the trigger.
-
And here, we want to map that middle button to the Voice Assistant part of the OS feature.
-
Right?
-
We have a
actionBuilderright here from AppCustomizationAction, and here. -
Then moving further down, here is we register this mapping between the product, the device, the trigger, and the action.
-
And of course, the real code are a bit more complicated than that, but the overall concept is this.
-
Very straightforward and easy to use.
-
Now, here's another very cool and interesting feature.
-
I put a GIF file here so it's easier for everyone to see.
-
So basically, when a compatible and supported device, in this case, a Logitech mobifold mouse, the OS will trigger a standard notification to tell you, "Hey, you have an app for that."
-
Tell user, of course.
-
And once you click onto it, you will be stream taken to the Play Store, and you can install right there.
-
It's called fast pairing discovery.
-
Now finally, let's moving onto the UI side.
-
Ryan has covered many, many nice things of Googlebook how you do UI, so I will go fairly quickly here.
-
So as you see, Options+ running from different platforms, in our case, Windows, Mac, and now Googlebooks.
-
So our goal actually two goals: for one, we want to make it feel like it's platform specific, but at the same time, we want to make it feel like similar across board, which means once you are familiar with Options+ on one platform, you should be able to use it smoothly in another one.
-
So that means we want to take need to take advantage of that specific platforms, but the same time, use the same design language.
-
So a consistent design language across board, as you can see.
-
And as we discussed before, Google user Googlebook users tend to use Googlebook in a more laptop/desktop way.
-
So of course, our app itself, even on Googlebook, looks like a desktop app.
-
So the app itself may behave like a desktop app and it works well across the window sizes, different touches, and of course, you can control to use mouse and keyboard.
Future roadmap and conclusion
-
All right, that's a quick story and a rather short version of story of Logitech peripherals and Options+ on Googlebook.
-
And it works great.
-
However, we're just getting started.
-
We have a few steps: for one, we want to bring this experience to more devices, more keyboards, mice, and other peripherals, and we want to refine this app self using the real user feedback.
-
And then, of course, the most important is we working going to work with Google further down the road, and the integrate deeper integrate into the new platforms.
-
So our ultimate goal is to make peripheral customization a very, very natural experience of using Googlebook, and helping people work the way they want.
-
Okie-dokie.
-
Make sure check our booths downstairs and try yourself on Options+ and the fantastic Logitech devices.
-
And thank you to our partnering Google, and thank you all for your time.
-
Thank you very much.
Code
Code snippets
// Vendor and product Information
const val VENDOR_ID = 1234
val pid = 123

// Use the mouse Middle Button as the trigger
val trigger = ButtonCustomizationTrigger(MotionEvent.BUTTON_TERTIARY)

// Set Voice Assistant as the action
val actionBuilder = AppCustomizationAction.Builder(component, ACTION_MAIN)
actionBuilder.setData(ActionId.ACTION_VOICE_ASSIST.actionId) // Action IDs are predefined
val action = actionBuilder.build()

val im = context.getSystemService(INPUT_SERVICE) as InputManager
im.addPeripheralCustomization(VENDOR_ID, pid, trigger, action)