
1. Introduction

What is Health Connect?
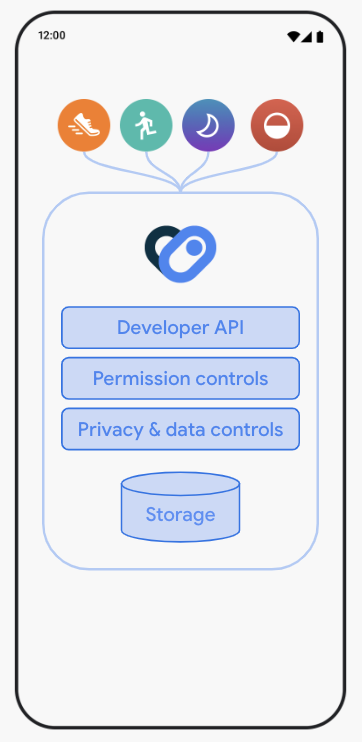
Health Connect is a health data platform for Android app developers. It provides a single, consolidated interface for access to users' health and fitness data, and consistent functional behavior across all devices. With Health Connect, users have a secure health and fitness data storage on-device, with full control and transparency over access.
How does Health Connect work?
Health Connect supports more than 50 common health and fitness data types and categories, including activity, sleep, nutrition, body measurements, and vitals like heart rate and blood pressure.
With user permission, developers can securely read from and write to Health Connect using standardized schemas and API behavior. Users get full control over their privacy settings, with granular controls to see which apps are requesting access to data at any given time. The data in Health Connect is stored on-device and encrypted. Users also get the ability to shut off access or delete data they don't want on their device, and the option to prioritize one data source over another when using multiple apps.
Health Connect Architecture
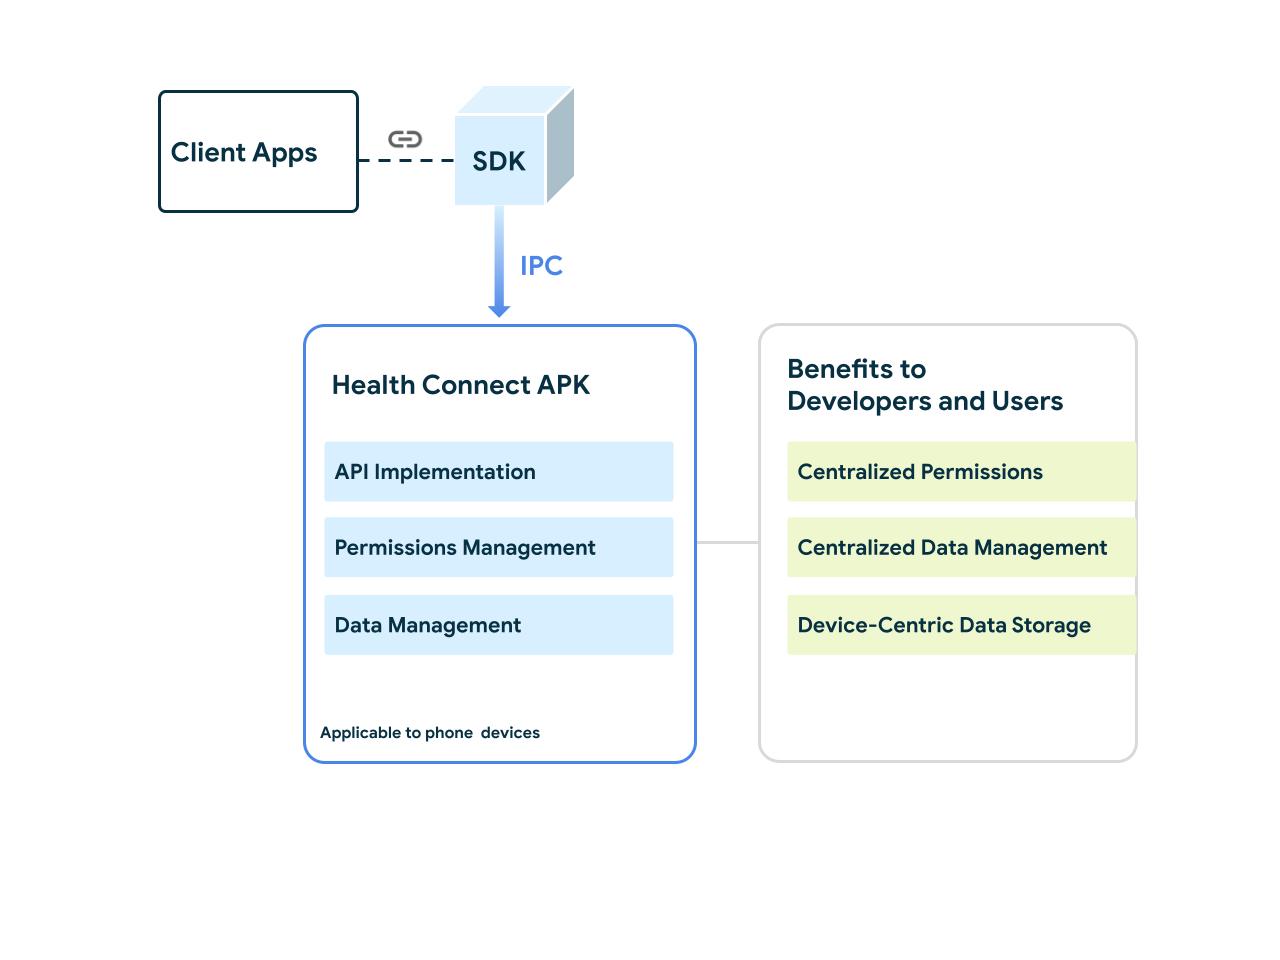
The following is an explanation of the key aspects and architectural components of Health Connect:
- Client app: To integrate with Health Connect, the client app links the SDK into their health and fitness app. This provides an API surface to interact with the Health Connect API.
- Software Development Kit: The SDK enables the client app to communicate with the Health Connect APK.
- Health Connect APK: This is the APK that implements Health Connect. It contains both its Permissions management and Data management components. The Health Connect APK is made available directly on the user's device, making Health Connect device-centric instead of account-centric.
- Permissions management: Health Connect includes a user interface through which apps request the user's permission to display data. It also provides a list of existing user permissions. This allows users to manage the access they have granted or denied to various applications.
- Data management: Health Connect provides a user interface with an overview of recorded data, whether it's a user's step counts, cycling speeds, heart rate, or other supported data types.
What you'll build
In this Codelab, you're going to build a simple health and fitness app integrated with Health Connect. Your app will do the following:
- Obtain and check user permissions for data access.
- Write data to Health Connect.
- Read aggregated data from Health Connect.
What you'll learn
- How to setup your environment to support Health Connect integration development.
- How to obtain permissions and execute permission checks.
- How to contribute health and fitness data to the Health Connect platform.
- How to benefit from the on-device data storage.
- How to validate your app with Google-provided developer tools.
What you'll need
- Latest stable version of Android Studio.
- Android mobile device with Android SDK version 28 (Pie) or higher.
2. Getting set up
Prepare the Health Connect app
The Health Connect app is responsible for handling all the requests that your application sends through the Health Connect SDK. These requests include storing data and managing its read and write access.
Access to Health Connect depends on the Android version installed on the phone. The following sections outline how to handle several recent versions of Android.
Android 14
Starting Android 14 (API Level 34), Health Connect is part of the Android framework. Because this version of Health Connect is a framework module, there's no setup necessary.
Android 13 and lower
On Android 13 (API Level 33) and lower versions, Health Connect is not part of the Android framework. Therefore, you need to install the Health Connect app from the Google Play Store. Scan the QR code to install Health Connect.

Get the sample code
Start by cloning source code from GitHub:
git clone https://github.com/android/android-health-connect-codelab.git
The sample directory contains the start and finished code for this Codelab. In the Project view on Android Studio, you will find two modules:
start: The starter code for this project where you will make changes to this to complete the codelab.finished: The completed code for this codelab where it is used to check your work.
Explore the ‘start' code
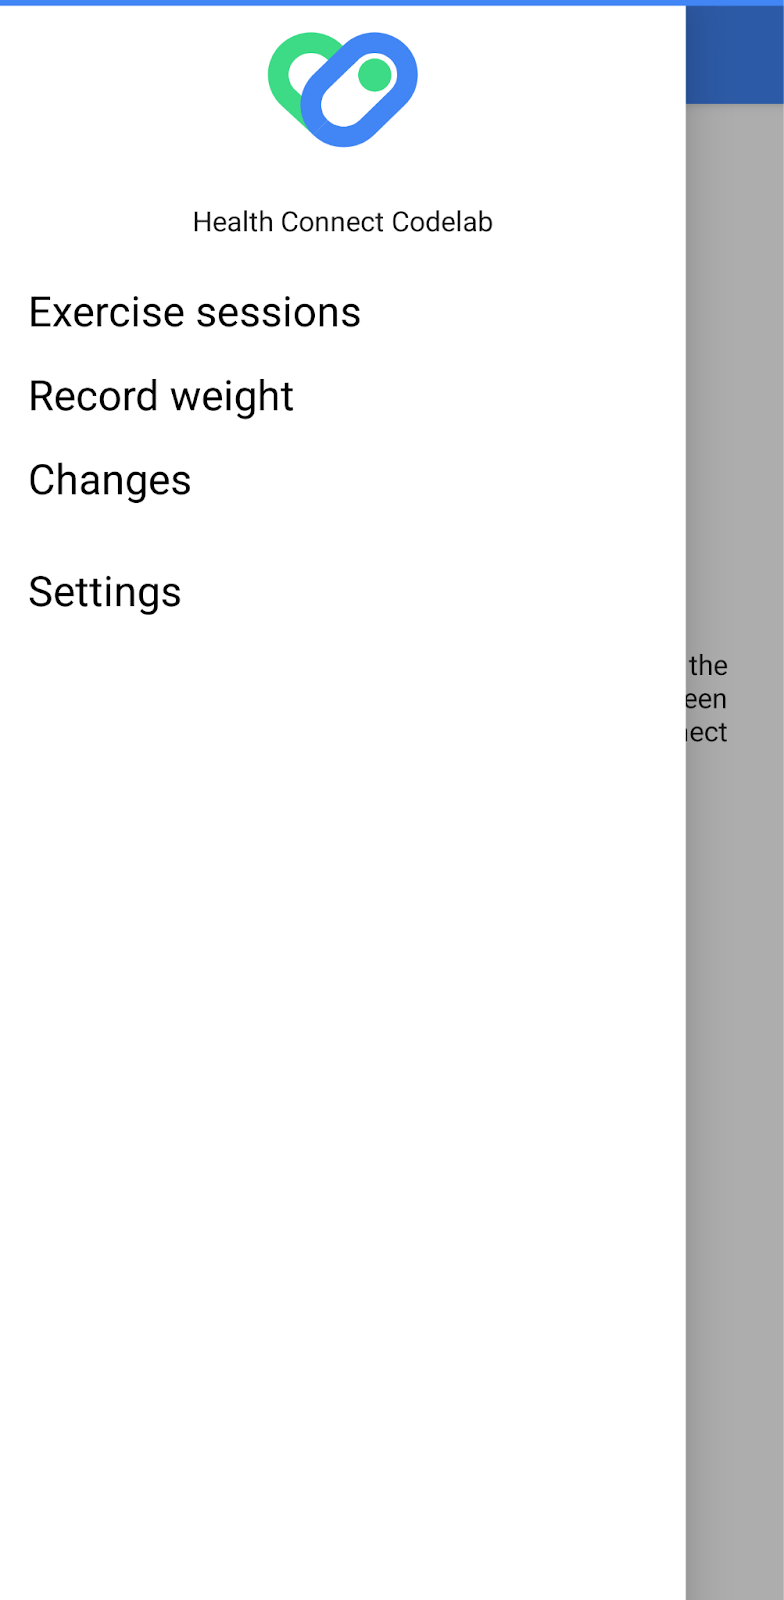
The Codelab sample app has basic UIs built using Jetpack Compose with the following screens:
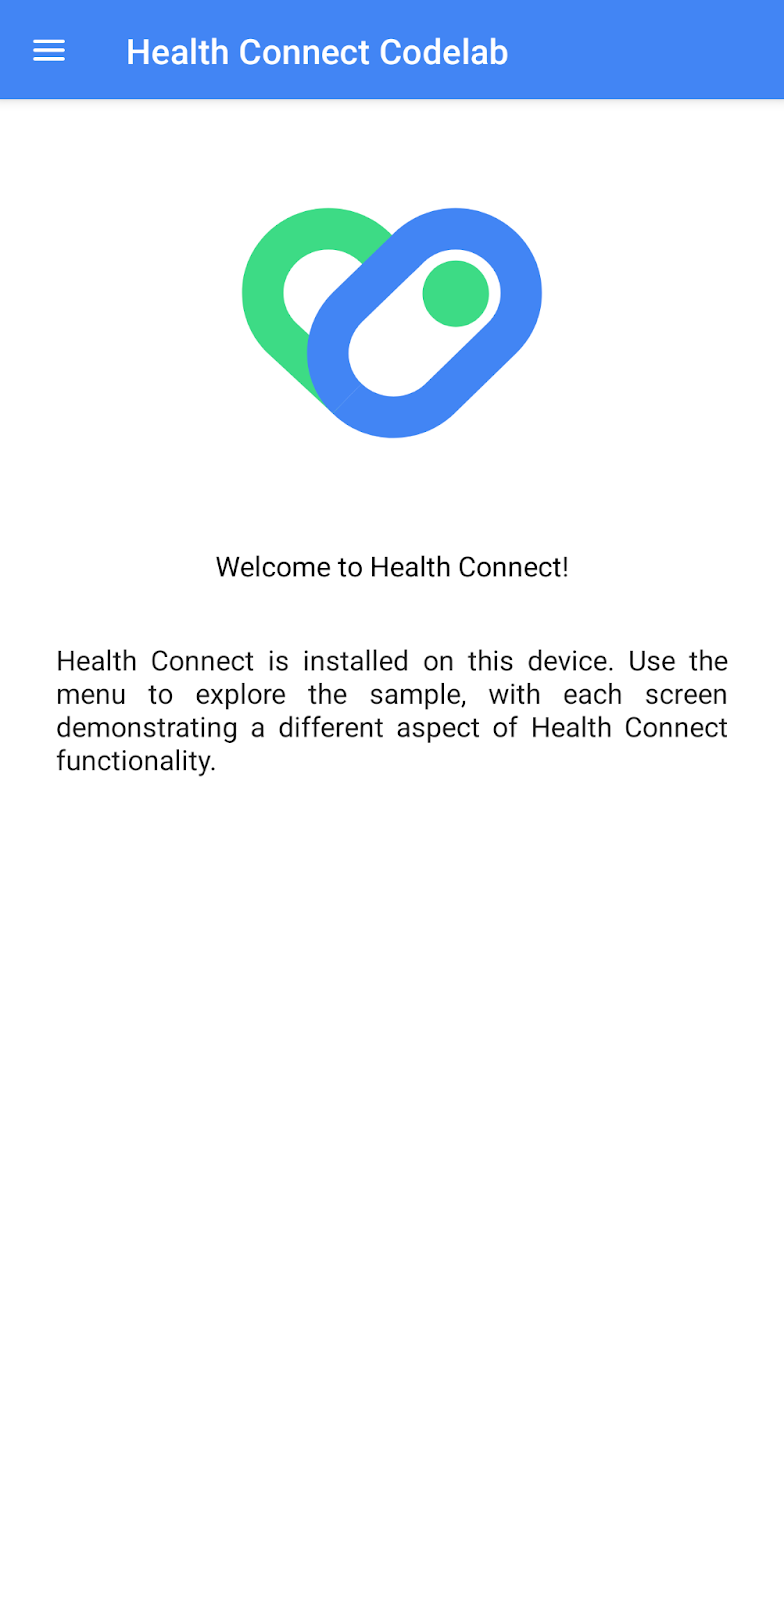
WelcomeScreen: It is the app's landing page that shows different messages depending on the Health Connect availability whether it is installed, not installed, or not supported.PrivacyPolicyScreen: It explains the app's use of permissions which is shown when the user clicks the Privacy policy link in the Health Connect permissions dialog.InputReadingsScreen: It demonstrates reading and writing simple weight records.ExerciseSessionScreen: It is where users insert and list out exercise sessions. When clicking on the record, it takes the user toExerciseSessionDetailScreento show more data associated with the session.DifferentialChangesScreen: It demonstrates how to get a Changes token and get new changes from Health Connect.
HealthConnectManager stores all the functions that interact with Health Connect. In this Codelab, we will guide you step by step to complete the essential functionalities. The <!-- TODO: strings within the start build have corresponding sections in this Codelab where sample codes are provided for you to insert into the project.
Let's start by adding Health Connect to the project!
Add Health Connect client SDK
To start using the Health Connect SDK, you need to add a dependency to the build.gradle file. To find the latest version of Health Connect, check the Jetpack library release.
dependencies {
    // Add a dependency of Health Connect SDK
    implementation "androidx.health.connect:connect-client:1.1.0-alpha11"
}
Declare Health Connect visibility
To interact with Health Connect within the app, declare the Health Connect package name in the AndroidManifest.xml:
<!-- TODO: declare Health Connect visibility -->
<queries>
   <package android:name="com.google.android.apps.healthdata" />
</queries>
Run the start project
Once they are all set, run the start project. At this point, you should see the welcome screen showing the text "Health Connect is installed on this device" and a menu drawer. We will add the functionalities to interact with Health Connect in the subsequent sections.
3. Permission control
Health Connect recommends developers to restrict permission requests to the data types that are used in the app. Blanket permission requests reduce user confidence in the app and could lower user trust. If a permission is denied more than twice, your app gets locked out. As a result, permission requests will no longer appear.
For the purpose of this Codelab, we only need the following permissions:
- Exercise Session
- Heart Rate
- Steps
- Total Calories Burned
- Weight
Declare permissions
Every data type your app reads or writes needs to be declared using a permission in AndroidManifest.xml. Starting from version 1.0.0-alpha10, Health Connect uses the standard Android permission declaration format.
To declare the permissions for the data types required, use the <uses-permission> elements and assign their respective names with the permissions. Nest them within the <manifest> tags. For the full list of permissions and their corresponding data types, see List of data types.
<!-- TODO: Required to specify which Health Connect permissions the app can request -->
  <uses-permission android:name="android.permission.health.READ_HEART_RATE"/>
  <uses-permission android:name="android.permission.health.WRITE_HEART_RATE"/>
  <uses-permission android:name="android.permission.health.READ_STEPS"/>
  <uses-permission android:name="android.permission.health.WRITE_STEPS"/>
  <uses-permission android:name="android.permission.health.READ_EXERCISE"/>
  <uses-permission android:name="android.permission.health.WRITE_EXERCISE"/>
  <uses-permission android:name="android.permission.health.READ_TOTAL_CALORIES_BURNED"/>
  <uses-permission android:name="android.permission.health.WRITE_TOTAL_CALORIES_BURNED"/>
  <uses-permission android:name="android.permission.health.READ_WEIGHT"/>
  <uses-permission android:name="android.permission.health.WRITE_WEIGHT"/>
Declare an intent filter in AndroidManifest.xml to handle the intent that explains how your app uses those permissions. Your app needs to handle this intent and display a privacy policy describing how user data is used and handled. This intent is sent to the app once the user taps the Privacy policy link in the Health Connect permissions dialog.
<!-- TODO: Add intent filter to handle permission rationale intent -->
<!-- Permission handling for Android 13 and before -->
<intent-filter>
  <action android:name="androidx.health.ACTION_SHOW_PERMISSIONS_RATIONALE" />
</intent-filter>

<!-- Permission handling for Android 14 and later -->
<intent-filter>
  <action android:name="android.intent.action.VIEW_PERMISSION_USAGE"/>
  <category android:name="android.intent.category.HEALTH_PERMISSIONS"/>
</intent-filter>
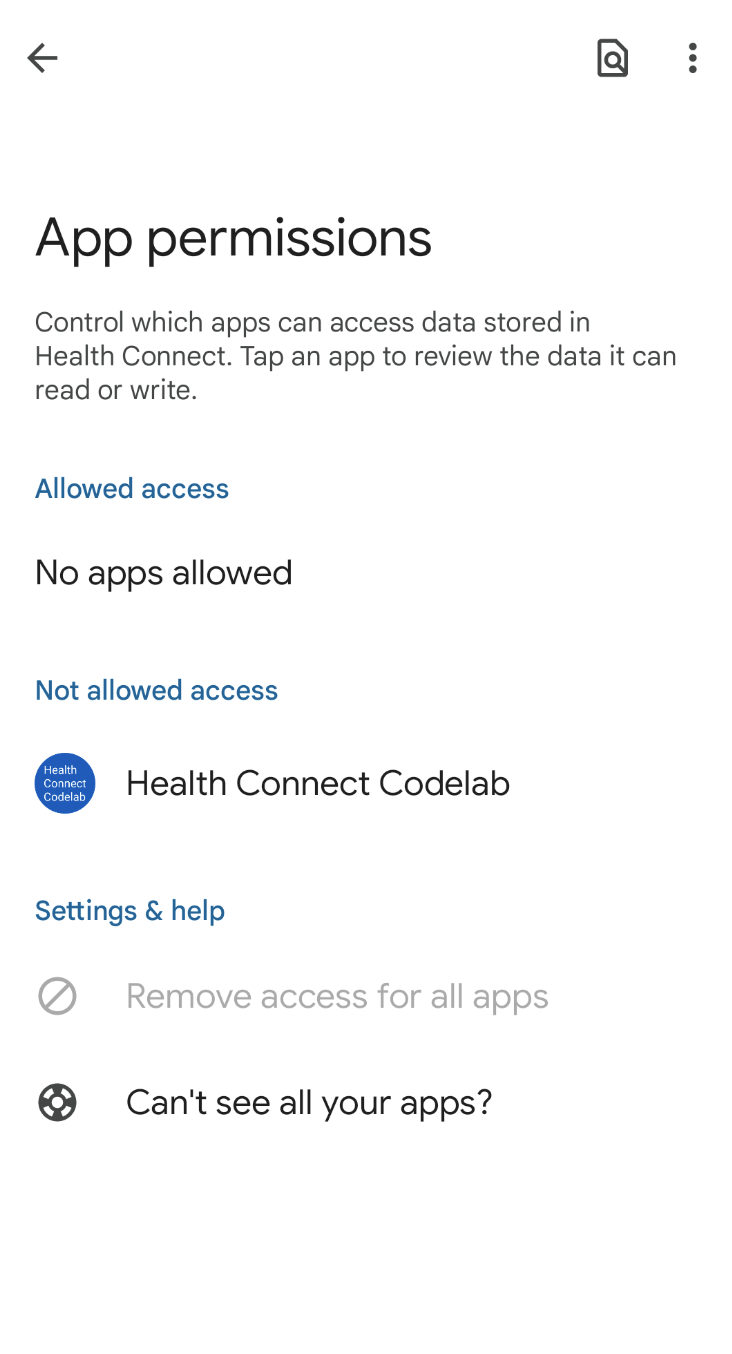
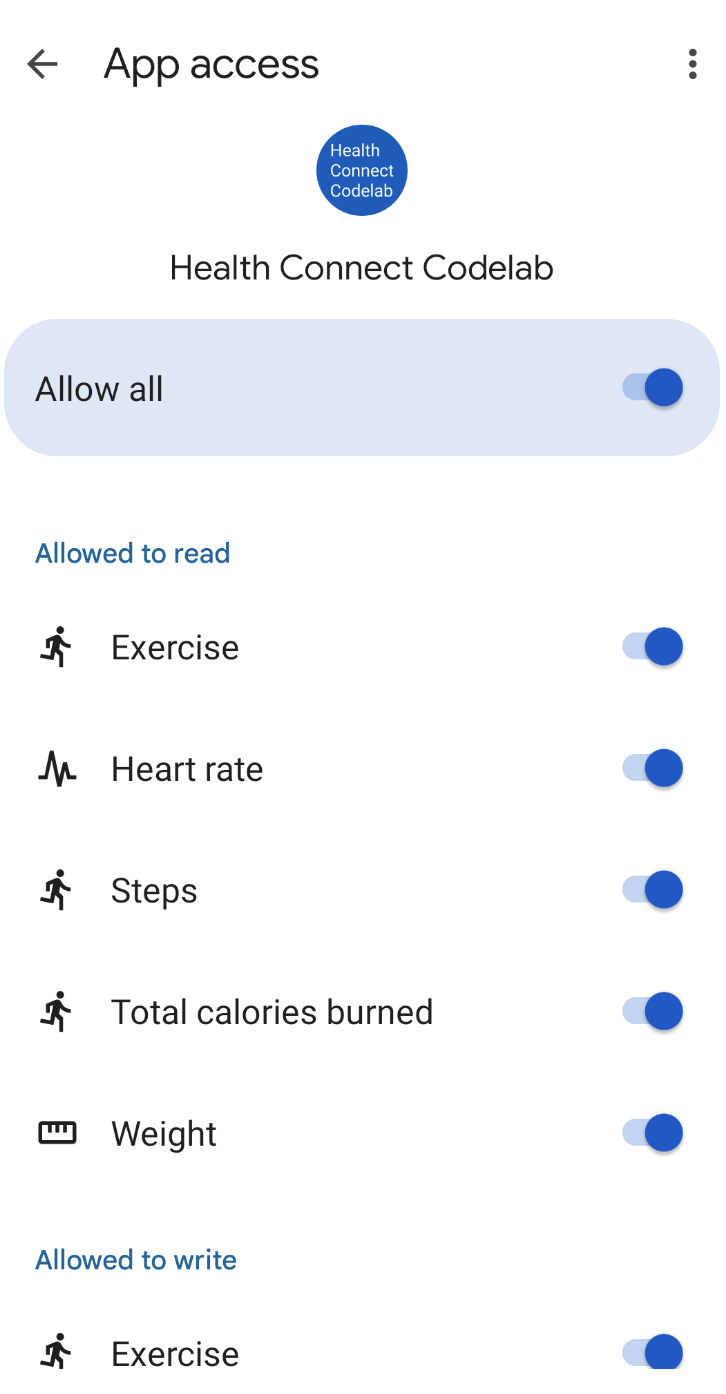
Now reopen the app to see the declared permissions. Click Settings from the menu drawer to get to the Health Connect Settings screen. Then, click App permissions where you should see Health Connect Codelab in the list. Click Health Connect Codelab to display a list of data types for read and write access on that app.
Request permissions
Apart from directly taking users to Health Connect Settings to manage permissions, you can also request permissions from your app via the Health Connect APIs. Note that users may change permissions at any time, so be sure your app checks if required permissions are available. In the Codelab project, we check and send permission requests before reading or writing data.
HealthConnectClient is an entry point to the Health Connect API. In HealthConnectManager.kt, obtain a HealthConnectClient instance.
private val healthConnectClient by lazy { HealthConnectClient.getOrCreate(context) }
To start the request permissions dialog within your application, build a set of permissions for the required data types first. You must request permissions to the data types that you only use.
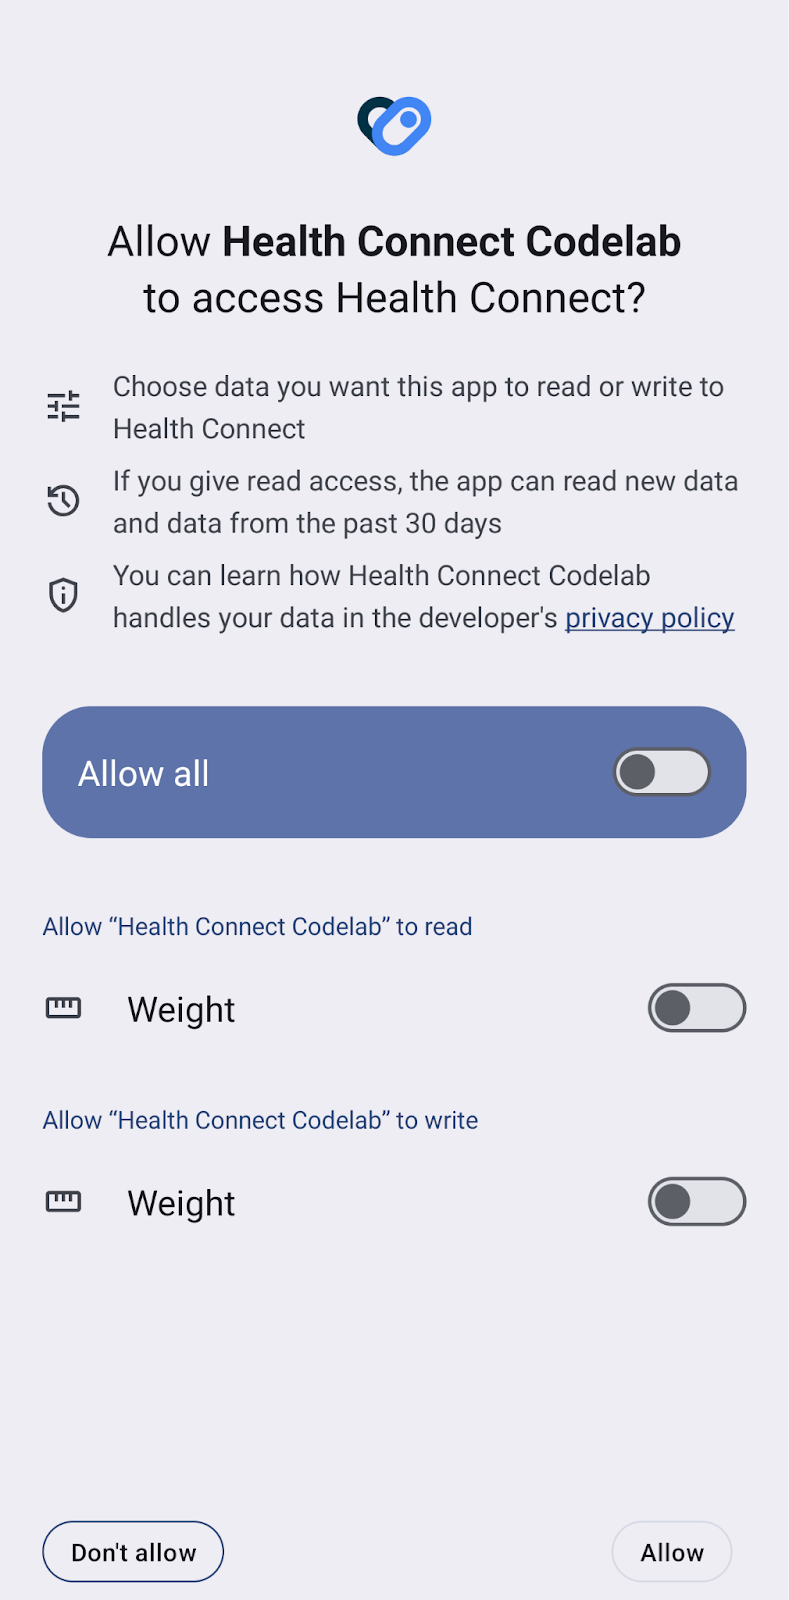
For example, in the Record weight screen, you only need to grant read and write permissions for Weight. We have created a permission set in InputReadingsViewModel.kt as shown in the following code.
  val permissions = setOf(
    HealthPermission.getReadPermission(WeightRecord::class),
    HealthPermission.getWritePermission(WeightRecord::class),
  )
Then, check if the permissions have been granted before launching the permission request. In HealthConnectManager.kt, use getGrantedPermissions to check if the permission of the required data types are granted. To launch the permission request, you have to create an ActivityResultContract by using PermissionController.createRequestPermissionResultContract(), which should be launched when the required permissions are not granted.
  suspend fun hasAllPermissions(permissions: Set<String>): Boolean {
    return healthConnectClient.permissionController.getGrantedPermissions().containsAll(permissions)
  }

  fun requestPermissionsActivityContract(): ActivityResultContract<Set<String>, Set<String>> {
    return PermissionController.createRequestPermissionResultContract()
  }
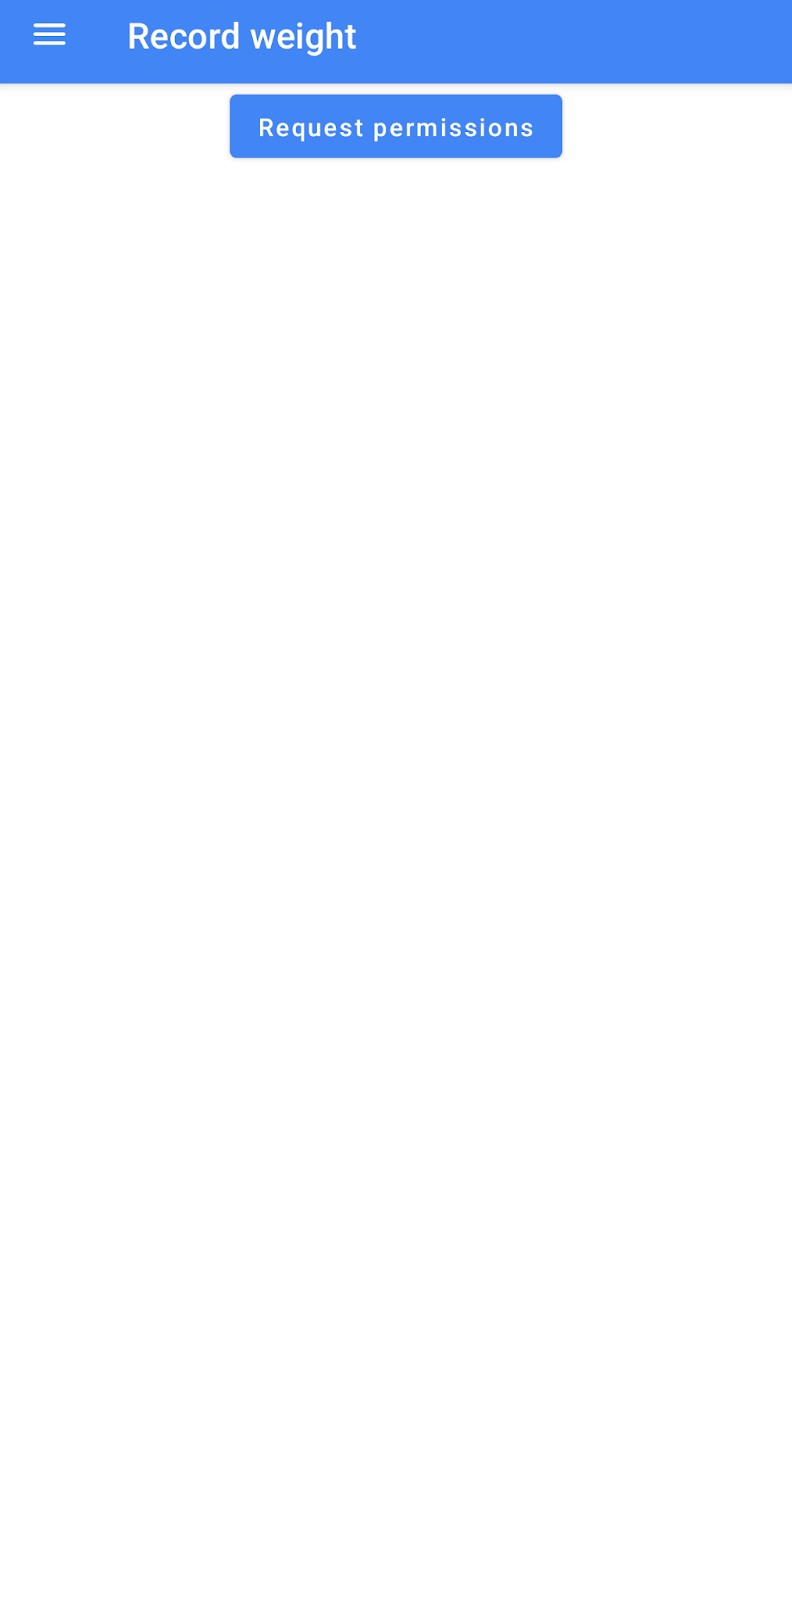
In the Codelab sample app, you may see the Request permissions button shown on the screen if you have not granted the permissions to the required data types. Click Request permissions to open the Health Connect permission dialog. Allow the required permissions and get back to the Codelab app.
4. Write data
Let's start writing records into Health Connect. To write a Weight record, create a WeightRecord object with the weight input value. Note that the Health Connect SDK supports various units classes. For example, use Mass.kilograms(weightInput) to set users weight in kilograms.
All data written to Health Connect should specify zone offset information. Specifying zone offset information while writing data provides time zone information when reading data in Health Connect.
After creating the weight record, use healthConnectClient.insertRecords to write the data into Health Connect.
/**
* TODO: Writes [WeightRecord] to Health Connect.
*/
suspend fun writeWeightInput(weightInput: Double) {
   val time = ZonedDateTime.now().withNano(0)
   val weightRecord = WeightRecord(
       metadata = Metadata.manualEntry(),
       weight = Mass.kilograms(weightInput),
       time = time.toInstant(),
       zoneOffset = time.offset
   )
   val records = listOf(weightRecord)
   try {
      healthConnectClient.insertRecords(records)
      Toast.makeText(context, "Successfully insert records", Toast.LENGTH_SHORT).show()
   } catch (e: Exception) {
      Toast.makeText(context, e.message.toString(), Toast.LENGTH_SHORT).show()
   }
}
Now let's run the app. Click Record weight and enter a new weight record in kilograms. To verify if the weight record is successfully written to Health Connect, open the Health Connect app in Settings and go to Data and access > Body measurements > Weight > See all entries. You should see the new weight record written from Health Connect Codelab.
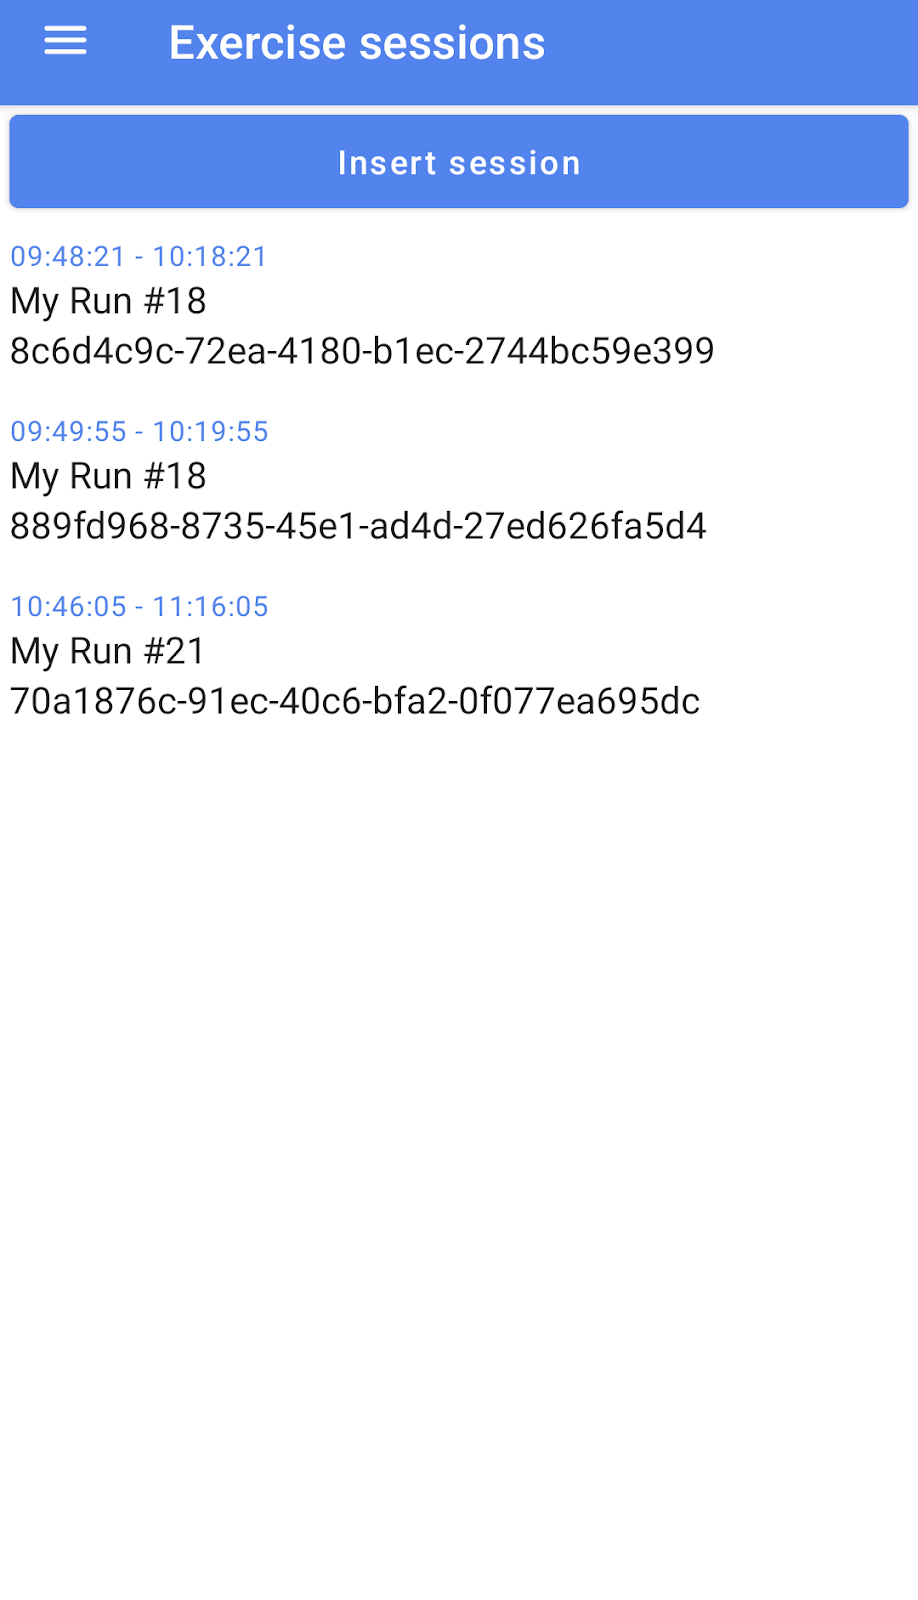
Write exercise sessions
A session is a time interval during which a user performs an activity. An exercise session in Health Connect can include anything from running to badminton. Sessions allow users to measure time-based performance. This data records an array of instantaneous samples measured over a period of time such as a continuous heart rate or location samples during an activity.
The following example shows you how to write an exercise session. Use healthConnectClient.insertRecords to insert multiple data records associated with a session. The insertion request in this example includes ExerciseSessionRecord with ExerciseType, StepsRecord with steps count, TotalCaloriesBurnedRecord with Energy and series of HeartRateRecord samples.
  /**
   * TODO: Writes an [ExerciseSessionRecord] to Health Connect.
   */
  suspend fun writeExerciseSession(start: ZonedDateTime, end: ZonedDateTime) {
    healthConnectClient.insertRecords(
      listOf(
        ExerciseSessionRecord(
          metadata = Metadata.manualEntry(),
          startTime = start.toInstant(),
          startZoneOffset = start.offset,
          endTime = end.toInstant(),
          endZoneOffset = end.offset,
          exerciseType = ExerciseSessionRecord.EXERCISE_TYPE_RUNNING,
          title = "My Run #${Random.nextInt(0, 60)}"
        ),
        StepsRecord(
          metadata = Metadata.manualEntry(),
          startTime = start.toInstant(),
          startZoneOffset = start.offset,
          endTime = end.toInstant(),
          endZoneOffset = end.offset,
          count = (1000 + 1000 * Random.nextInt(3)).toLong()
        ),
        TotalCaloriesBurnedRecord(
          metadata = Metadata.manualEntry(),
          startTime = start.toInstant(),
          startZoneOffset = start.offset,
          endTime = end.toInstant(),
          endZoneOffset = end.offset,
          energy = Energy.calories((140 + Random.nextInt(20)) * 0.01)
        )
      ) + buildHeartRateSeries(start, end)
    )
  }

  /**
   * TODO: Build [HeartRateRecord].
   */
  private fun buildHeartRateSeries(
    sessionStartTime: ZonedDateTime,
    sessionEndTime: ZonedDateTime,
  ): HeartRateRecord {
    val samples = mutableListOf<HeartRateRecord.Sample>()
    var time = sessionStartTime
    while (time.isBefore(sessionEndTime)) {
      samples.add(
        HeartRateRecord.Sample(
          time = time.toInstant(),
          beatsPerMinute = (80 + Random.nextInt(80)).toLong()
        )
      )
      time = time.plusSeconds(30)
    }
    return HeartRateRecord(
      metadata = Metadata.manualEntry(),
      startTime = sessionStartTime.toInstant(),
      startZoneOffset = sessionStartTime.offset,
      endTime = sessionEndTime.toInstant(),
      endZoneOffset = sessionEndTime.offset,
      samples = samples
    )
  }
5. Read data
Now that you have written Weight and Exercise Session records with both the Codelab sample app and the Toolbox app, let's use the Health Connect API to read those records. First, create a ReadRecordsRequest and specify the record type and the time range to read from. The ReadRecordsRequest can also set a dataOriginFilter to specify the source app of the record you want to read from.
    /**
     * TODO: Reads in existing [WeightRecord]s.
     */
    suspend fun readWeightInputs(start: Instant, end: Instant): List<WeightRecord> {
        val request = ReadRecordsRequest(
            recordType = WeightRecord::class,
            timeRangeFilter = TimeRangeFilter.between(start, end)
        )
        val response = healthConnectClient.readRecords(request)
        return response.records
    }
  /**
   * TODO: Obtains a list of [ExerciseSessionRecord]s in a specified time frame.
   */
  suspend fun readExerciseSessions(start: Instant, end: Instant): List<ExerciseSessionRecord> {
    val request = ReadRecordsRequest(
      recordType = ExerciseSessionRecord::class,
      timeRangeFilter = TimeRangeFilter.between(start, end)
    )
    val response = healthConnectClient.readRecords(request)
    return response.records
  }
Now let's run the app and check if you can see a list of weight records and exercise sessions.
6. Read data in background
Declare permission
To access health data in the background, declare the READ_HEALTH_DATA_IN_BACKGROUND permission in your AndroidManifest.xml file.
<!-- TODO: Required to specify which Health Connect permissions the app can request -->
...
<uses-permission android:name="android.permission.health.READ_HEALTH_DATA_IN_BACKGROUND" />
Check feature availability
Because users may not always have the latest version of Health Connect, it's best to verify feature availability first. In HealthConnectManager.kt, we use the getFeatureStatus() method to accomplish this.
fun isFeatureAvailable(feature: Int): Boolean{
    return healthConnectClient
      .features
      .getFeatureStatus(feature) == HealthConnectFeatures.FEATURE_STATUS_AVAILABLE
  }
The background read functionality in ExerciseSessionViewModel.kt is verified using the FEATURE_READ_HEALTH_DATA_IN_BACKGROUND constant:
backgroundReadAvailable.value = healthConnectManager.isFeatureAvailable(
    HealthConnectFeatures.FEATURE_READ_HEALTH_DATA_IN_BACKGROUND
)
Request permissions
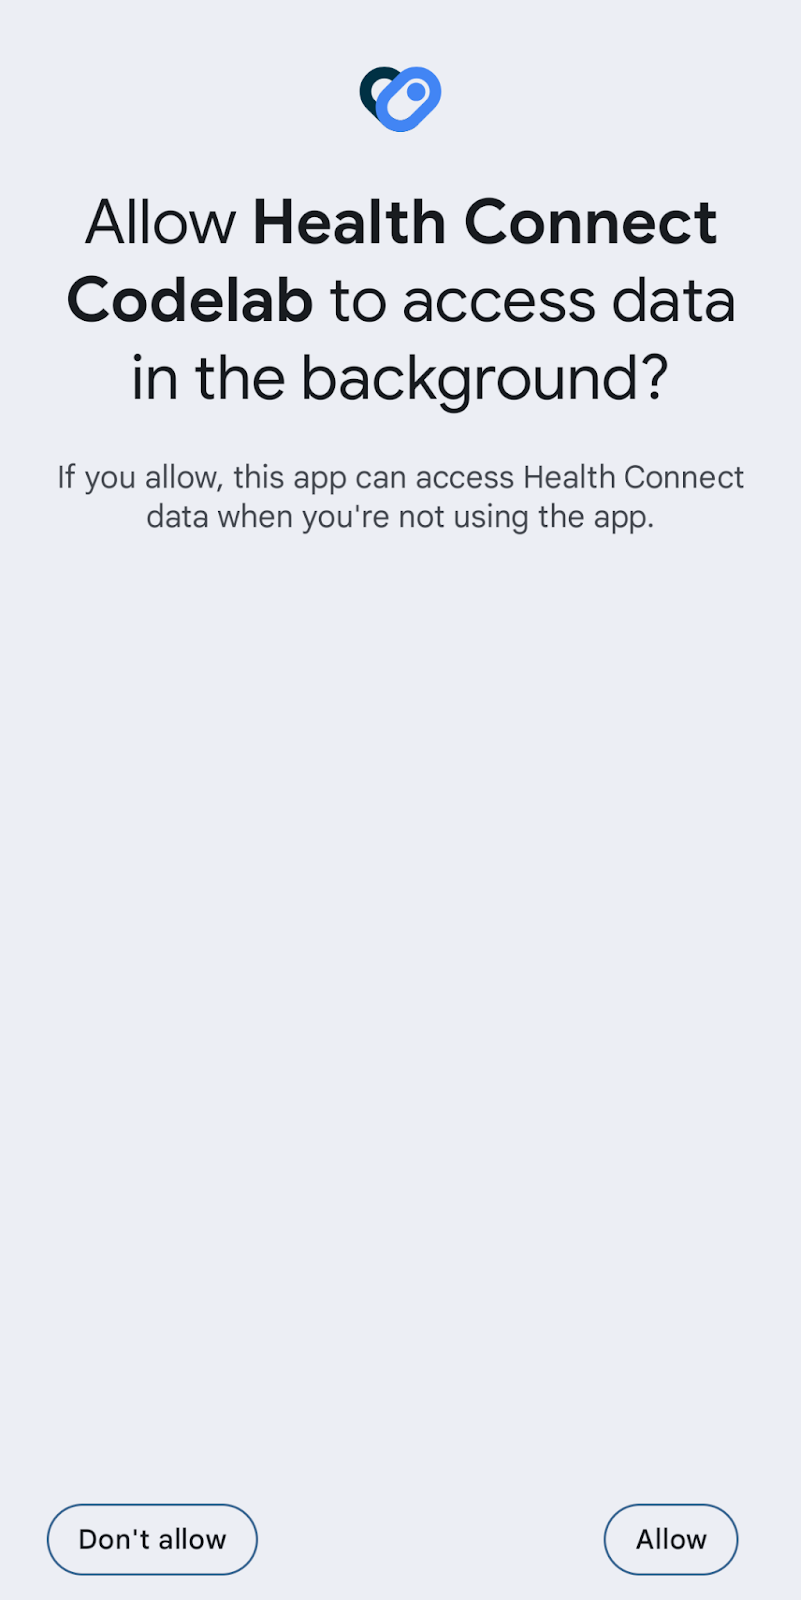
After verifying that the background read feature is available, you can request the PERMISSION_READ_HEALTH_DATA_IN_BACKGROUND permission by clicking Request Background Read on the Exercise sessions screen.
Users see the following prompt:
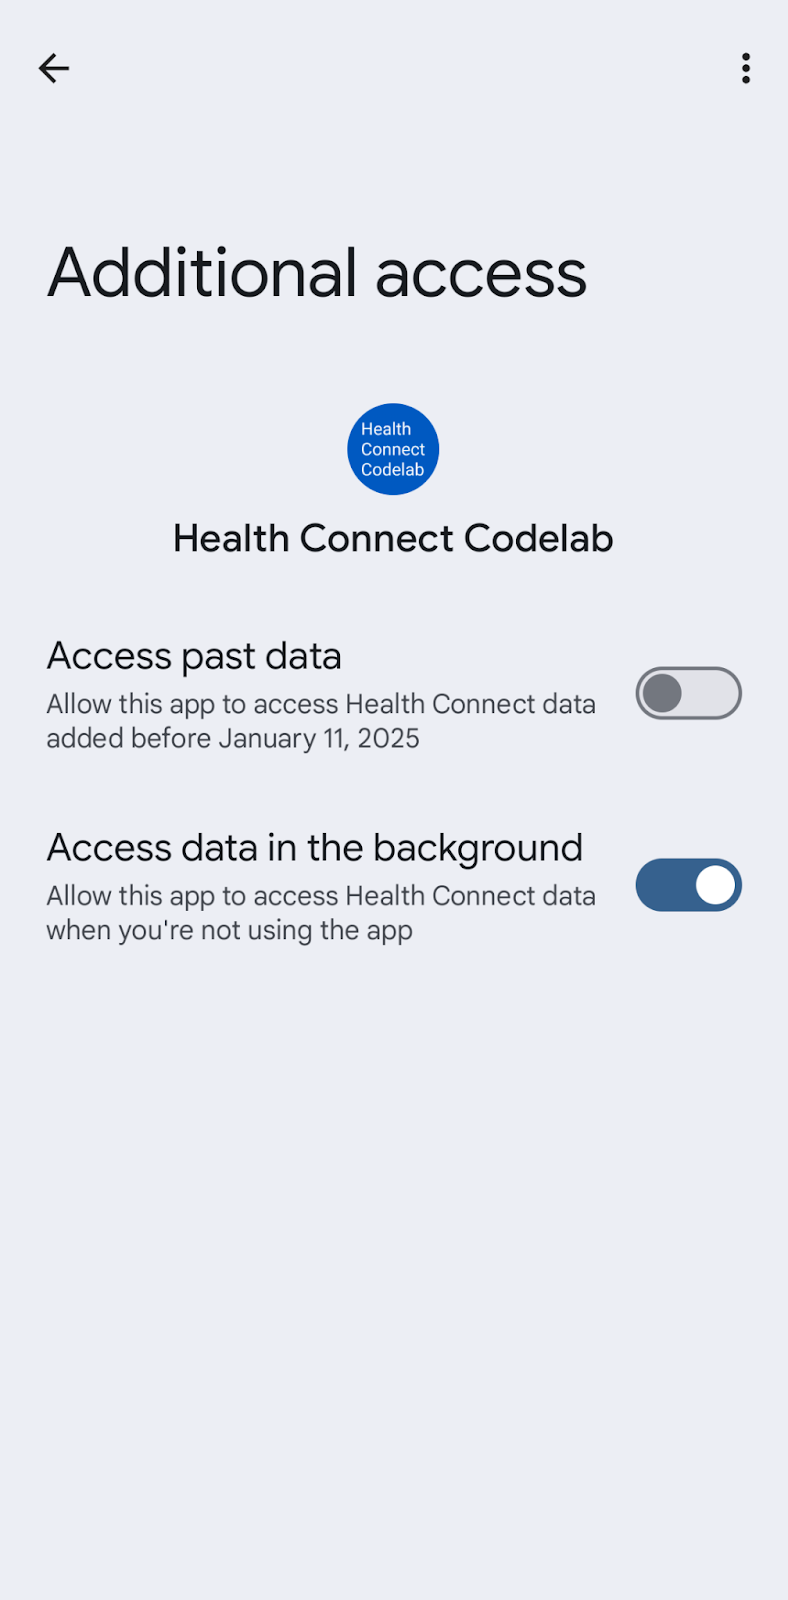
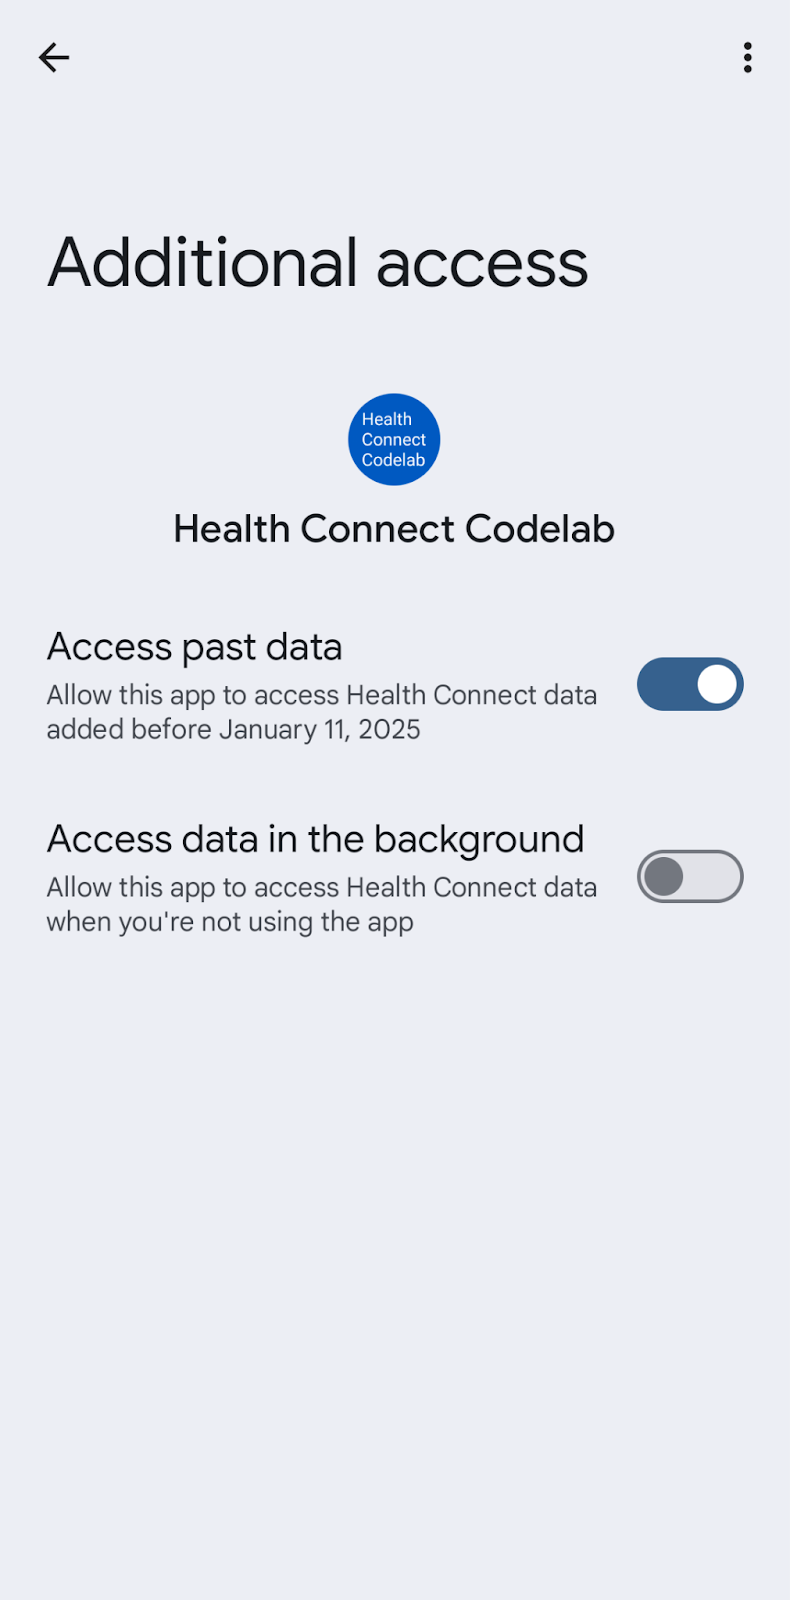
Users can also grant access to background reads by navigating to Health Connect > App permissions > Health Connect Codelab > Additional access > Access data in the background in system settings:
Read data in background
Utilize WorkManager to schedule background tasks. Upon tapping the Read Steps In Background button, the app will initiate ReadStepWorker after a 10-second delay. This worker will retrieve the total step count from Health Connect for the past 24 hours. Subsequently, a similar log entry detailing this information will appear in Logcat:
There are 4000 steps in Health Connect in the last 24 hours.
7. Read historical data
Declare permission
To access health data from other applications that are older than 30 days, declare the READ_HEALTH_DATA_HISTORY permission in your AndroidManifest.xml file.
<!-- TODO: Required to specify which Health Connect permissions the app can request -->
...
<uses-permission android:name="android.permission.health.READ_HEALTH_DATA_HISTORY" />
Check feature availability
Because users may not always have the latest version of Health Connect, it's best to verify feature availability first. In HealthConnectManager.kt, we use the getFeatureStatus() method to accomplish this.
fun isFeatureAvailable(feature: Int): Boolean{
    return healthConnectClient
      .features
      .getFeatureStatus(feature) == HealthConnectFeatures.FEATURE_STATUS_AVAILABLE
  }
The history read functionality in ExerciseSessionViewModel.kt is verified using the FEATURE_READ_HEALTH_DATA_HISTORY constant:
historyReadAvailable.value = healthConnectManager.isFeatureAvailable(
    HealthConnectFeatures.FEATURE_READ_HEALTH_DATA_HISTORY
)
Request permissions
After verifying that the history read feature is available, you can request the PERMISSION_READ_HEALTH_DATA_HISTORY permission by clicking Request History Read on the Exercise sessions screen.
Users see the following prompt:
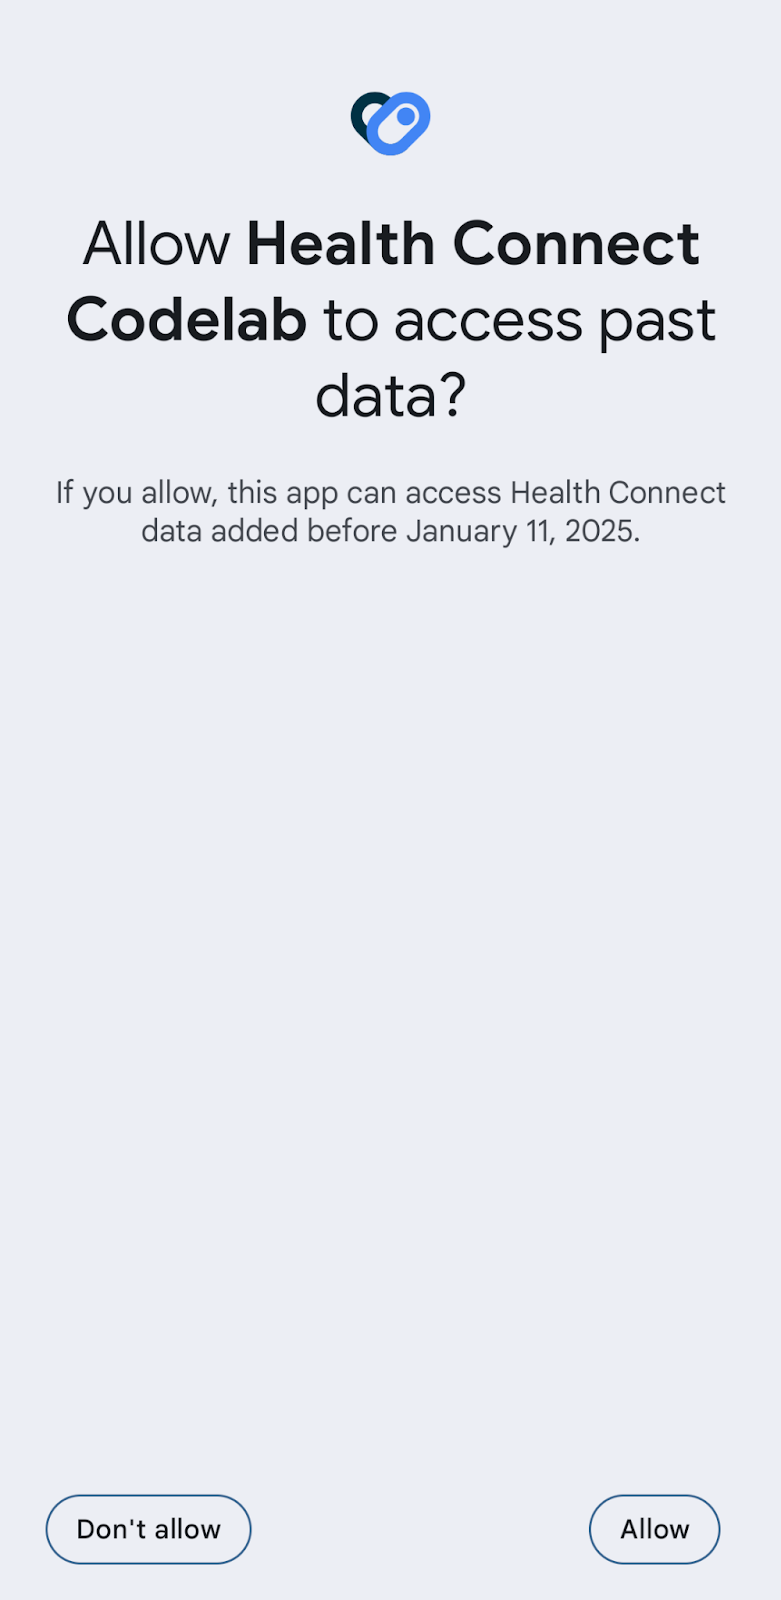
Users can also grant access to history reads by navigating to Health Connect > App permissions > Health Connect Codelab > Additional access > Access past data in system settings:
Read historical data
The Exercise sessions screen will display past data from other apps once access to read history has been granted.
8. Read differential data
The Health Connect Differential Changes API helps to track changes from a specific point of time for a set of data types. For example, you want to know if users have updated or deleted any existing records outside your app so that you can update your database accordingly.
Reading data with Health Connect is restricted to applications running in the foreground. This restriction is in place to further strengthen user privacy. It notifies and assures users that Health Connect does not have background read access to their data and that data is only read and accessed in the foreground. When the app is in the foreground, the Differential Changes API enables developers to retrieve changes made to Health Connect by deploying a Changes token.
In HealthConnectManager.kt there are two functions which are getChangesToken() and getChanges(). We will add Differential Changes APIs to these functions to get data changes.
Initial Changes token setup
The data changes are retrieved from Health Connect only when your app requests them with a Changes token. The Changes token represents the point in commit history from which differential data will be taken.
To get a Changes token, send a ChangesTokenRequest with a set of data types you want to track the data changes. Keep the token and use it when you want to retrieve any updates from Health Connect.
  /**
   * TODO: Obtains a Changes token for the specified record types.
   */
  suspend fun getChangesToken(): String {
    return healthConnectClient.getChangesToken(
      ChangesTokenRequest(
        setOf(
          ExerciseSessionRecord::class
        )
      )
    )
  }
Data update with Changes token
When you want to get changes from the last time your app synced with Health Connect, use the Changes token you got earlier and send a getChanges call with the token. The ChangesResponse returns a list of observed changes from Health Connect such as UpsertionChange and DeletionChange.
  /**
   * TODO: Retrieve changes from a Changes token.
   */
  suspend fun getChanges(token: String): Flow<ChangesMessage> = flow {
    var nextChangesToken = token
    do {
      val response = healthConnectClient.getChanges(nextChangesToken)
      if (response.changesTokenExpired) {
        throw IOException("Changes token has expired")
      }
      emit(ChangesMessage.ChangeList(response.changes))
      nextChangesToken = response.nextChangesToken
    } while (response.hasMore)
    emit(ChangesMessage.NoMoreChanges(nextChangesToken))
  }
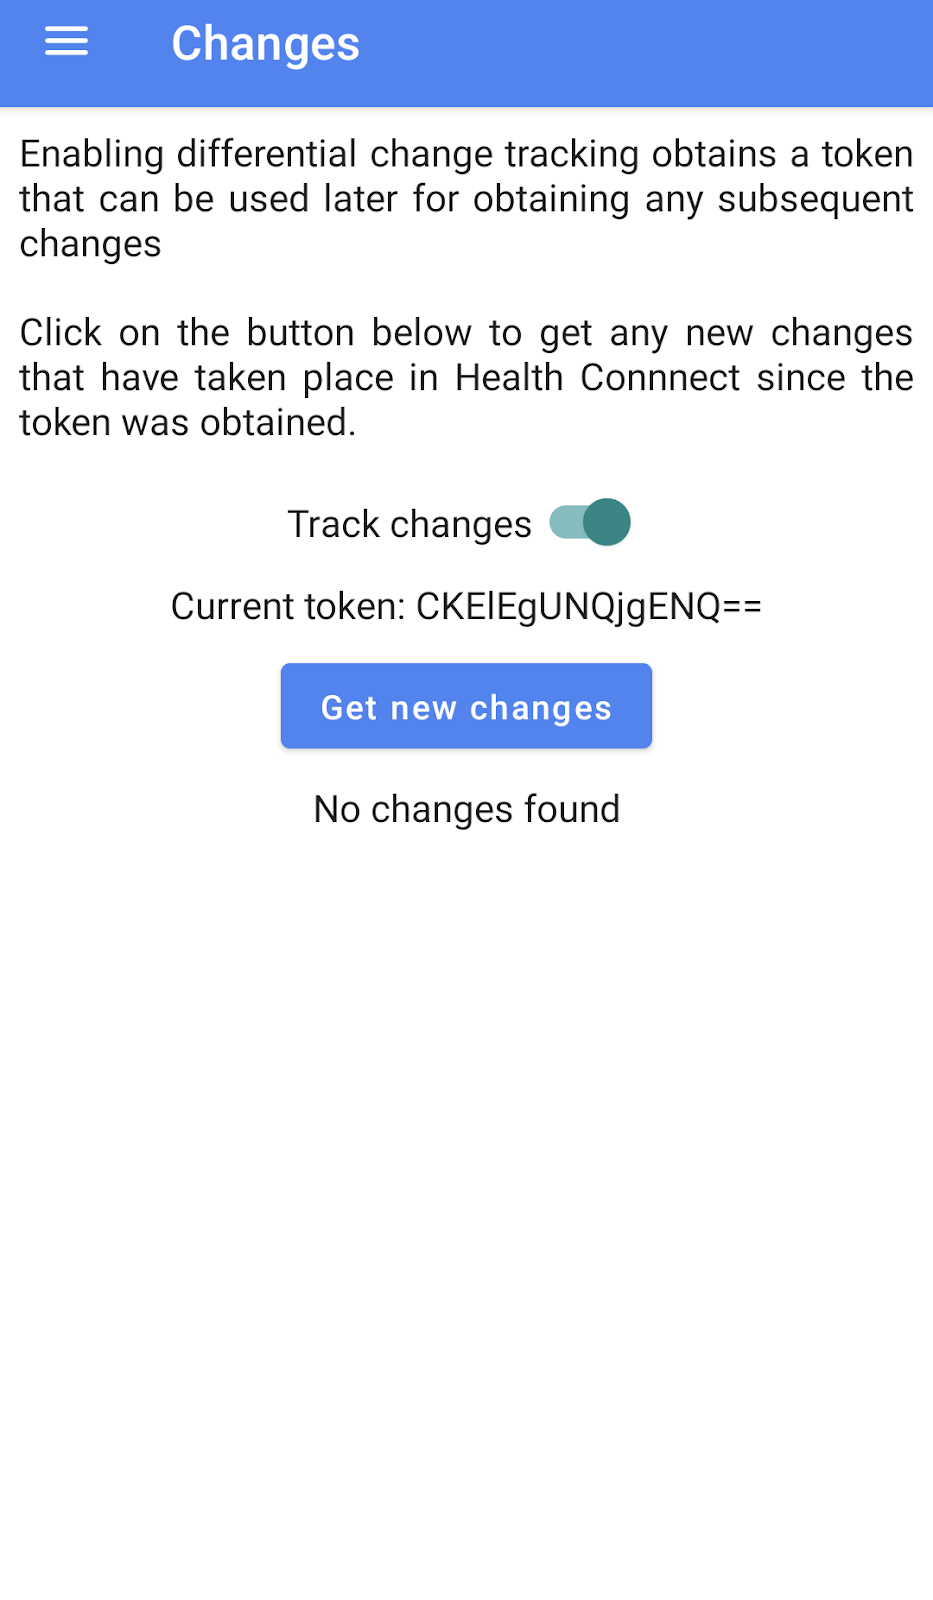
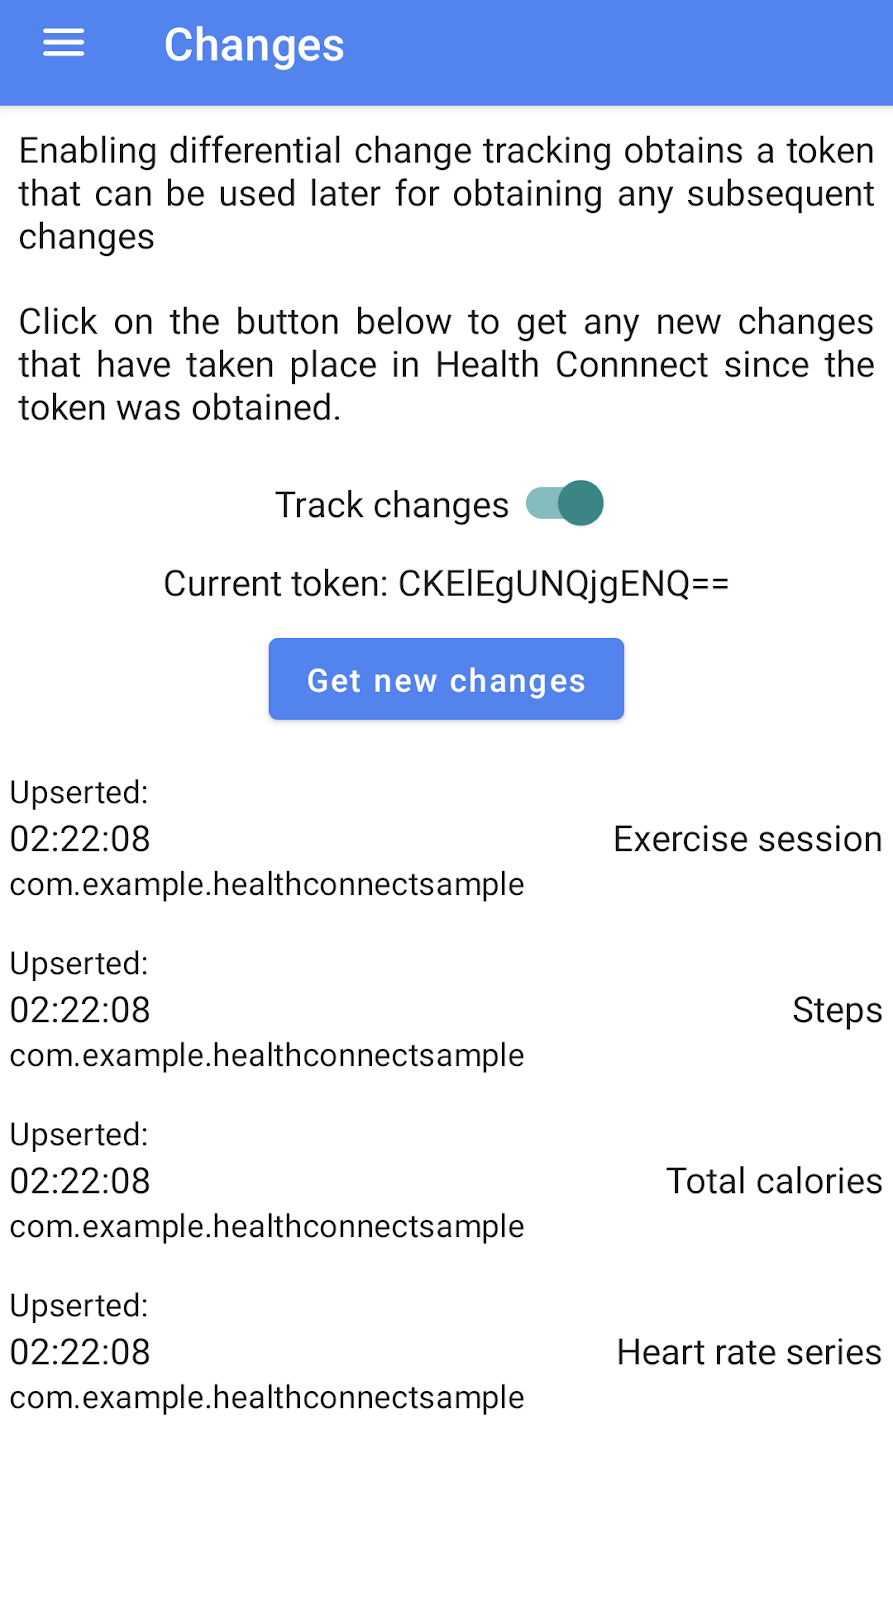
Now let's run the app and go to the Changes screen. First, enable Track changes to get a Changes token. Then insert weight or exercise sessions either from the Toolbox or from the Codelab app. Go back to the Changes screen and select Get new changes. You should see the upsertion changes now.
9. Aggregate data
Health Connect also provides aggregated data through aggregate APIs. The following examples show you how to get cumulative and statistical data from Health Connect.
Use healthConnectClient.aggregate to send AggregateRequest. In the aggregate request, specify a set of aggregate metrics and the time range you want to get. For example, ExerciseSessionRecord.EXERCISE_DURATION_TOTAL and StepsRecord.COUNT_TOTAL provide cumulative data, while WeightRecord.WEIGHT_AVG, HeartRateRecord.BPM_MAX, and HeartRateRecord.BPM_MIN provide statistical data.
    /**
     * TODO: Returns the weekly average of [WeightRecord]s.
     */
    suspend fun computeWeeklyAverage(start: Instant, end: Instant): Mass? {
        val request = AggregateRequest(
            metrics = setOf(WeightRecord.WEIGHT_AVG),
            timeRangeFilter = TimeRangeFilter.between(start, end)
        )
        val response = healthConnectClient.aggregate(request)
        return response[WeightRecord.WEIGHT_AVG]
    }
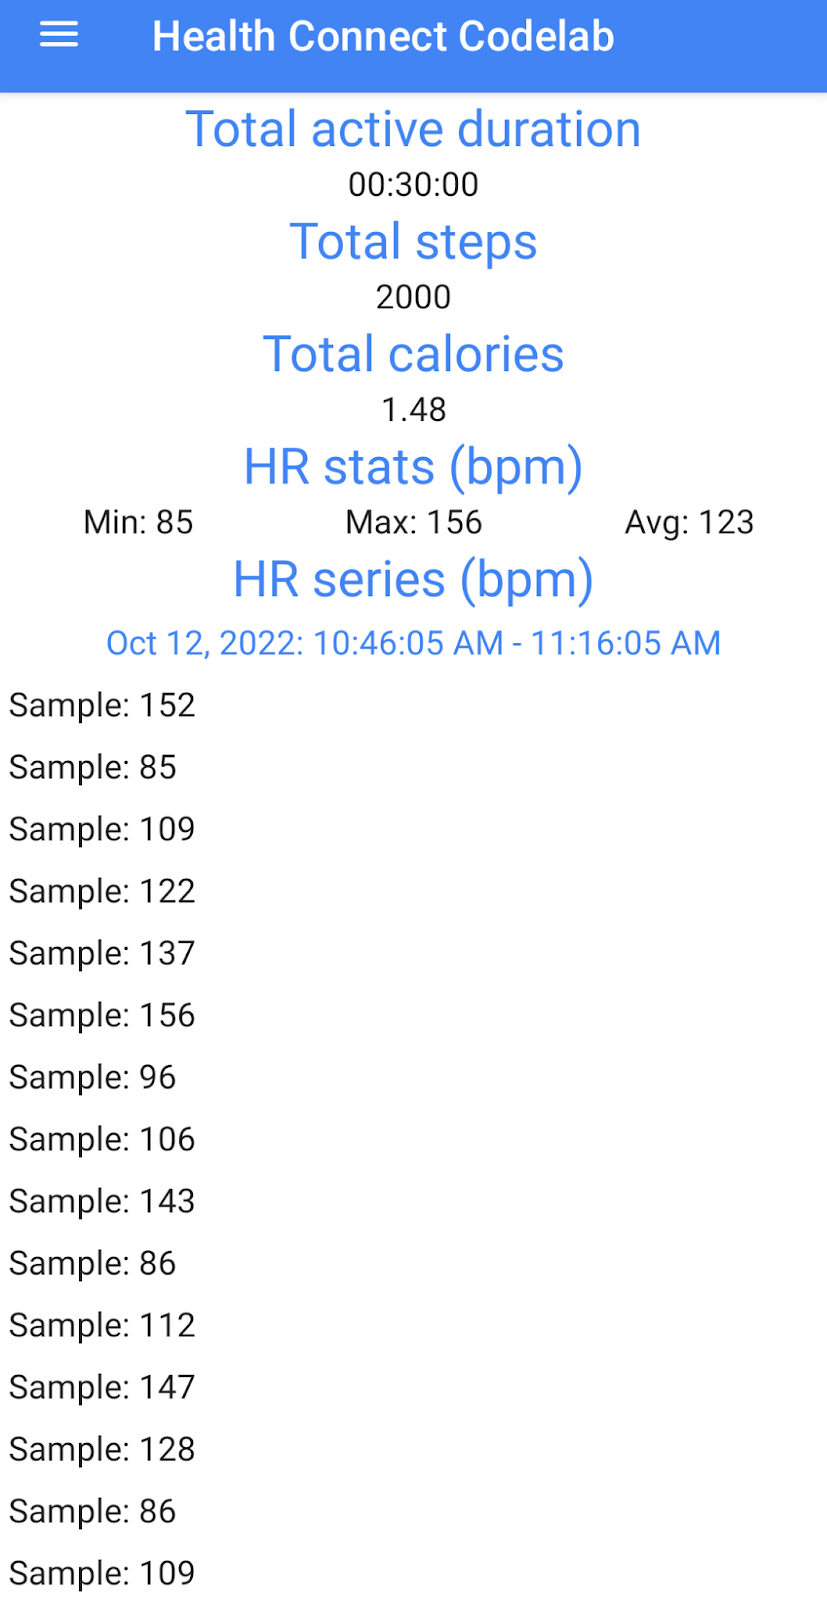
This example shows how to get associated aggregation data for a specific exercise session. First, read a record using healthConnectClient.readRecord with a uid. Then, use the startTime and the endTime of the exercise session as time range and the dataOrigin as filters to read associated aggregations.
  /**
   * TODO: Reads aggregated data and raw data for selected data types, for a given [ExerciseSessionRecord].
   */
  suspend fun readAssociatedSessionData(
      uid: String,
  ): ExerciseSessionData {
    val exerciseSession = healthConnectClient.readRecord(ExerciseSessionRecord::class, uid)
    // Use the start time and end time from the session, for reading raw and aggregate data.
    val timeRangeFilter = TimeRangeFilter.between(
      startTime = exerciseSession.record.startTime,
      endTime = exerciseSession.record.endTime
    )
    val aggregateDataTypes = setOf(
      ExerciseSessionRecord.EXERCISE_DURATION_TOTAL,
      StepsRecord.COUNT_TOTAL,
      TotalCaloriesBurnedRecord.ENERGY_TOTAL,
      HeartRateRecord.BPM_AVG,
      HeartRateRecord.BPM_MAX,
      HeartRateRecord.BPM_MIN,
    )
    // Limit the data read to just the application that wrote the session. This may or may not
    // be desirable depending on the use case: In some cases, it may be useful to combine with
    // data written by other apps.
    val dataOriginFilter = setOf(exerciseSession.record.metadata.dataOrigin)
    val aggregateRequest = AggregateRequest(
      metrics = aggregateDataTypes,
      timeRangeFilter = timeRangeFilter,
      dataOriginFilter = dataOriginFilter
    )
    val aggregateData = healthConnectClient.aggregate(aggregateRequest)
    val heartRateData = readData<HeartRateRecord>(timeRangeFilter, dataOriginFilter)

    return ExerciseSessionData(
      uid = uid,
      totalActiveTime = aggregateData[ExerciseSessionRecord.EXERCISE_DURATION_TOTAL],
      totalSteps = aggregateData[StepsRecord.COUNT_TOTAL],
      totalEnergyBurned = aggregateData[TotalCaloriesBurnedRecord.ENERGY_TOTAL],
      minHeartRate = aggregateData[HeartRateRecord.BPM_MIN],
      maxHeartRate = aggregateData[HeartRateRecord.BPM_MAX],
      avgHeartRate = aggregateData[HeartRateRecord.BPM_AVG],
      heartRateSeries = heartRateData,
    )
  }
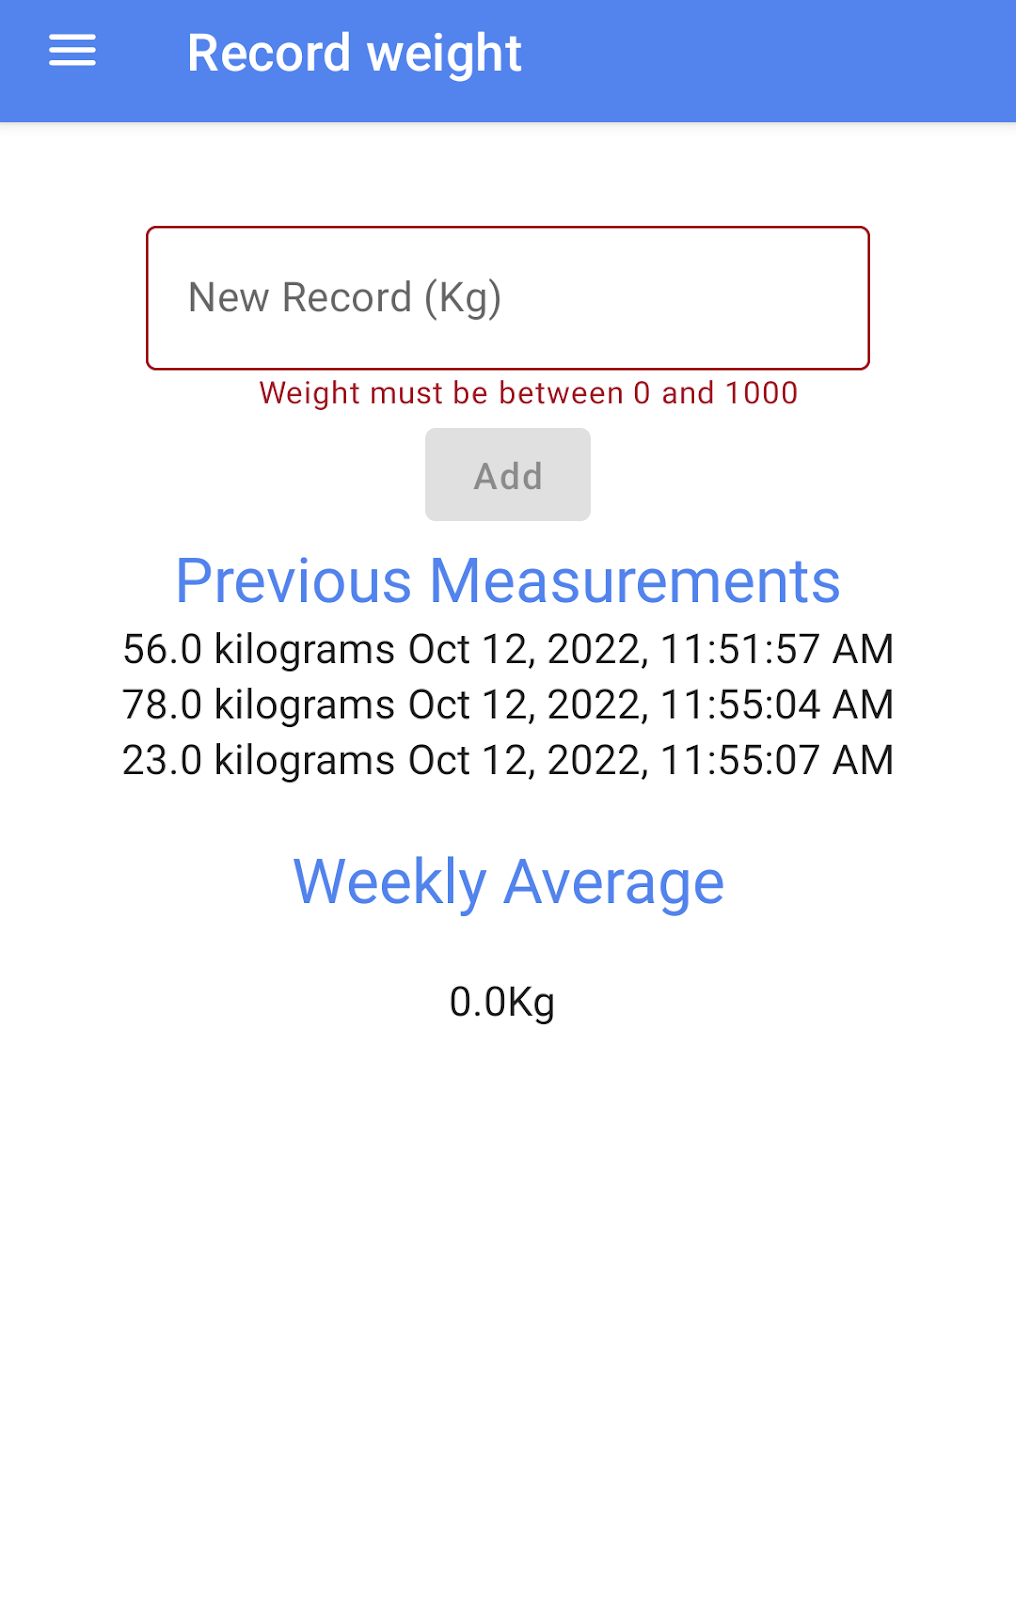
Now let's run the app and check if you can see the average weight on the Record weight screen. You can also see the detailed data of an exercise session by opening the Exercise sessions screen and choosing on one of the exercise session records.
10. Congratulations
Congratulations, you've successfully built your first Health Connect integrated health and fitness app.
The app can declare permissions and request user permissions on data types used in the app. It can also read and write data from the Health Connect data storage. You've also learned how to use the Health Connect Toolbox to support your app development by creating mock data in the Health Connect data storage.
You now know the key steps required to make your health and fitness app a part of the Health Connect ecosystem.