
Android Studio 3.4 (April 2019)
Android Studio 3.4 is a major release that includes a variety of new features and improvements.
3.4.2 (July 2019)
This minor update includes various bug fixes and performance improvements. To see a list of notable bug fixes, read the related post on the Release Updates blog.
3.4.1 (May 2019)
This minor update includes various bug fixes and performance improvements. To see a list of notable bug fixes, read the related post on the Release Updates blog.
3.4.0 known issues
Profiling is disabled when deploying your app to a device running Android Q Beta.
- When using the Data Binding Library,
LiveDataListener.onChanged()might fail with a NPE. A fix for this issue will be included in Android Studio 3.4.1 and is already available in the latest Preview version of Android Studio 3.5. (See issue #122066788)
IntelliJ IDEA 2018.3.4
The core Android Studio IDE has been updated with improvements from IntelliJ IDEA through the 2018.3.4 release.
Android Gradle plugin 3.4.0 updates
For information on what’s new in Android Gradle plugin 3.4.0, see its release notes.
New Project Structure Dialog
The new Project Structure Dialog (PSD) makes it easier to update dependencies and configure different aspects of your project, such as modules, build variants, signing configurations, and build variables.
You can open the PSD by selecting File > Project Structure from the menu
bar. You can also open the PSD by pressing Ctrl+Shift+Alt+S on Windows and
Linux, or Command+; (semicolon) on macOS. You can find descriptions of some of
the new and updated sections of the PSD below.
Variables
The new variables section of the PSD allows you to create and manage build variables, such as those to keep version numbers for dependencies consistent across your project.
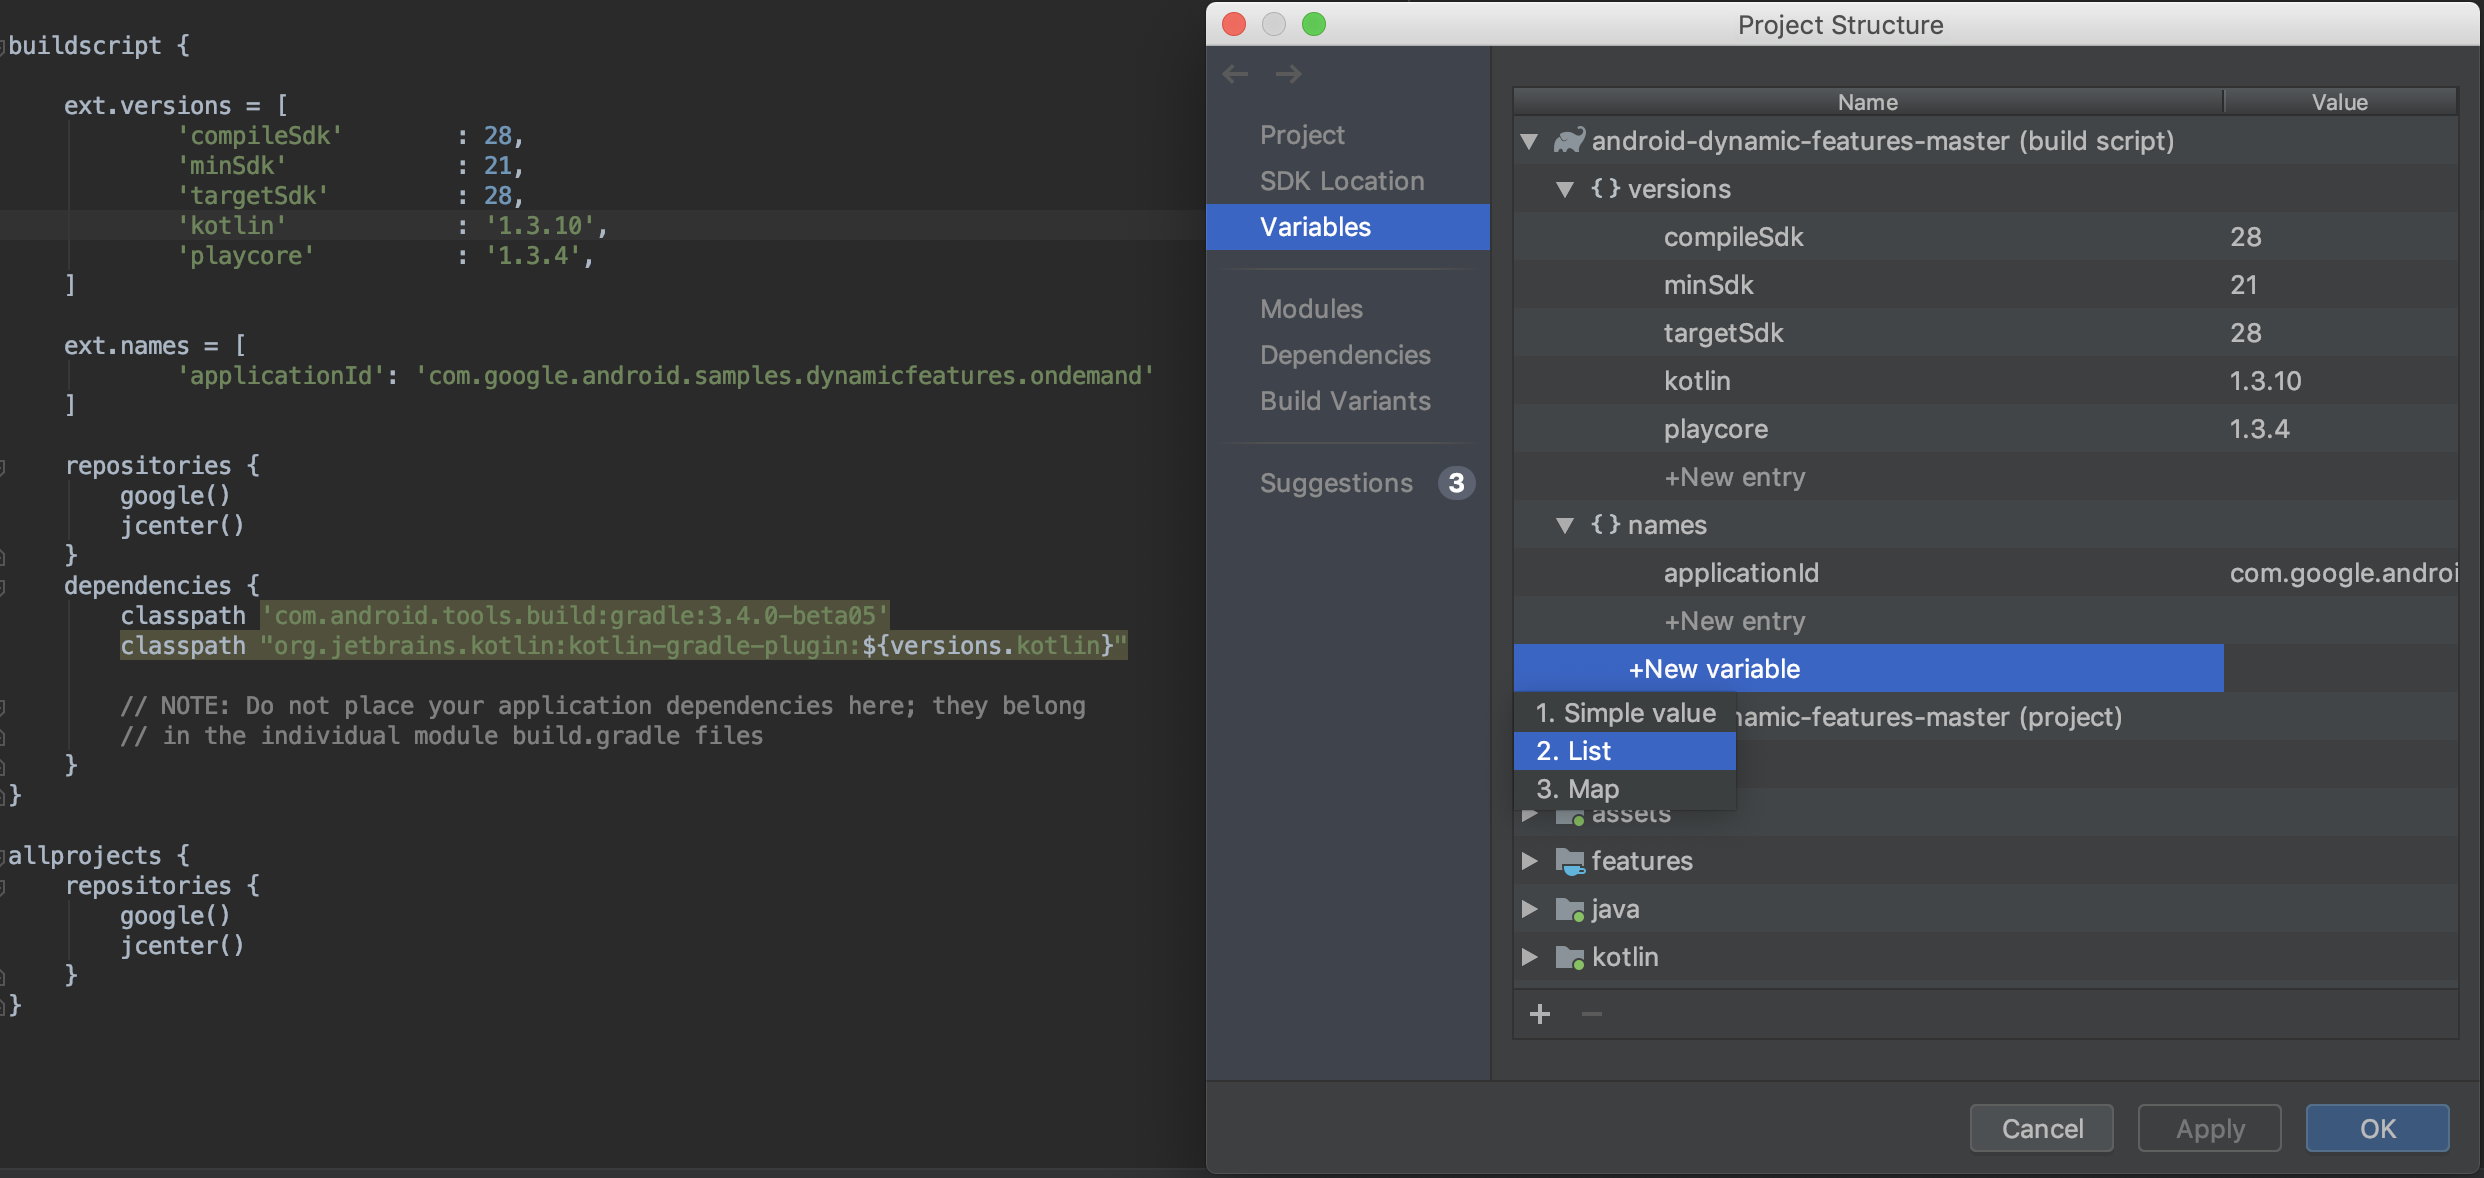
- Quickly view and edit build variables that already exist in your project’s Gradle build scripts.
- Add new build variables at a project- or module-level directly from the PSD.
Note: If your existing build configuration files assign values through complex Groovy scripts, you may not be able to edit those values through the PSD. Additionally, you can not edit build files written in Kotlin using the PSD.
Modules
Configure properties that are applied to all build variants in an existing
module or add new modules to your project from the Modules section. For
example, this is where you can configure defaultConfig properties or manage
signing configurations.
Dependencies
Inspect and visualize each dependency in the dependency graph of your project, as resolved by Gradle during project sync, by following these steps:
- In the left pane of the PSD, select Dependencies.
- In the Modules pane, select a module for which you’d like to inspect the resolved dependencies.
- On the right side of the PSD, open the Resolved Dependencies pane, which is shown below.

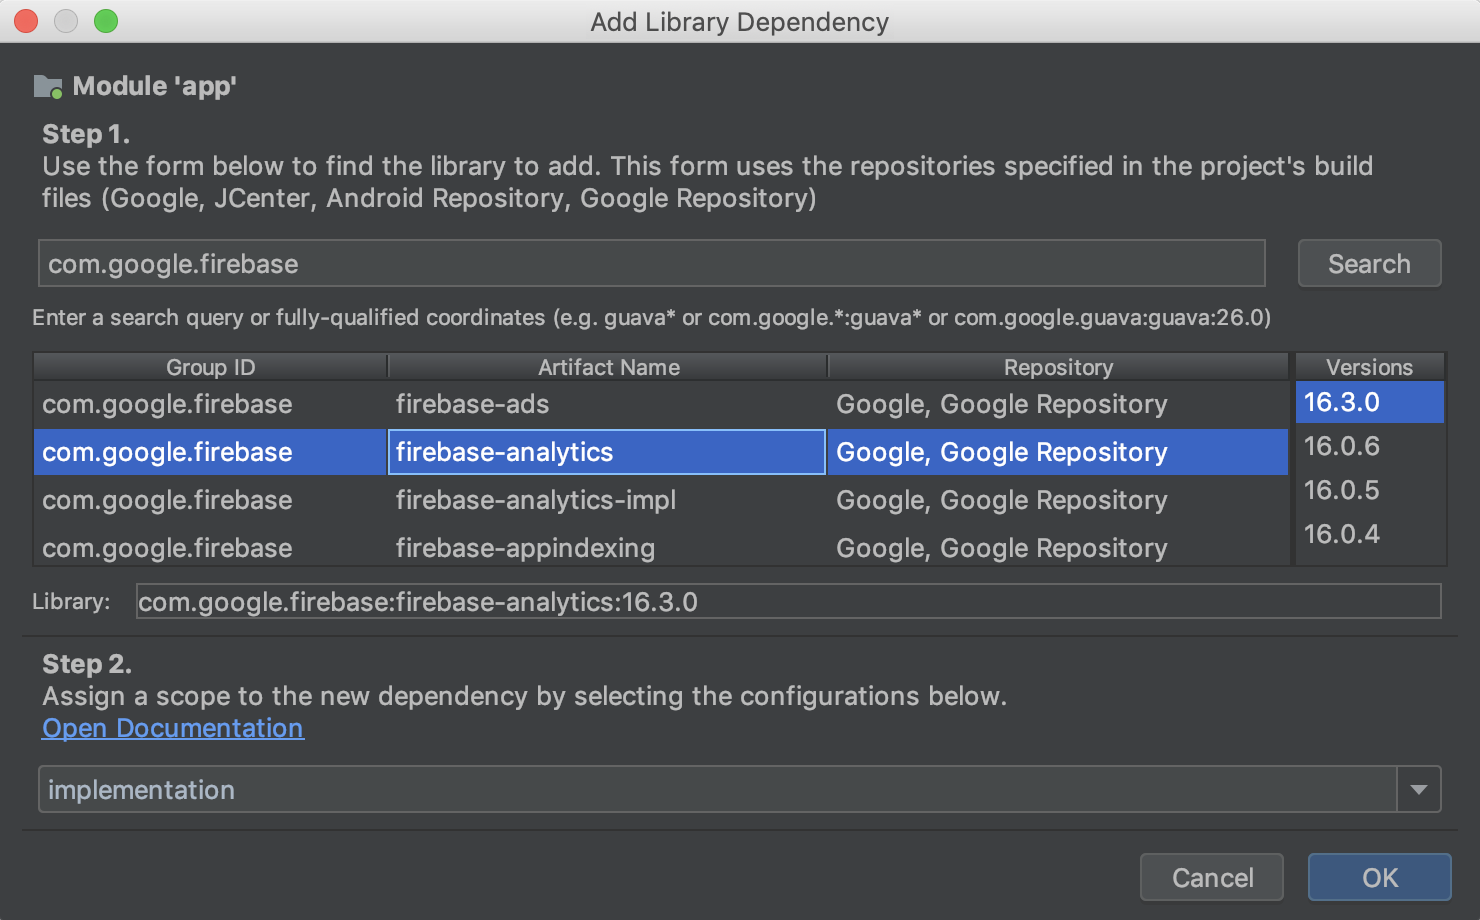
You can also quickly search for and add dependencies to your project by first selecting a module from the Dependencies section of the PSD, clicking the (+) button in the Declared Dependencies section, and selecting the type of dependency you want to add.
Depending on the type of dependency you select, you should see a dialog, similar to the one below, that helps you add the dependency to the module.
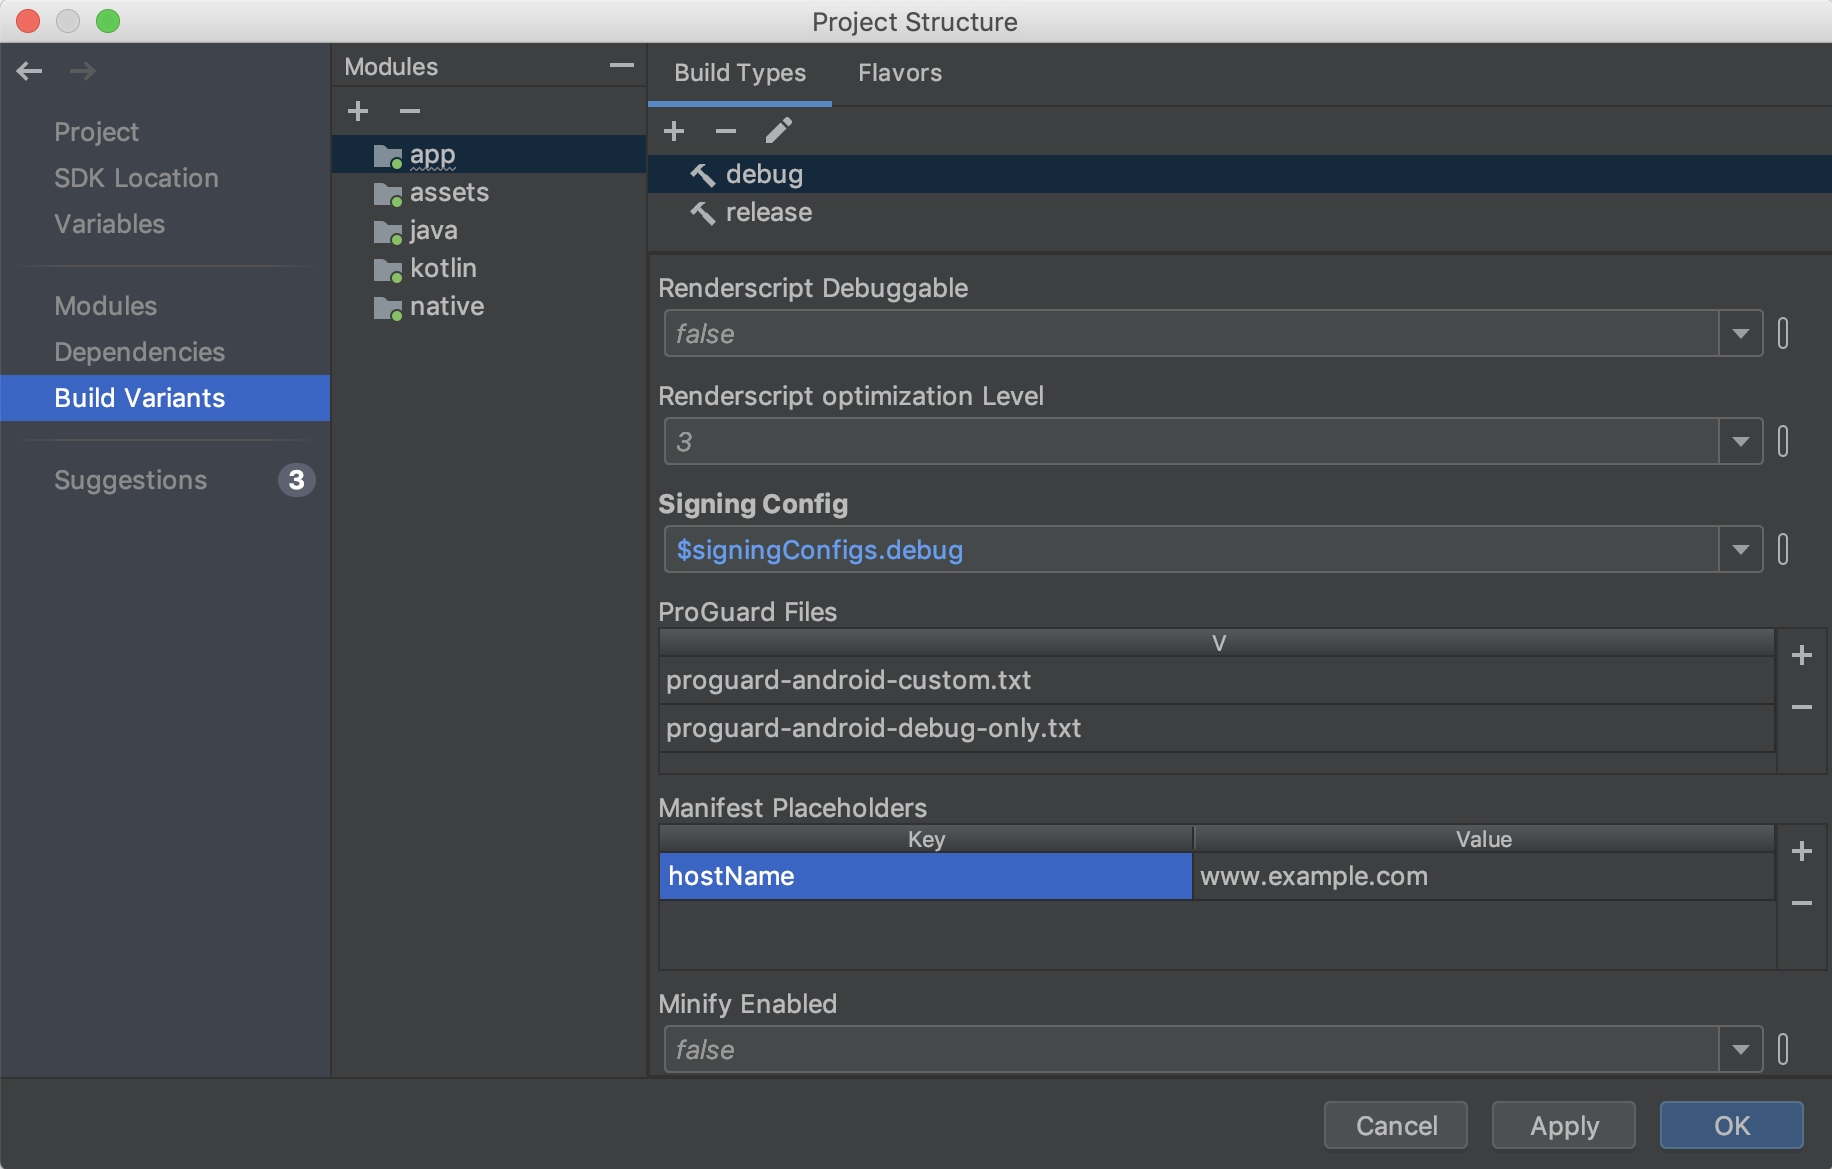
Build Variants
In this section of the PSD, create and configure build variants and product flavors for each module in your project. You can add manifest placeholders, add ProGuard files, and assign signing keys, and more.
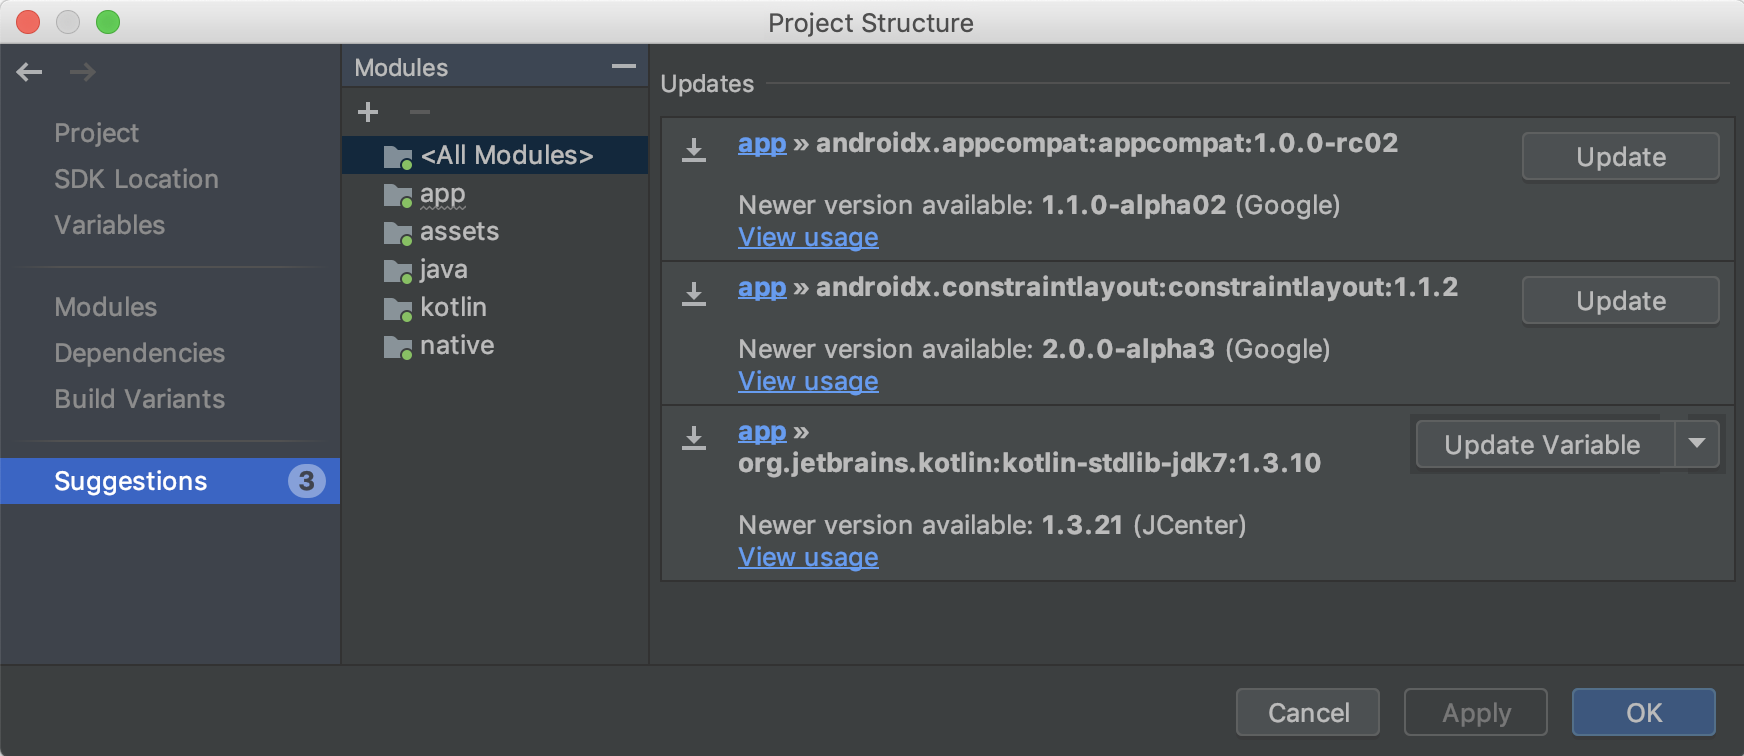
Suggestions
See suggested updates for project dependencies and build variables in the Suggestions section, as shown below.
New Resource Manager
Resource Manager is a new tool window for importing, creating, managing, and using resources in your app. You can open the tool window by selecting View > Tool Windows > Resource Manager from the menu bar. The Resource Manager allows you to do the following:
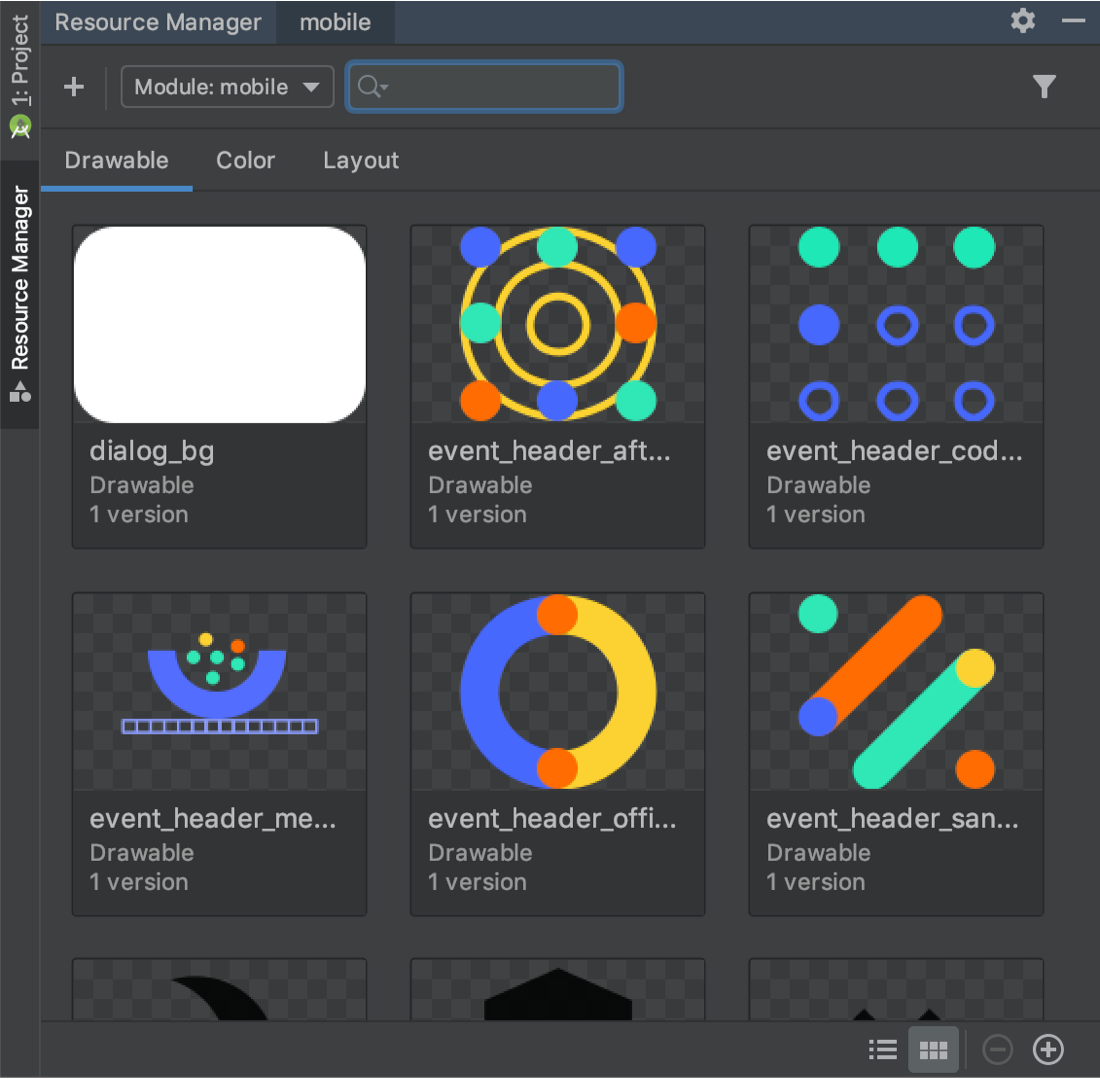
- Visualize resources: You can preview drawables, colors, and layouts to quickly find the resources you need.
- Bulk import: You can import multiple drawable assets at once by either dragging and dropping them into the Resource Manager tool window or by using the Import drawables wizard. To access the wizard, select the (+) button at the top-left corner of the tool window, and then select Import Drawables from the drop down menu.
-
Convert SVGs into
VectorDrawableobjects: You can use the Import Drawables wizard to convert your SVG images intoVectorDrawableobjects. - Drag and drop assets: From the Resource Manager tool window, you can drag and drop drawables onto both the design and XML views of the Layout Editor.
- View alternative versions: You can now view alternative versions of your resources by double-clicking a resource within the Tool window. This view shows the different versions you have created and the qualifiers that were included.
- Tile and list views: You can change the view within the tool window to visualize your resources in different arrangements.
To learn more, read the guide about how to Manage app resources.
Checking build IDs when profiling and debugging APKs
When you provide debugging symbol files for the .so shared libraries inside
your APK, Android Studio verifies that the
build ID of the provided symbol files match
the build ID of the .so libraries inside the APK.
If you build the native libraries in your APK with a build ID, Android Studio checks whether the build ID in your symbol files matches the build ID in your native libraries and rejects the symbol files if there is a mismatch. If you did not build with a build ID, then providing incorrect symbol files may cause problems with debugging.
R8 enabled by default
R8 integrates desugaring, shrinking, obfuscating, optimizing, and dexing all in one step—resulting in noticeable build performance improvements. R8 was introduced in Android Gradle plugin 3.3.0 and is now enabled by default for both app and Android library projects using plugin 3.4.0 and higher.
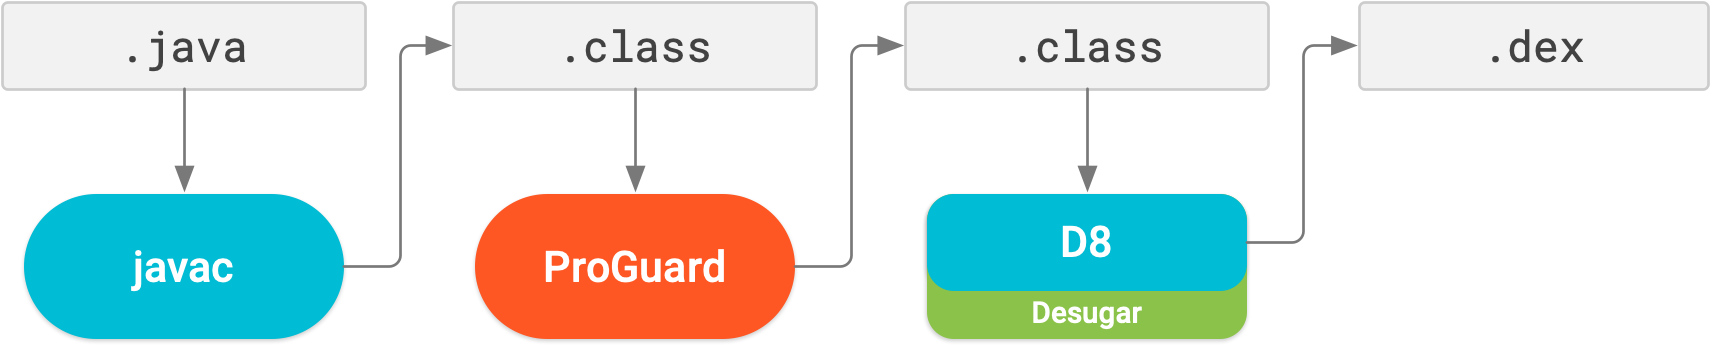
The image below provides a high-level overview of the compile process before R8 was introduced.
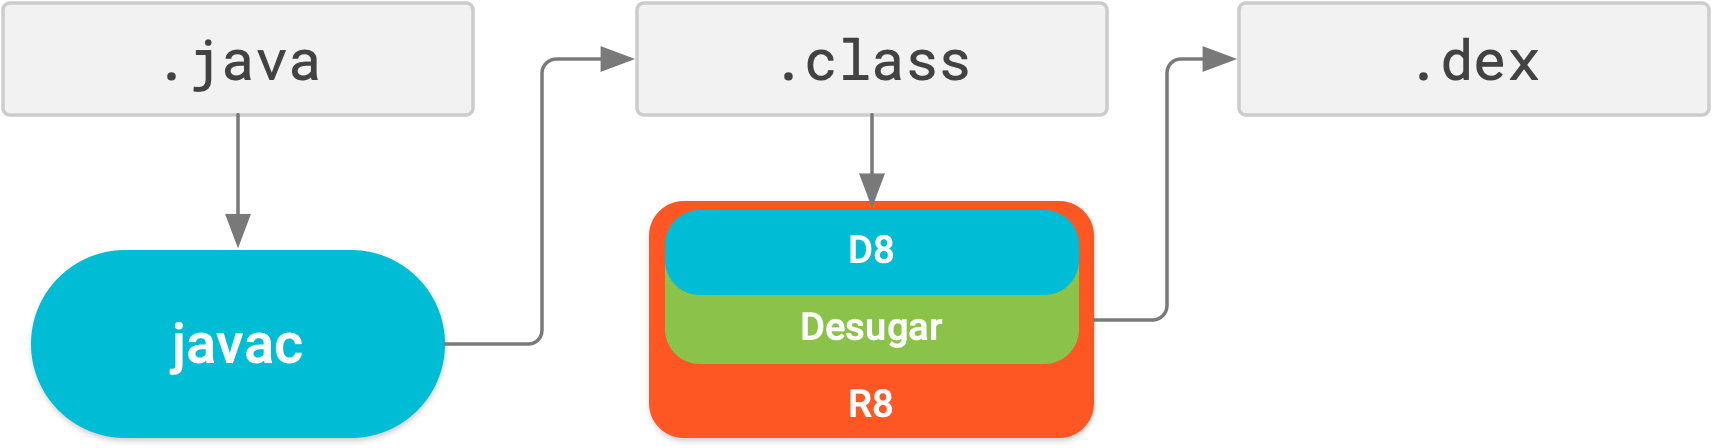
Now, with R8, desugaring, shrinking, obfuscating, optimizing, and dexing (D8) are all completed in one step, as illustrated below.
Keep in mind, R8 is designed to work with your existing ProGuard rules, so you’ll likely not need to take any actions to benefit from R8. However, because it’s a different technology to ProGuard that’s designed specifically for Android projects, shrinking and optimization may result in removing code that ProGuard may have not. So, in this unlikely situation, you might need to add additional rules to keep that code in your build output.
If you experience issues using R8, read the
R8 compatibility FAQ
to check if there’s a solution to your issue. If a solution isn’t documented,
please report a bug.
You can disable R8 by adding one of the following lines to your project’s
gradle.properties file:
    # Disables R8 for Android Library modules only.
    android.enableR8.libraries = false
    # Disables R8 for all modules.
    android.enableR8 = false
Note: For a given build type, if you set
useProguard to false in your app
module's build.gradle file, the Android Gradle plugin uses R8 to shrink your
app's code for that build type, regardless of whether you disable R8 in your
project's gradle.properties file.
Navigation Editor now supports all argument types
All argument types supported by the Navigation component are now supported in the Navigation Editor. For more information on supported types, see Pass data between destinations.
Layout Editor improvements {:#layout-editor}
The Attributes pane in the Layout Editor has been streamlined into a single page with sections you can expand to reveal attributes you can configure. The Attributes pane also includes the following updates:
- A new Declared Attributes section lists the attributes the layout file specifies and allows you to quickly add new ones.
- The Attributes pane now also features indicators next to each attribute that are solid when the attribute's value is a resource reference and empty otherwise.
- Attributes with errors or warnings are now highlighted. Red highlights indicate errors (for example, when you use invalid layout values) and orange highlights indicate warnings (for example, when you use hard-coded values).
New intention action to quickly import dependencies
If you start using certain Jetpack and Firebase classes in your code, a new
intention action suggests adding the required Gradle library dependency to your
project, if you haven’t already done so. For example, if you reference the
WorkManager class without first importing the required
android.arch.work:work-runtime dependency, an intention action lets you do so
easily in a single click, as shown below.

In particular, because Jetpack repackaged the support library into discrete packages that are easier to manage and update, this intention action helps you quickly add only the dependencies you need for the Jetpack components you want to use.