
Gemini Developer API מאפשר לכם לגשת למודלים של Gemini מבית Google, כדי שתוכלו לשלב באפליקציות שלכם ל-Android תכונות מתקדמות של AI גנרטיבי, כולל צ'אט שיחתי, יצירת תמונות (עם Nano Banana) ויצירת טקסט על סמך קלט של טקסט, תמונות, אודיו וסרטונים.
כדי לגשת למודלים Gemini Pro ו-Flash, אפשר להשתמש ב-Gemini Developer API עם Firebase AI Logic. אפשר להתחיל להשתמש בו בלי כרטיס אשראי, והוא כולל תוכנית חינמית נדיבה. אחרי שתאמתו את השילוב עם מספר קטן של משתמשים, תוכלו להרחיב את השימוש בו על ידי מעבר למינוי בתשלום.

תחילת העבודה
לפני שמתקשרים עם Gemini API ישירות מהאפליקציה, צריך לבצע כמה פעולות, כולל להכיר את ההנחיות ולהגדיר את Firebase ואת האפליקציה לשימוש ב-SDK.
התנסות בהנחיות
ניסויים עם הנחיות יכולים לעזור לכם למצוא את הניסוח, התוכן והפורמט הכי טובים לאפליקציית Android שלכם. Google AI Studio הוא סביבת פיתוח משולבת (IDE) שבה תוכלו ליצור אב טיפוס ולעצב הנחיות לתרחישי השימוש באפליקציה שלכם.
כדי ליצור הנחיות יעילות לתרחיש השימוש שלכם, צריך לבצע ניסויים רבים, וזהו חלק חשוב בתהליך. מידע נוסף על הנחיות זמין במסמכי Firebase.
אחרי שאתם מרוצים מההנחיה, לוחצים על הלחצן <> כדי לקבל קטעי קוד שאפשר להוסיף לקוד.
הגדרת פרויקט Firebase וקישור האפליקציה ל-Firebase
כשמוכנים לקרוא ל-API מהאפליקציה, פועלים לפי ההוראות שבשלב 1 במדריך לתחילת העבודה עם Firebase AI Logic כדי להגדיר את Firebase ואת ה-SDK באפליקציה.
הוספת התלות ב-Gradle
מוסיפים את יחסי התלות הבאים של Gradle למודול האפליקציה:
Kotlin
dependencies {
  // ... other androidx dependencies

  // Import the BoM for the Firebase platform
  implementation(platform("com.google.firebase:firebase-bom:34.15.0"))

  // Add the dependency for the Firebase AI Logic library When using the BoM,
  // you don't specify versions in Firebase library dependencies
  implementation("com.google.firebase:firebase-ai")
}
Java
dependencies {
  // Import the BoM for the Firebase platform
  implementation(platform("com.google.firebase:34.15.0"))

  // Add the dependency for the Firebase AI Logic library When using the BoM,
  // you don't specify versions in Firebase library dependencies
  implementation("com.google.firebase:firebase-ai")

  // Required for one-shot operations (to use `ListenableFuture` from Guava
  // Android)
  implementation("com.google.guava:guava:31.0.1-android")

  // Required for streaming operations (to use `Publisher` from Reactive
  // Streams)
  implementation("org.reactivestreams:reactive-streams:1.0.4")
}
הפעלת המודל הגנרטיבי
כדי להתחיל, יוצרים מופע של GenerativeModel ומציינים את שם המודל:
Kotlin
// Start by instantiating a GenerativeModel and specifying the model name: val model = Firebase.ai(backend = GenerativeBackend.googleAI()) .generativeModel("gemini-2.5-flash")
Java
GenerativeModel firebaseAI = FirebaseAI.getInstance(GenerativeBackend.googleAI()) .generativeModel("gemini-2.5-flash"); GenerativeModelFutures model = GenerativeModelFutures.from(firebaseAI);
מידע נוסף על המודלים הזמינים לשימוש עם Gemini Developer API מידע נוסף על הגדרת פרמטרים של מודל
אינטראקציה עם Gemini Developer API מהאפליקציה
אחרי שמגדירים את Firebase ואת האפליקציה לשימוש ב-SDK, אפשר להתחיל להשתמש ב-Gemini Developer API מתוך האפליקציה.
יצירת טקסט
כדי ליצור תשובה טקסטואלית, מתקשרים אל generateContent() עם ההנחיה.
Kotlin
scope.launch { val response = model.generateContent("Write a story about a magic backpack.") }
Java
Content prompt = new Content.Builder() .addText("Write a story about a magic backpack.") .build(); ListenableFuture<GenerateContentResponse> response = model.generateContent(prompt); Futures.addCallback(response, new FutureCallback<GenerateContentResponse>() { @Override public void onSuccess(GenerateContentResponse result) { String resultText = result.getText(); } @Override public void onFailure(Throwable t) { t.printStackTrace(); } }, executor);
יצירת טקסט מתמונות וממדיה אחרת
אפשר גם ליצור טקסט מהנחיה שכוללת טקסט בתוספת תמונות או מדיה אחרת. כשמתקשרים אל generateContent(), אפשר להעביר את המדיה כנתונים מוטבעים.
לדוגמה, כדי להשתמש במפת סיביות, משתמשים בסוג התוכן image:
Kotlin
scope.launch { val response = model.generateContent( content { image(bitmap) text("what is the object in the picture?") } ) }
Java
Content content = new Content.Builder() .addImage(bitmap) .addText("what is the object in the picture?") .build(); ListenableFuture<GenerateContentResponse> response = model.generateContent(content); Futures.addCallback(response, new FutureCallback<GenerateContentResponse>() { @Override public void onSuccess(GenerateContentResponse result) { String resultText = result.getText(); } @Override public void onFailure(Throwable t) { t.printStackTrace(); } }, executor);
כדי להעביר קובץ אודיו, משתמשים בסוג התוכן inlineData:
Kotlin
scope.launch { val contentResolver = applicationContext.contentResolver contentResolver.openInputStream(audioUri).use { stream -> stream?.let { val bytes = it.readBytes() val prompt = content { inlineData(bytes, "audio/mpeg") // Specify the appropriate audio MIME type text("Transcribe this audio recording.") } val response = model.generateContent(prompt) } } }
Java
ContentResolver resolver = applicationContext.getContentResolver(); try (InputStream stream = resolver.openInputStream(audioUri)) { File audioFile = new File(new URI(audioUri.toString())); int audioSize = (int) audioFile.length(); byte[] audioBytes = new byte[audioSize]; if (stream != null) { stream.read(audioBytes, 0, audioBytes.length); stream.close(); // Provide a prompt that includes audio specified earlier and text Content prompt = new Content.Builder() .addInlineData(audioBytes, "audio/mpeg") // Specify the appropriate audio MIME type .addText("Transcribe what's said in this audio recording.") .build(); // To generate text output, call `generateContent` with the prompt ListenableFuture<GenerateContentResponse> response = model.generateContent(prompt); Futures.addCallback(response, new FutureCallback<GenerateContentResponse>() { @Override public void onSuccess(GenerateContentResponse result) { String text = result.getText(); Log.d(TAG, (text == null) ? "" : text); } @Override public void onFailure(Throwable t) { Log.e(TAG, "Failed to generate a response", t); } }, executor); } else { Log.e(TAG, "Error getting input stream for file."); // Handle the error appropriately } } catch (IOException e) { Log.e(TAG, "Failed to read the audio file", e); } catch (URISyntaxException e) { Log.e(TAG, "Invalid audio file", e); }
כדי לספק קובץ וידאו, ממשיכים להשתמש בסוג התוכן inlineData:
Kotlin
scope.launch { val contentResolver = applicationContext.contentResolver contentResolver.openInputStream(videoUri).use { stream -> stream?.let { val bytes = it.readBytes() val prompt = content { inlineData(bytes, "video/mp4") // Specify the appropriate video MIME type text("Describe the content of this video") } val response = model.generateContent(prompt) } } }
Java
ContentResolver resolver = applicationContext.getContentResolver(); try (InputStream stream = resolver.openInputStream(videoUri)) { File videoFile = new File(new URI(videoUri.toString())); int videoSize = (int) videoFile.length(); byte[] videoBytes = new byte[videoSize]; if (stream != null) { stream.read(videoBytes, 0, videoBytes.length); stream.close(); // Provide a prompt that includes video specified earlier and text Content prompt = new Content.Builder() .addInlineData(videoBytes, "video/mp4") .addText("Describe the content of this video") .build(); // To generate text output, call generateContent with the prompt ListenableFuture<GenerateContentResponse> response = model.generateContent(prompt); Futures.addCallback(response, new FutureCallback<GenerateContentResponse>() { @Override public void onSuccess(GenerateContentResponse result) { String resultText = result.getText(); System.out.println(resultText); } @Override public void onFailure(Throwable t) { t.printStackTrace(); } }, executor); } } catch (IOException e) { e.printStackTrace(); } catch (URISyntaxException e) { e.printStackTrace(); }
באופן דומה, אפשר גם להעביר מסמכי PDF (application/pdf) וטקסט פשוט (text/plain) על ידי העברת סוג ה-MIME המתאים שלהם כפרמטר.
שיחה עם זיכרון
הוא יכול גם לתמוך בשיחות רב-שלביות. מפעילים צ'אט באמצעות הפונקציה startChat(). אפשר גם לספק למודל היסטוריית הודעות. לאחר מכן קוראים לפונקציה sendMessage() כדי לשלוח הודעות בצ'אט.
Kotlin
val chat = model.startChat( history = listOf( content(role = "user") { text("Hello, I have 2 dogs in my house.") }, content(role = "model") { text("Great to meet you. What would you like to know?") } ) ) scope.launch { val response = chat.sendMessage("How many paws are in my house?") }
Java
Content.Builder userContentBuilder = new Content.Builder(); userContentBuilder.setRole("user"); userContentBuilder.addText("Hello, I have 2 dogs in my house."); Content userContent = userContentBuilder.build(); Content.Builder modelContentBuilder = new Content.Builder(); modelContentBuilder.setRole("model"); modelContentBuilder.addText("Great to meet you. What would you like to know?"); Content modelContent = modelContentBuilder.build(); List<Content> history = Arrays.asList(userContent, modelContent); // Initialize the chat ChatFutures chat = model.startChat(history); // Create a new user message Content.Builder messageBuilder = new Content.Builder(); messageBuilder.setRole("user"); messageBuilder.addText("How many paws are in my house?"); Content message = messageBuilder.build(); // Send the message ListenableFuture<GenerateContentResponse> response = chat.sendMessage(message); Futures.addCallback(response, new FutureCallback<GenerateContentResponse>() { @Override public void onSuccess(GenerateContentResponse result) { String resultText = result.getText(); System.out.println(resultText); } @Override public void onFailure(Throwable t) { t.printStackTrace(); } }, executor);
איך ליצור תמונות ב-Android באמצעות Nano Banana
מודל התמונות Gemini 2.5 Flash (שנקרא גם Nano Banana) יכול ליצור ולערוך תמונות על סמך ידע על העולם ויכולת חשיבה רציונלית. הוא יוצר תמונות שרלוונטיות להקשר, ומשלב בצורה חלקה בין טקסט לתמונות. הוא יכול גם ליצור תמונות מדויקות עם רצפים ארוכים של טקסט, והוא תומך בעריכת תמונות בממשק שיחה תוך שמירה על ההקשר.
במדריך הזה נסביר איך להשתמש במודל Gemini 2.5 Flash Image (Nano Banana) באמצעות Firebase AI Logic SDK ל-Android. לפרטים נוספים על יצירת תמונות באמצעות Gemini, אפשר לעיין בתיעוד בנושא יצירת תמונות באמצעות Gemini ב-Firebase.
הפעלת המודל הגנרטיבי
מפעילים את GenerativeModel ומציינים את שם המודל
gemini-2.5-flash-image-preview. מוודאים שהגדרתם את responseModalities כך שיכלול גם את TEXT וגם את IMAGE.
Kotlin
val model = Firebase.ai(backend = GenerativeBackend.googleAI()).generativeModel( modelName = "gemini-2.5-flash-image-preview", // Configure the model to respond with text and images (required) generationConfig = generationConfig { responseModalities = listOf( ResponseModality.TEXT, ResponseModality.IMAGE ) } )
Java
GenerativeModel ai = FirebaseAI.getInstance(GenerativeBackend.googleAI()).generativeModel( "gemini-2.5-flash-image-preview", // Configure the model to respond with text and images (required) new GenerationConfig.Builder() .setResponseModalities(Arrays.asList(ResponseModality.TEXT, ResponseModality.IMAGE)) .build() ); GenerativeModelFutures model = GenerativeModelFutures.from(ai);
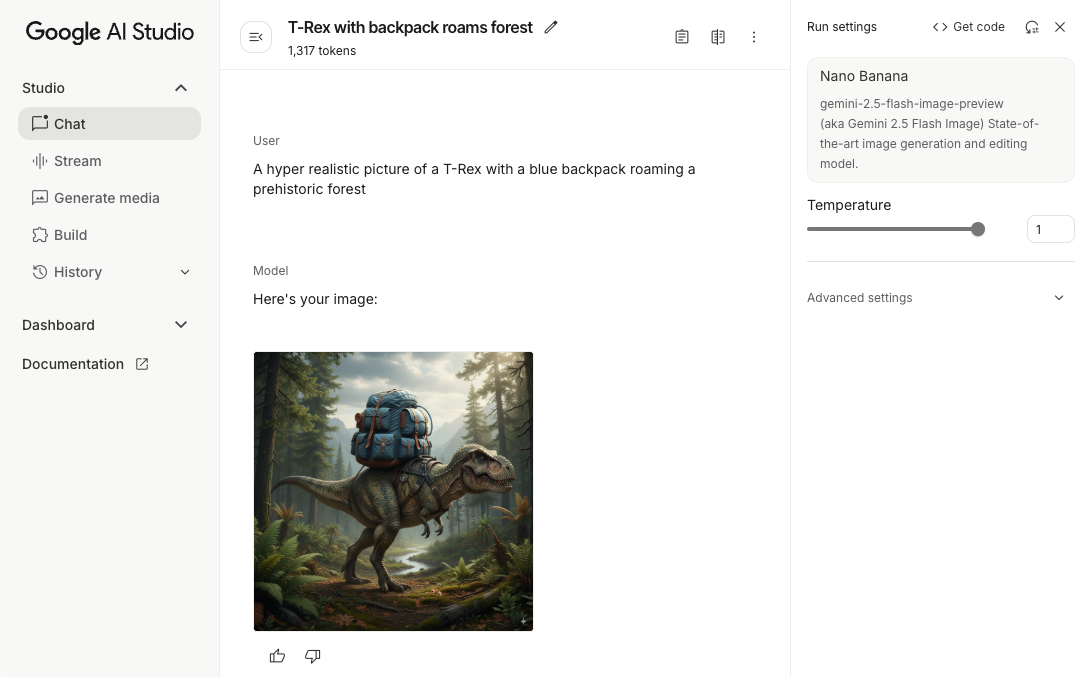
יצירת תמונות (קלט טקסט בלבד)
אתם יכולים להנחות מודל Gemini ליצור תמונות באמצעות הנחיה שמכילה טקסט בלבד:
Kotlin
scope.launch { // Provide a text prompt instructing the model to generate an image val prompt = "A hyper realistic picture of a t-rex with a blue bag pack roaming a pre-historic forest." // To generate image output, call `generateContent` with the text input val generatedImageAsBitmap: Bitmap? = model.generateContent(prompt) .candidates.first().content.parts.filterIsInstance<ImagePart>() .firstOrNull()?.image }
Java
// Provide a text prompt instructing the model to generate an image Content prompt = new Content.Builder() .addText("Generate an image of the Eiffel Tower with fireworks in the background.") .build(); // To generate an image, call `generateContent` with the text input ListenableFuture<GenerateContentResponse> response = model.generateContent(prompt); Futures.addCallback(response, new FutureCallback<GenerateContentResponse>() { @Override public void onSuccess(GenerateContentResponse result) { // iterate over all the parts in the first candidate in the result object for (Part part : result.getCandidates().get(0).getContent().getParts()) { if (part instanceof ImagePart) { ImagePart imagePart = (ImagePart) part; // The returned image as a bitmap Bitmap generatedImageAsBitmap = imagePart.getImage(); break; } } } @Override public void onFailure(Throwable t) { t.printStackTrace(); } }, executor);
עריכת תמונות (הזנת טקסט ותמונות)
אתם יכולים לבקש ממודל Gemini לערוך תמונות קיימות על ידי צירוף טקסט ותמונה אחת או יותר להנחיה:
Kotlin
scope.launch { // Provide a text prompt instructing the model to edit the image val prompt = content { image(bitmap) text("Edit this image to make it look like a cartoon") } // To edit the image, call `generateContent` with the prompt (image and text input) val generatedImageAsBitmap: Bitmap? = model.generateContent(prompt) .candidates.first().content.parts.filterIsInstance<ImagePart>().firstOrNull()?.image // Handle the generated text and image }
Java
// Provide an image for the model to edit Bitmap bitmap = BitmapFactory.decodeResource(resources, R.drawable.scones); // Provide a text prompt instructing the model to edit the image Content promptcontent = new Content.Builder() .addImage(bitmap) .addText("Edit this image to make it look like a cartoon") .build(); // To edit the image, call `generateContent` with the prompt (image and text input) ListenableFuture<GenerateContentResponse> response = model.generateContent(promptcontent); Futures.addCallback(response, new FutureCallback<GenerateContentResponse>() { @Override public void onSuccess(GenerateContentResponse result) { // iterate over all the parts in the first candidate in the result object for (Part part : result.getCandidates().get(0).getContent().getParts()) { if (part instanceof ImagePart) { ImagePart imagePart = (ImagePart) part; Bitmap generatedImageAsBitmap = imagePart.getImage(); break; } } } @Override public void onFailure(Throwable t) { t.printStackTrace(); } }, executor);
איטרציה ועריכה של תמונות באמצעות צ'אט מרובה-תורות
כדי לערוך תמונות בגישה שיחתית, אפשר להשתמש בשיחה עם זיכרון. כך אפשר לשלוח בקשות המשך כדי לשפר את העריכות בלי לשלוח מחדש את התמונה המקורית.
קודם כל, מתחילים צ'אט עם startChat(), ואפשר גם לספק היסטוריית הודעות. אחרי זה, משתמשים בלחצן sendMessage() להודעות הבאות:
Kotlin
scope.launch { // Create the initial prompt instructing the model to edit the image val prompt = content { image(bitmap) text("Edit this image to make it look like a cartoon") } // Initialize the chat val chat = model.startChat() // To generate an initial response, send a user message with the image and text prompt var response = chat.sendMessage(prompt) // Inspect the returned image var generatedImageAsBitmap: Bitmap? = response .candidates.first().content.parts.filterIsInstance<ImagePart>().firstOrNull()?.image // Follow up requests do not need to specify the image again response = chat.sendMessage("But make it old-school line drawing style") generatedImageAsBitmap = response .candidates.first().content.parts.filterIsInstance<ImagePart>().firstOrNull()?.image }
Java
// Provide an image for the model to edit Bitmap bitmap = BitmapFactory.decodeResource(resources, R.drawable.scones); // Initialize the chat ChatFutures chat = model.startChat(); // Create the initial prompt instructing the model to edit the image Content prompt = new Content.Builder() .setRole("user") .addImage(bitmap) .addText("Edit this image to make it look like a cartoon") .build(); // To generate an initial response, send a user message with the image and text prompt ListenableFuture<GenerateContentResponse> response = chat.sendMessage(prompt); // Extract the image from the initial response ListenableFuture<Bitmap> initialRequest = Futures.transform(response, result -> { for (Part part : result.getCandidates().get(0).getContent().getParts()) { if (part instanceof ImagePart) { ImagePart imagePart = (ImagePart) part; return imagePart.getImage(); } } return null; }, executor); // Follow up requests do not need to specify the image again ListenableFuture<GenerateContentResponse> modelResponseFuture = Futures.transformAsync( initialRequest, generatedImage -> { Content followUpPrompt = new Content.Builder() .addText("But make it old-school line drawing style") .build(); return chat.sendMessage(followUpPrompt); }, executor); // Add a final callback to check the reworked image Futures.addCallback(modelResponseFuture, new FutureCallback<GenerateContentResponse>() { @Override public void onSuccess(GenerateContentResponse result) { for (Part part : result.getCandidates().get(0).getContent().getParts()) { if (part instanceof ImagePart) { ImagePart imagePart = (ImagePart) part; Bitmap generatedImageAsBitmap = imagePart.getImage(); break; } } } @Override public void onFailure(Throwable t) { t.printStackTrace(); } }, executor);
הערות ומגבלות
חשוב לשים לב לשיקולים ולמגבלות הבאים:
- פורמט הפלט: התמונות נוצרות כקובצי PNG עם מימד מקסימלי של 1,024 פיקסלים.
- סוגי קלט: המודל לא תומך בקלט אודיו או וידאו ליצירת תמונות.
- תמיכה בשפות: כדי לקבל את הביצועים הכי טובים, מומלץ להשתמש בשפות הבאות:
אנגלית (
en), ספרדית מקסיקנית (es-mx), יפנית (ja-jp), סינית פשוטה (zh-cn) והינדי (hi-in). - בעיות ביצירה:
- יצירת תמונות לא תמיד מופעלת, ולפעמים התוצאה היא טקסט בלבד. נסו לבקש במפורש תמונות (למשל, "צור תמונה", "תציג תמונות במהלך השיחה", "תעדכן את התמונה").
- יכול להיות שהמודל יפסיק ליצור באמצע התהליך. אפשר לנסות שוב או להזין הנחיה אחרת.
- יכול להיות שהמודל ייצור טקסט כתמונה. כדאי לבקש במפורש פלט של טקסט (לדוגמה, "צור טקסט נרטיבי עם איורים").
פרטים נוספים מופיעים במאמרי העזרה של Firebase.
השלבים הבאים
אחרי שמגדירים את האפליקציה, כדאי לבצע את השלבים הבאים:
- מעיינים באפליקציה לדוגמה של Firebase ל-Android ובקטלוג הדוגמאות ל-AI ב-Android ב-GitHub.
- הכנת האפליקציה להפקה, כולל הגדרה של Firebase App Check כדי להגן על Gemini API מפני שימוש לרעה על ידי לקוחות לא מורשים.
- מידע נוסף על Firebase AI Logic זמין במסמכי Firebase.