This page lists the new features introduced in Android Studio preview releases. The preview builds provide early access to the latest features and improvements in Android Studio. You can download these preview versions. If you encounter any problems using a preview version of Android Studio, let us know. Your bug reports help to make Android Studio better.
Canary releases contain leading edge features under active development, and are lightly tested. While you can use Canary builds for development, be aware that features might be added or changed. Release Candidates (RC) are the next version of Android Studio, and are almost ready for stable release. The feature set for the next version has been stabilized. See Android Studio release names to understand Android Studio version naming.
For the latest news on Android Studio preview releases, including a list of notable fixes in each preview release, see the Release Updates in the Android Studio blog.
Current versions of Android Studio
The following table lists the current versions of Android Studio and their respective channels.
| Version | Channel |
|---|---|
| Android Studio Quail 1 | Stable |
| Android Gradle plugin 9.2.0 | Stable |
| Android Studio Quail 2 | RC |
Compatibility with Android Gradle plugin previews
Each preview version of Android Studio is published alongside a corresponding version of the Android Gradle plugin (AGP). Preview versions of Studio should work with any compatible stable version of AGP. However, if you're using a preview version of AGP, you must use the corresponding preview version of Studio (for example, Android Studio Chipmunk Canary 7 with AGP 7.2.0-alpha07). Attempts to use divergent versions (for example, Android Studio Chipmunk Beta 1 with AGP 7.2.0-alpha07) will cause a Sync failure, which results in a prompt to update to the corresponding version of AGP.
For a detailed log of Android Gradle plugin API deprecations and removals, see the Android Gradle plugin API updates.
Studio Labs
Studio Labs lets you try out the latest AI experimental features in a stable version of Android Studio, so you can more quickly integrate our AI assistance offerings in your development workflow. For more information, see Studio Labs.
The following are features currently available in Studio Labs.
| Feature | Description | Docs |
|---|---|---|
| Journeys for Android Studio | Use natural language to describe steps and assertions for end-to-end tests. | Journeys for Android Studio |
Android Studio Quail 2
The following are new features in Android Studio Quail 2.
To see what's been fixed in this version of Android Studio, see the closed issues.
More agent skills
Android Studio supports agent skills, which are modular instruction sets that ground the agent in specialized workflows and domain-specific knowledge. By adding skills to your project, you can teach the agent to follow specific best practices, architecture patterns, and workflows. This enables more accurate, context-aware code generation and automated skill activation when you perform a relevant task.
You can create your own custom skills or use Android CLI to install our official Android skills. Android skills cover common workflows, such as XML to Compose migration, edge-to-edge support, Navigation 3, and more.

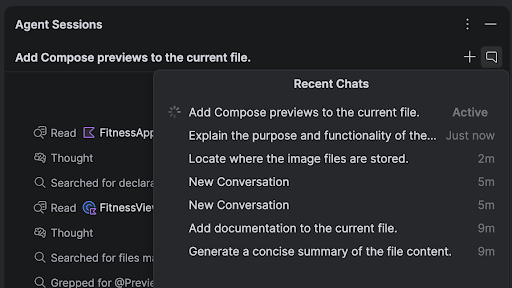
Parallel conversations
You can run multiple conversations in Agent Mode in parallel, enabling you to multitask more effectively inside the IDE. For example, you can kick off a long-running task like generating tests in one conversation, use a second conversation to plan a new feature, and use a third conversation to draft documentation—all at the same time.
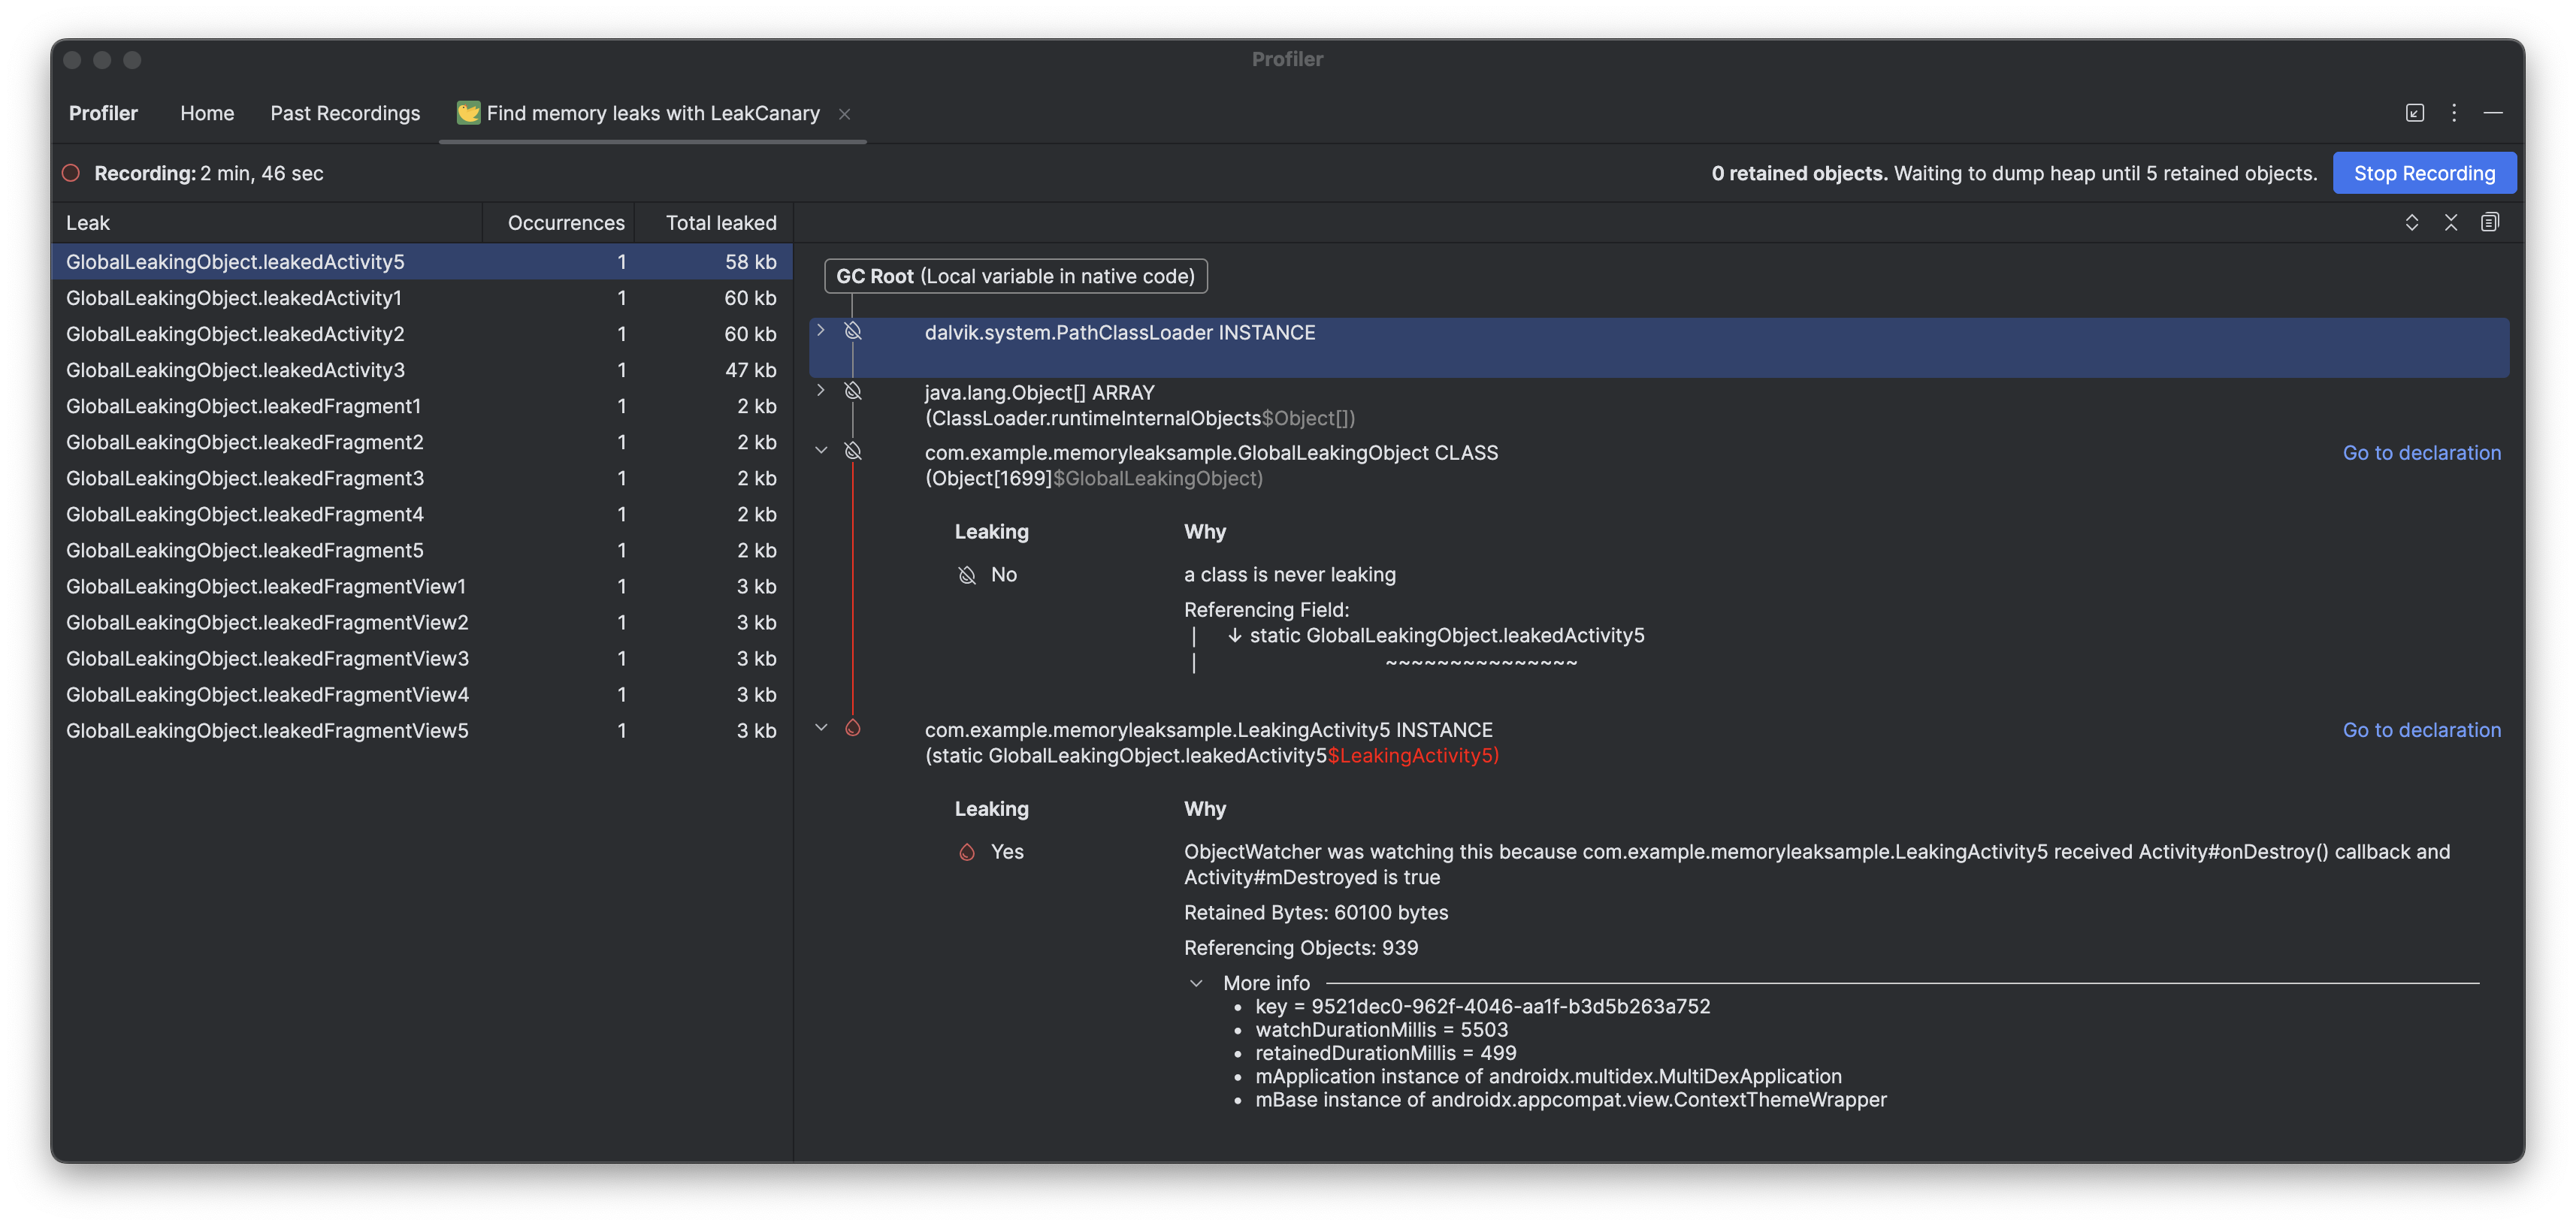
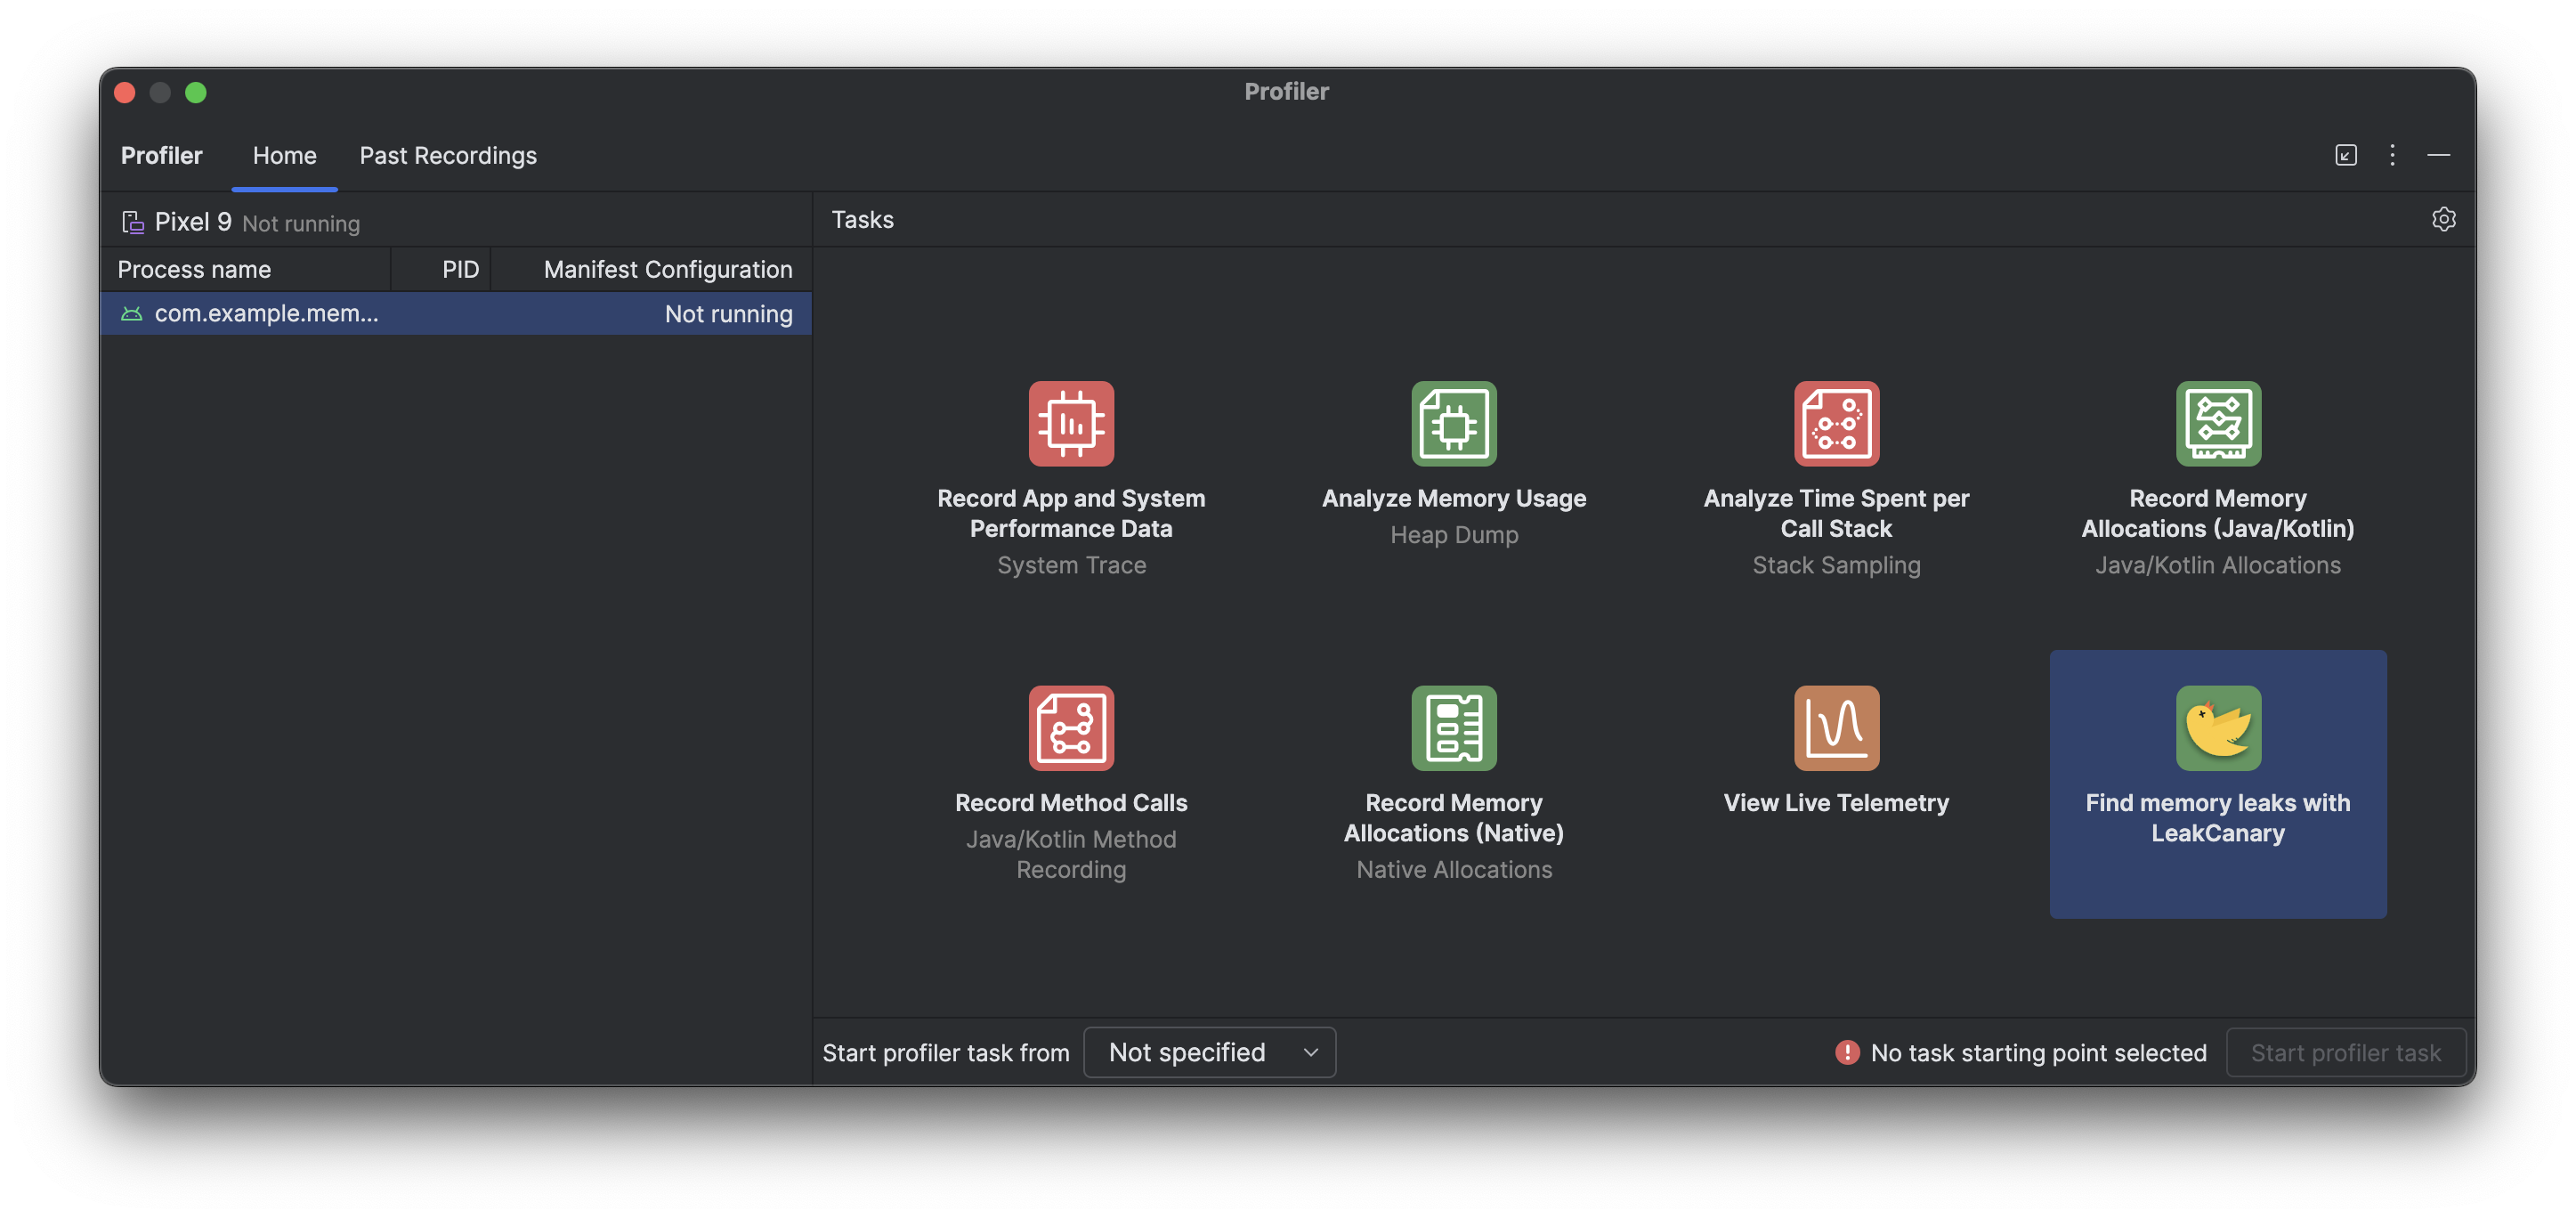
LeakCanary in Android Studio Profiler
Android Studio Panda includes a LeakCanary integration directly in the Android Studio Profiler as a dedicated task.
The LeakCanary profiler task in Android Studio actively moves the memory leak analysis from your device to your development machine, resulting in a significant performance boost during the leak analysis phase as compared to on-device leak analysis.
Additionally, the leak analysis is now contextualized within the IDE and fully integrated with your source code, providing features like Jump to Source and other helpful code connections that drastically reduce the friction and time required to investigate and fix memory leaks. You can also copy the entire leak analysis for further processing with Gemini. This can dramatically increase your productivity and improve your workflow during the development phase.