
The Android XR Interaction Framework (AXRIF) provides familiar, high-level, opinionated interactions for OpenXR applications on Android XR. AXRIF bridges the gap between system-level interactions and in-app interactions, offering an intuitive and cohesive way to handle user input.
Follow this guide to set up and get started using AXRIF with Unity.
Prerequisites
Before beginning, ensure your development environment meets the following requirements:
- Unity version: Unity 6 version 6000.3.12f1 or higher.
- Project setup: Complete all steps in the Unity project setup guide.
Set up and configure Unity
Before you can try out the sample scene, you need to set up and configure Unity for AXRIF. Follow the steps in the following sections to complete this process.
Import the AXRIF package
First, install the AXRIF package and its dependencies:
- Navigate to Window > Package Manager.
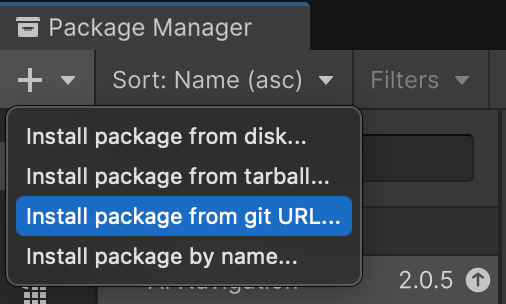
- Open the add menu in the Package Manager toolbar.
- In the options for adding packages, click + (plus).
From the drop-down menu, select Install package from git URL.
Enter the following URL:
https://github.com/android-xr/android-xr-interaction-framework-unity-package.gitClick Install.

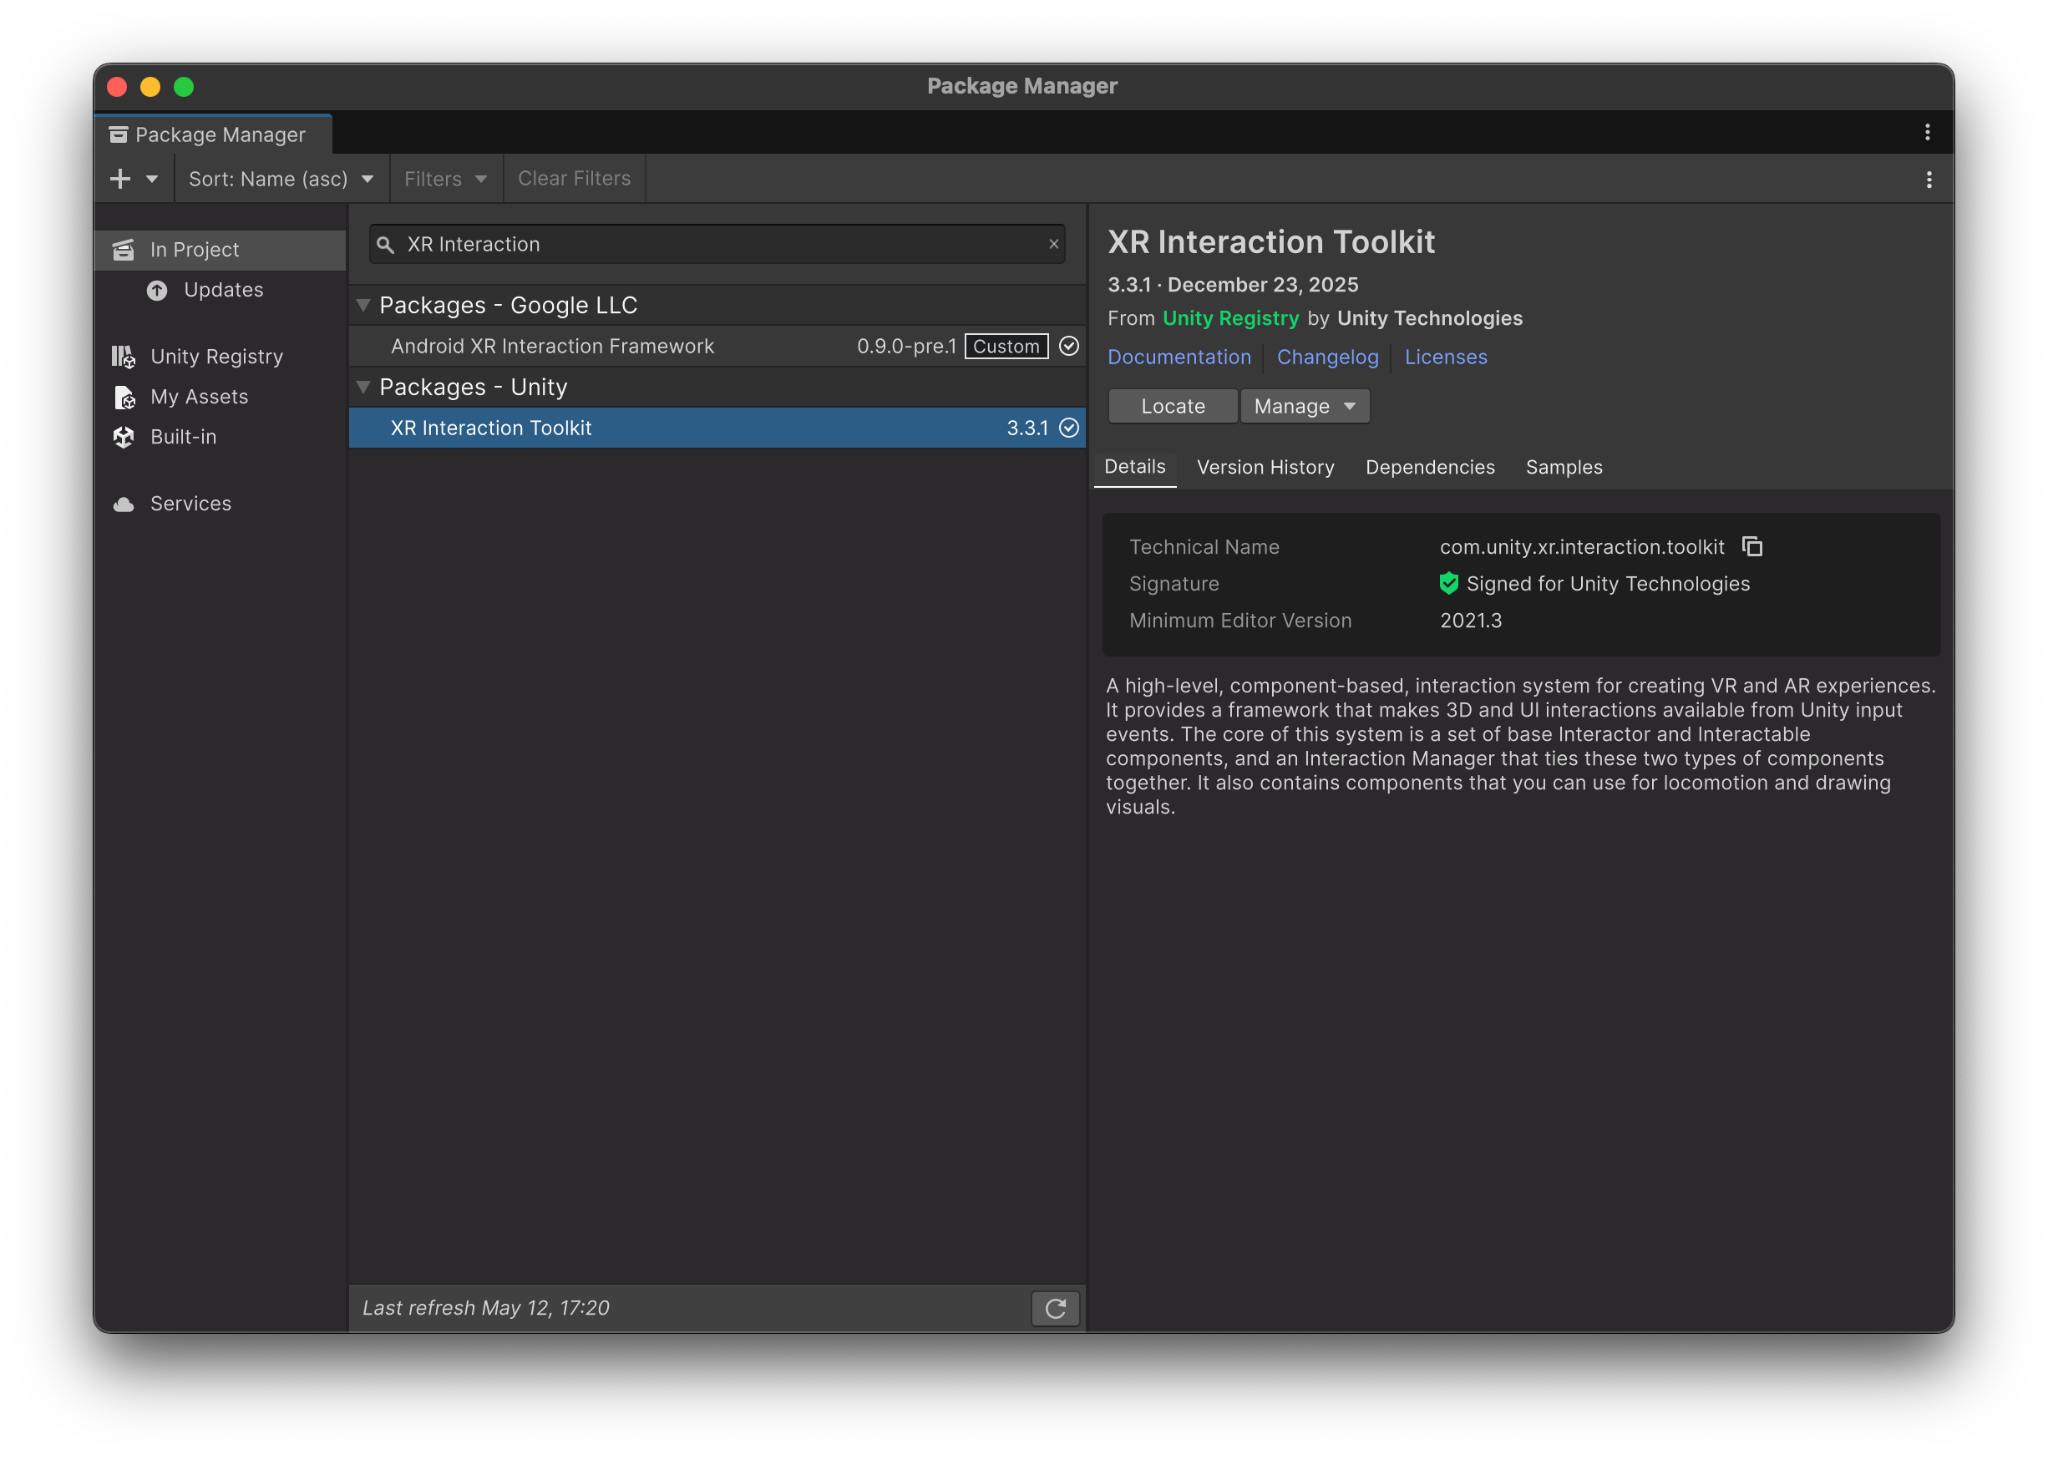
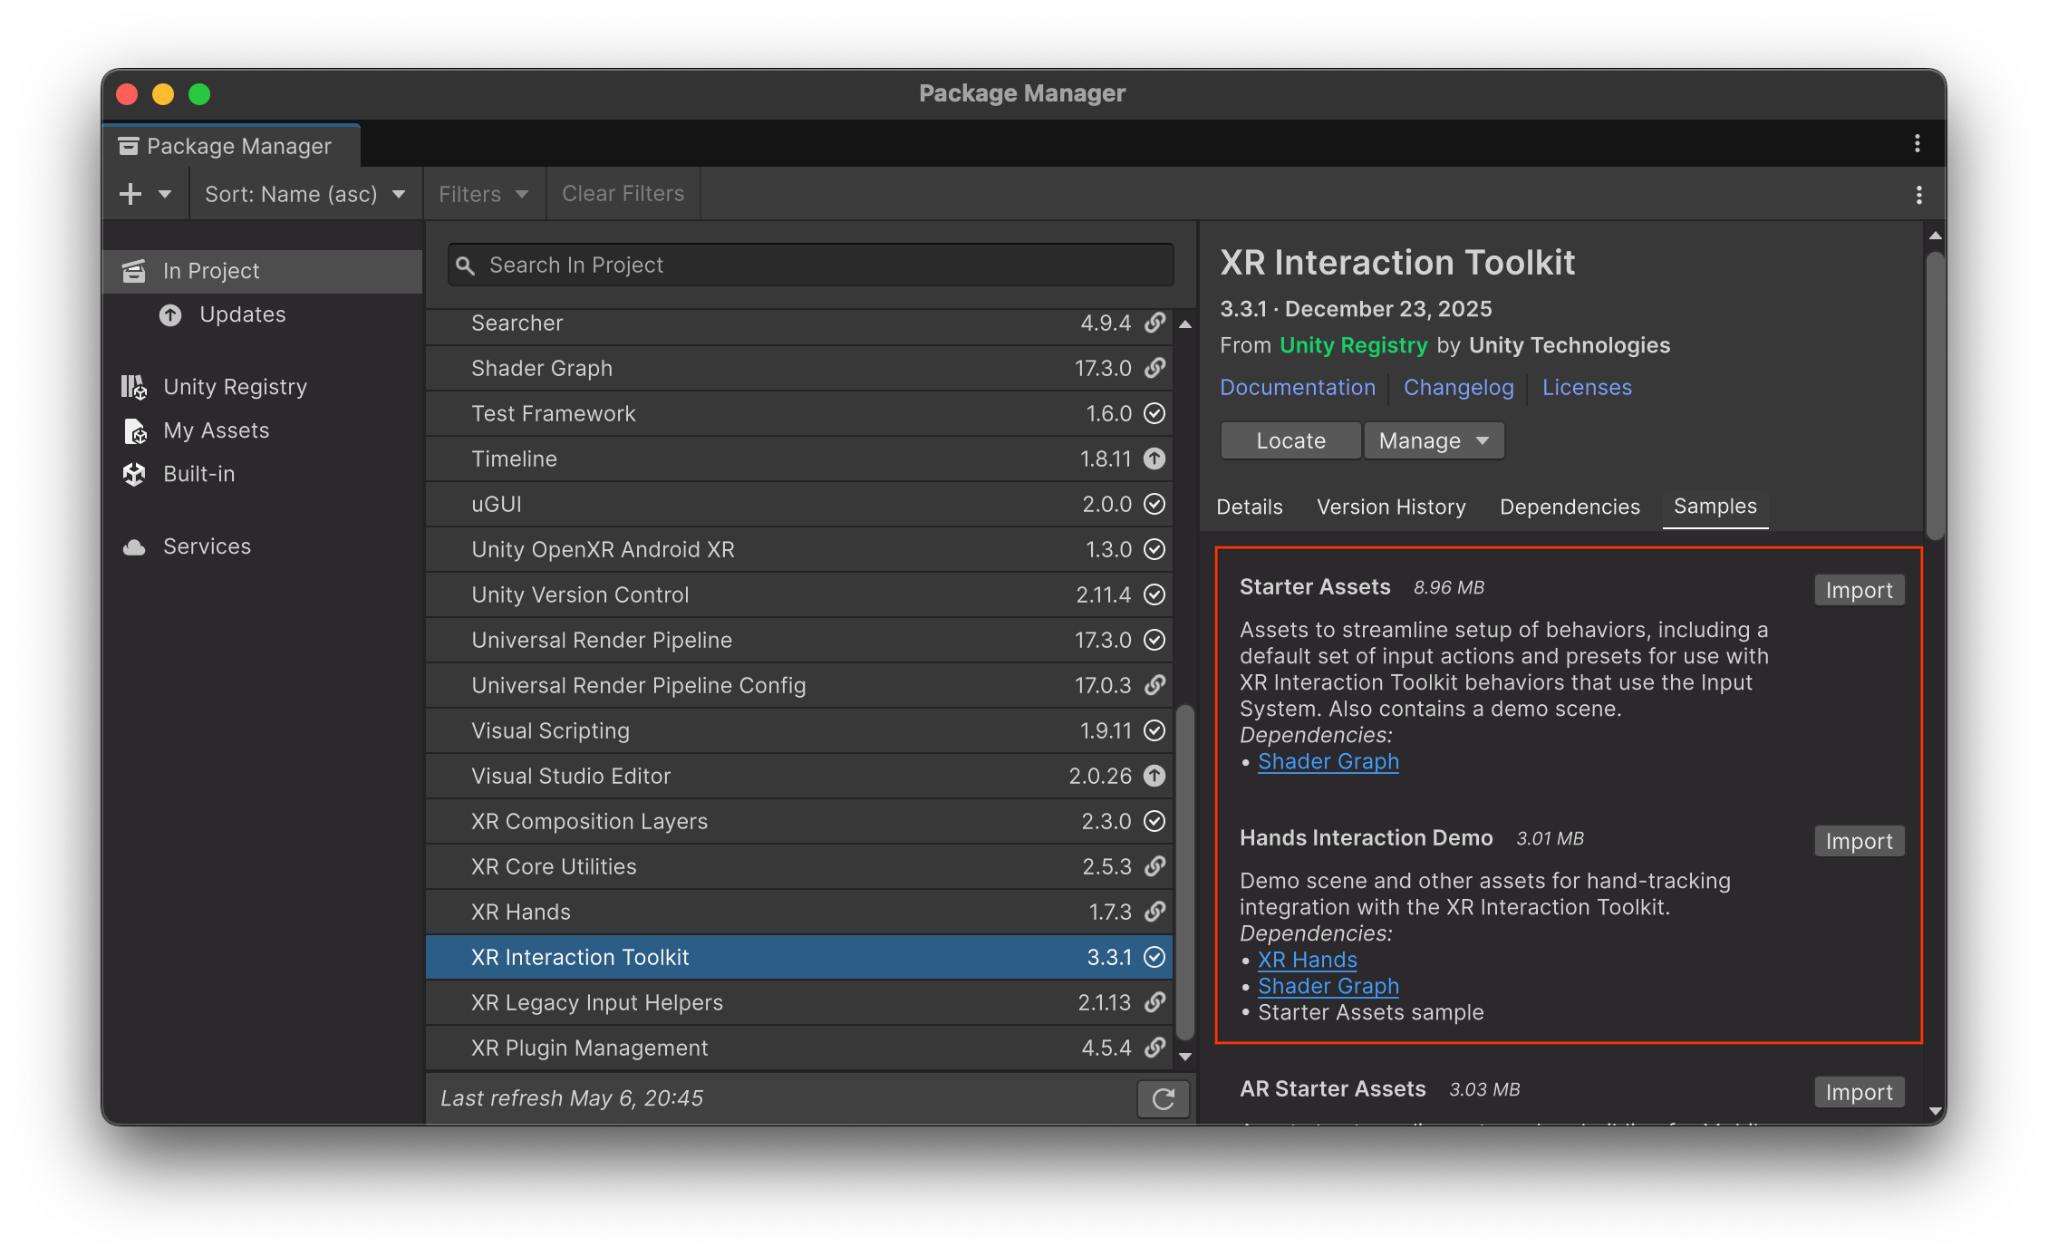
Check the XR Interaction Toolkit version
The AXRIF package works alongside the Unity XR Interaction Toolkit (XRIT) and doesn't replace it. Because the AXRIF package defines a dependency to XRIT, Unity should have installed XRIT when you installed the AXRIF package in the previous steps. However, you should check that version 3.3.1 or higher is installed by navigating to Window > Package Manager > Unity Registry > XR Interaction Toolkit in the Unity Editor.
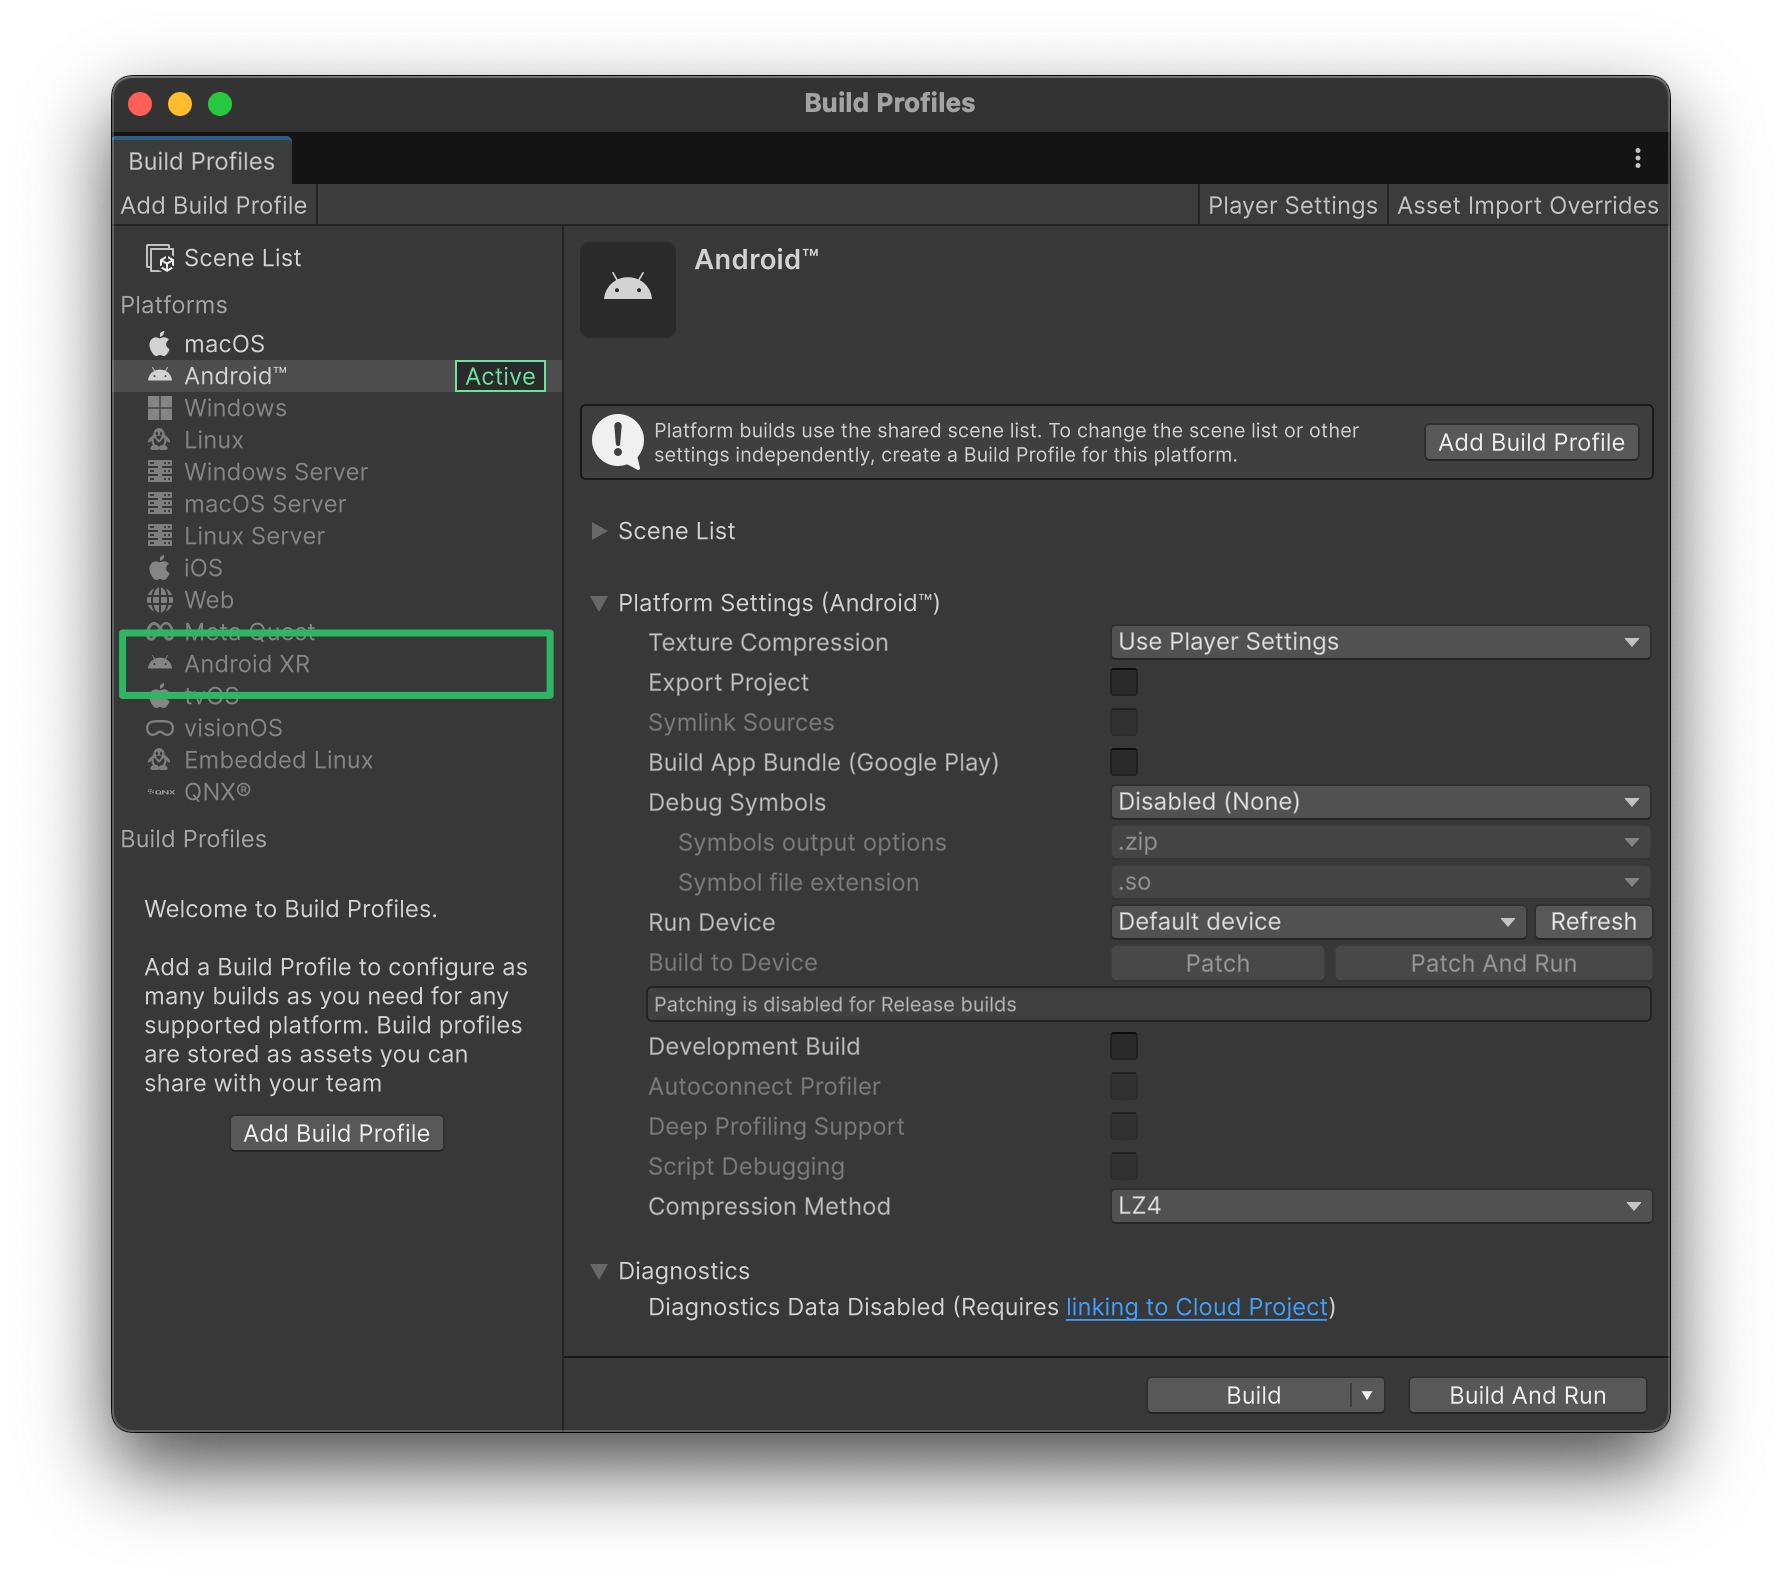
Select the Android XR build profile
Select the Android XR build profile to enable appropriate OpenXR Extensions and build settings for Android XR:
- Navigate to File > Build Profiles.
Click Android XR, and then click Switch Platform.
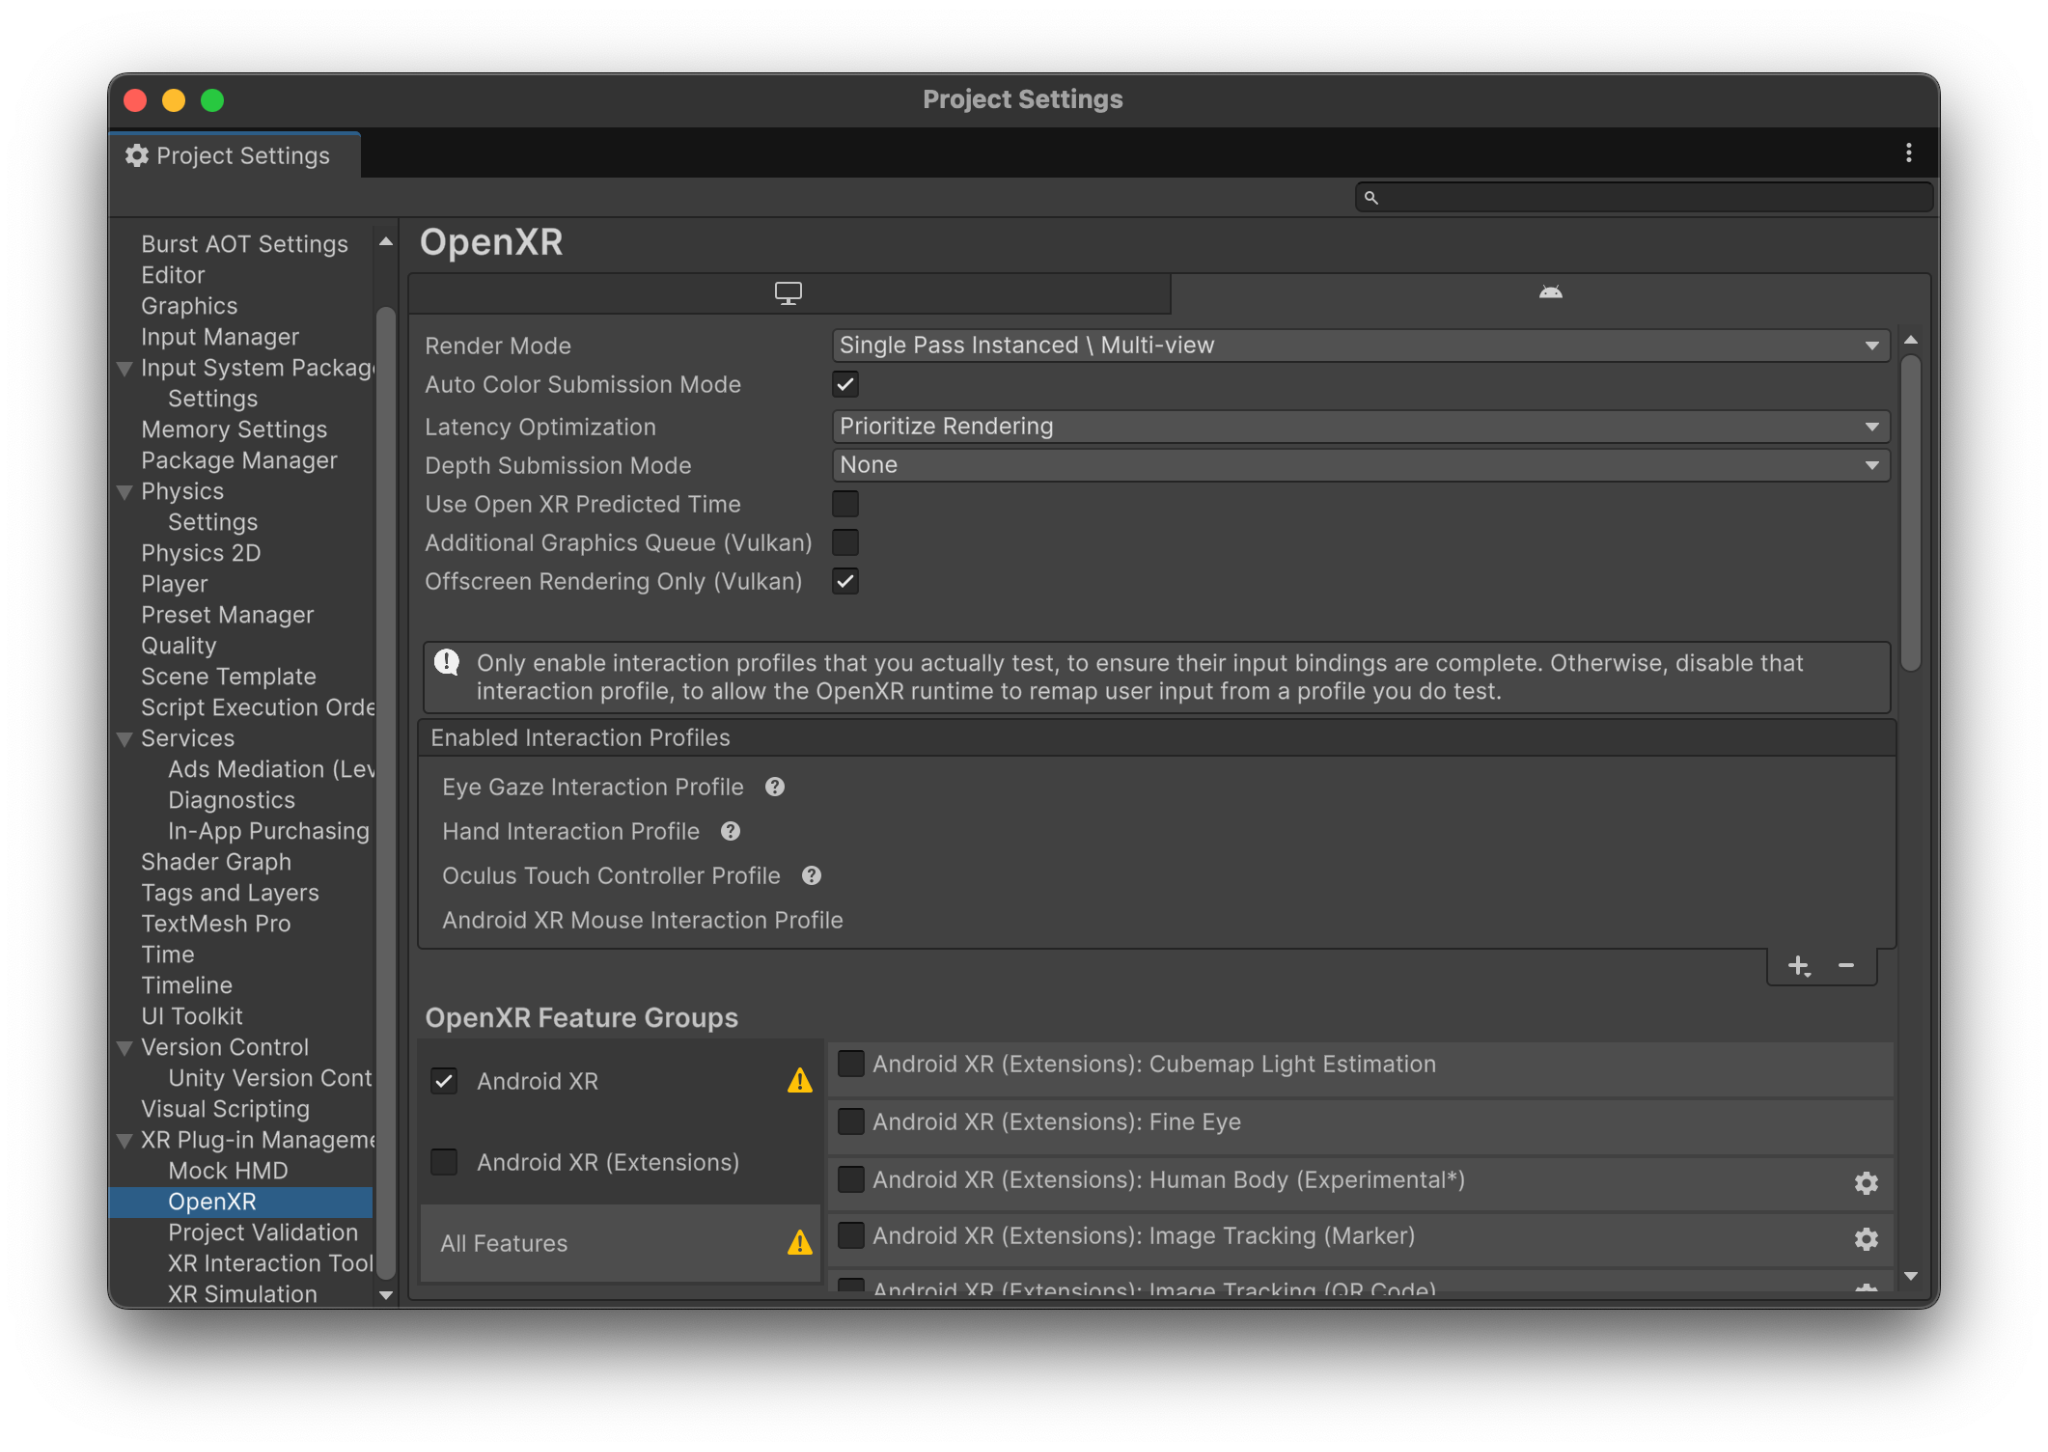
Configure OpenXR settings
Configure Unity's OpenXR settings so Unity can access the necessary OpenXR data:
- Navigate to Edit > Project Settings > XR Plug-in Management > OpenXR.
- In the Android tab, click + (plus) for the Enabled Interaction Profiles section.
Add any of the following profiles, depending on your app's needs:
- Eye Gaze Interaction Profile
- Hand Interaction Profile
- Oculus Touch Controller Profile
- Android XR Mouse Interaction Profile
In the features list in XR Plug-in Management > OpenXR, enable the following features:
- Android XR (Extensions): Passthrough Composition Layer
- Android XR (Extensions): Session Management
- Android XR Support
- Android XR: AR Camera
- Android XR: AR Session
- Android XR: AR Hand Mesh Data
- Composition Layers Support
- Hand Tracking Subsystem
Perform project validation
Perform project validation to fix any OpenXR errors in your project's configuration:
- Navigate to Edit > Project Settings > XR Plug-in Management > Project Validation.
Fix any outstanding alerts or warnings to ensure runtime errors don't affect compilation.
Use the sample scene
Now that you've finished the preliminary setup and configuration, you can use the AXRIF sample scene. Follow the steps in the following sections to get the sample scene and try it out.
Import XRIT sample packages and the AXRIF sample
The AXRIF sample scene depends on Unity's XR Interaction Toolkit (XRIT) Starter Assets and Hands Interaction Demo sample packages.
Import XRIT sample packages
Import the XRIT sample packages that the AXRIF sample depends on:
- Navigate to Window > Package Manager.
- Select XR Interaction Toolkit from the package list.
In the Samples tab, click Import next to both Starter Assets and Hands Interaction Demo.
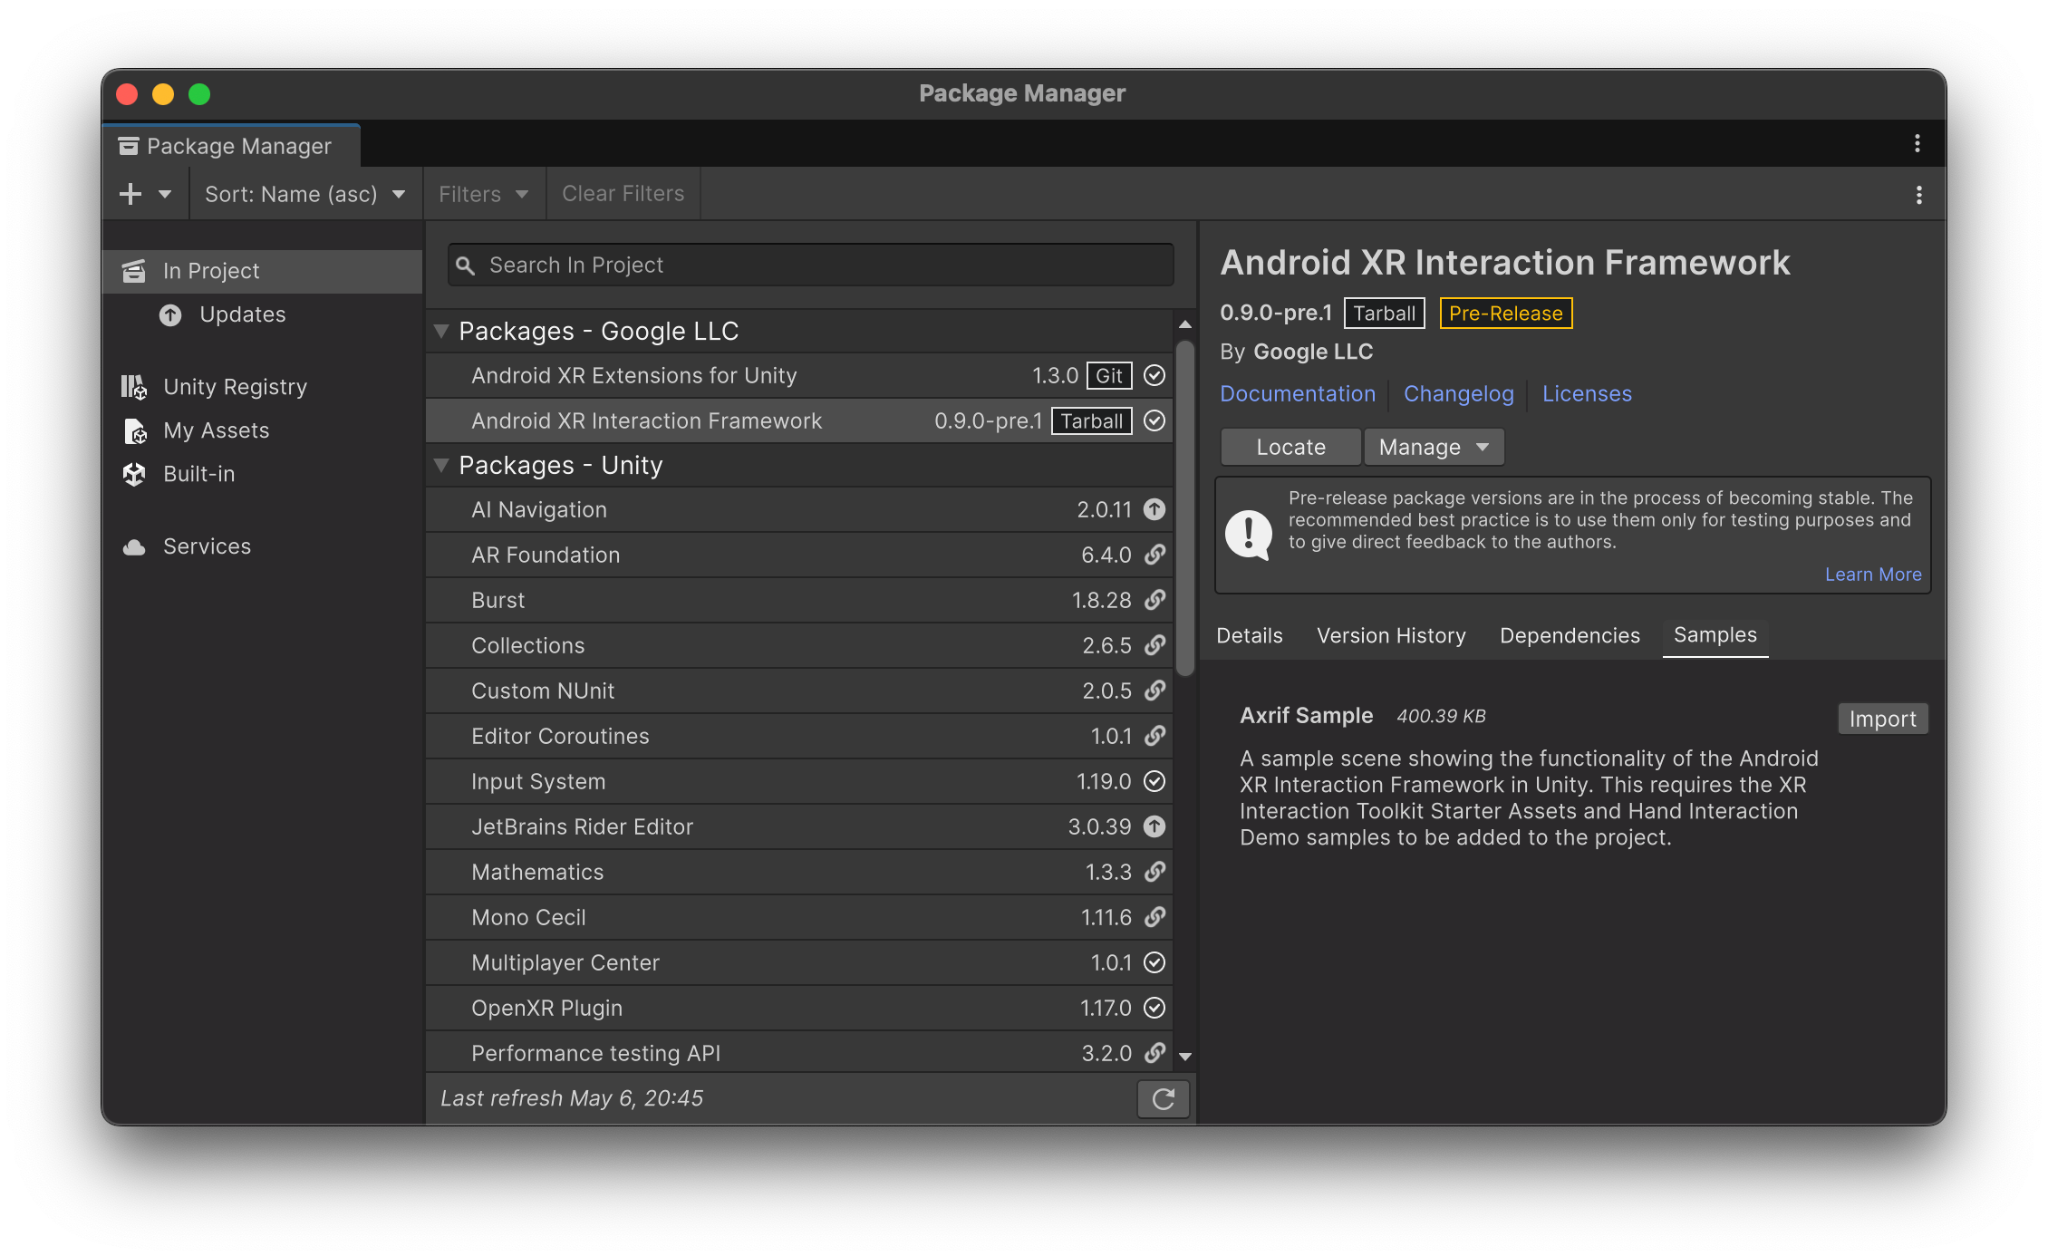
Import the AXRIF sample
Import the AXRIF sample to get the sample scene:
- Navigate to Window > Package Manager.
- Select Android XR Interaction Framework from the package list.
In the Samples tab, click Import next to Axrif Sample.
Open the Scene
After you've imported the required sample packages, you can open the scene:
- Navigate to Assets > Samples > Android XR Interaction Framework > [AXRIF Version Number] > Axrif Sample.
Open AxrifDemoScene.
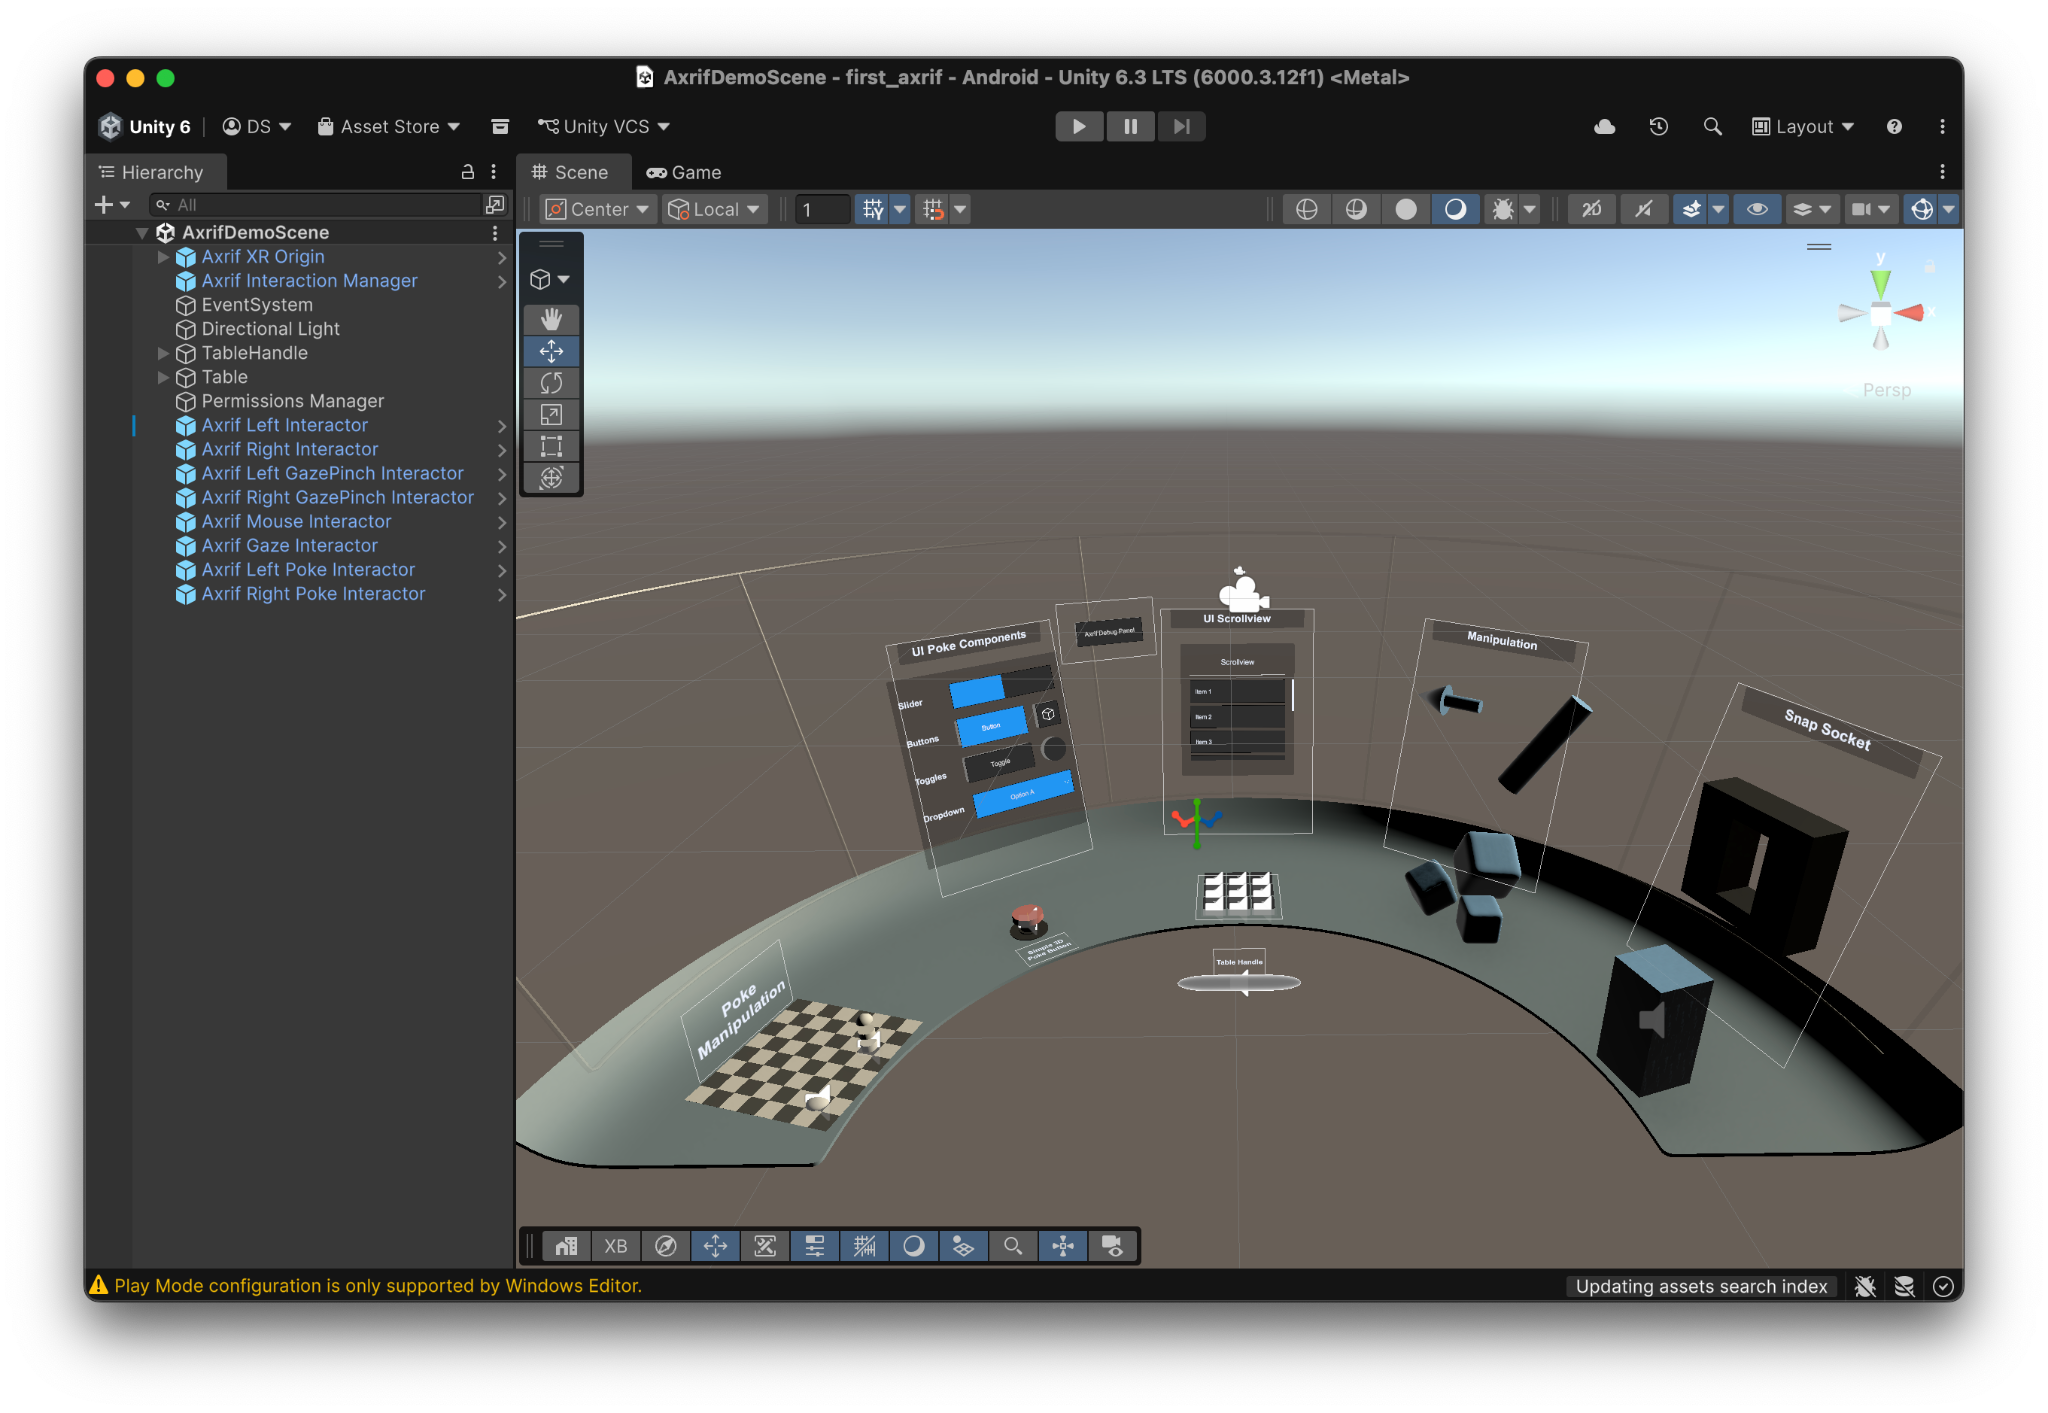
Explore the prefabs
The scene comes pre-configured using modular prefabs located under Packages > Android XR Interaction Framework > Prefabs.
Interactor prefabs
The Axrif Interactor prefabs drive Unity XRIT interactor mechanics using the corresponding input modalities from the following list:
- Hand/Controller Ray:
- Axrif Left Interactor - Uses left hand raycast or controller.
- Axrif Right Interactor - Uses right hand raycast or controller.
- Gaze Pinch:
- Axrif Left GazePinch Interactor - Uses eye gaze and left-hand motion when pinching.
- Axrif Right GazePinch Interactor - Uses eye gaze and right-hand motion when pinching.
- Axrif Gaze Interactor - Uses eye gaze to point only.
- Hand Poke:
- Axrif Left Poke Interactor - Uses left index finger when touching interactables.
- Axrif Right Poke Interactor - Uses right index finger when touching interactables.
- Mouse:
- Axrif Mouse Interactor - Uses Android XR spatial mouse.
Axrif Interaction Manager and Origin prefabs
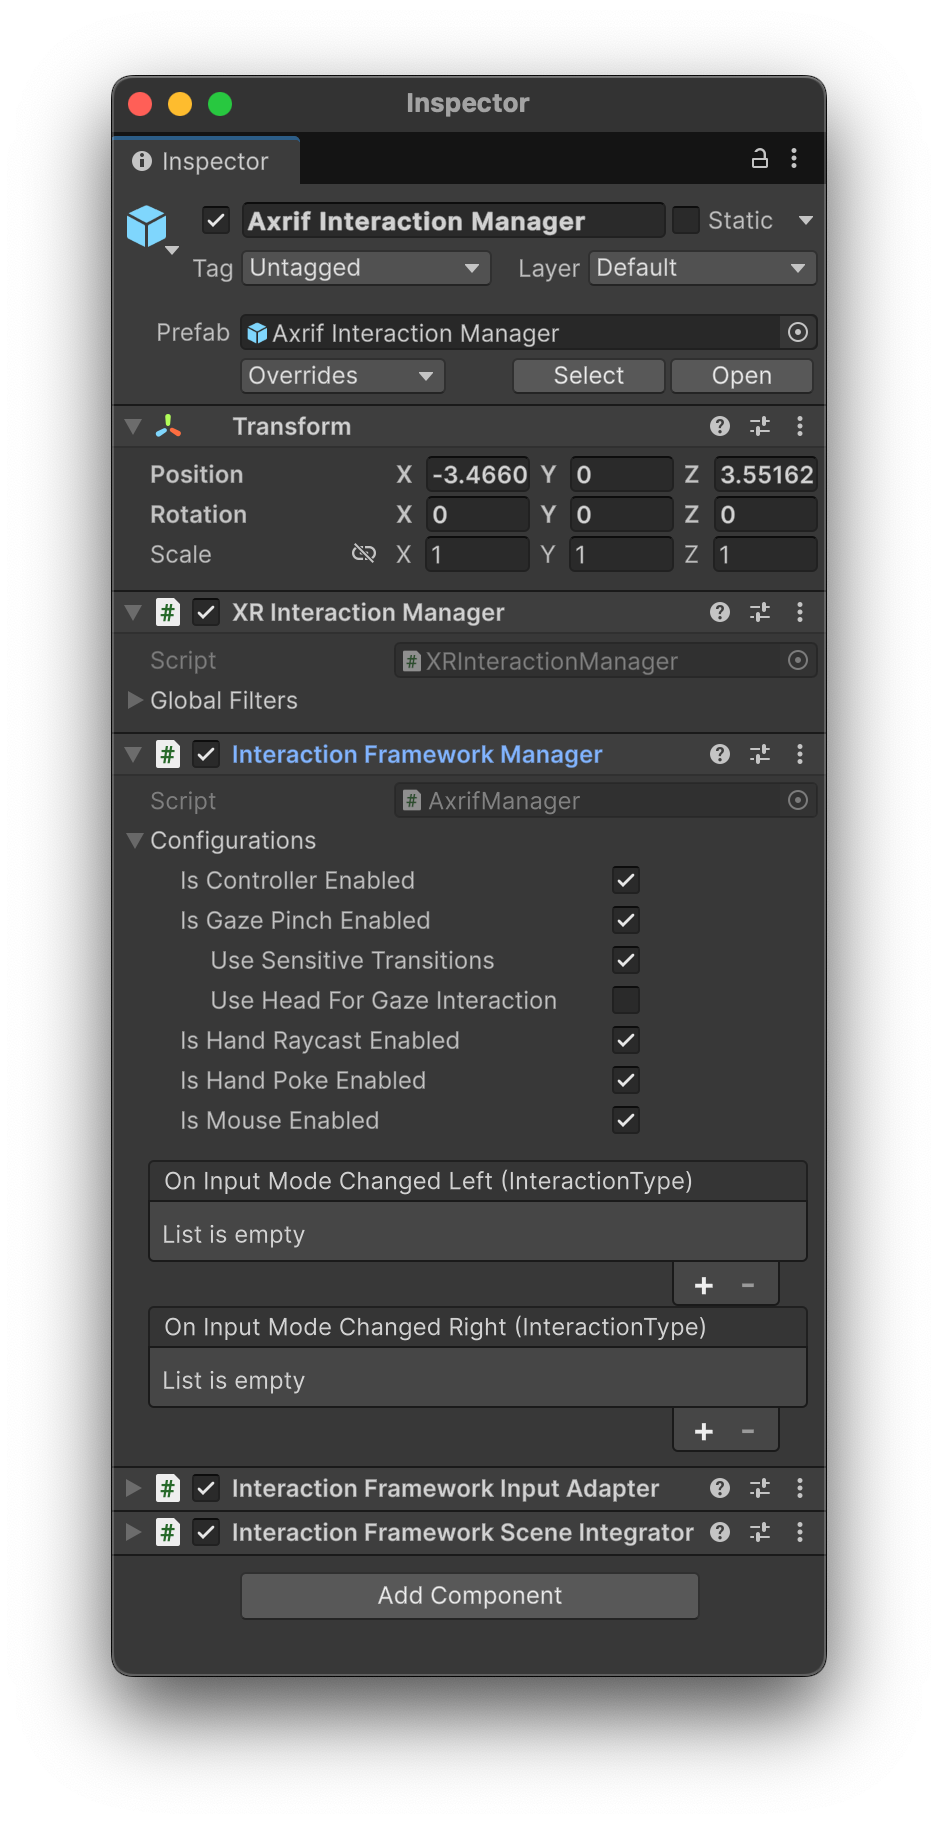
Axrif Interaction Manager: This prefab is the central hub for AXRIF in the scene. The prefab houses the Axrif Interaction Manager component, which is designed to work in conjunction with the XRIT XR Interaction Manager. This prefab is responsible for:
- Initializing and managing the core AXRIF subsystems at runtime.
- Processing and routing input data from OpenXR using the Interaction Framework Input Adapter.
- Observing UI and collider states using the Interaction Framework Scene Integrator.
Axrif XR Origin: Serves as the main character and camera driver and manages hand-mesh visualizers.
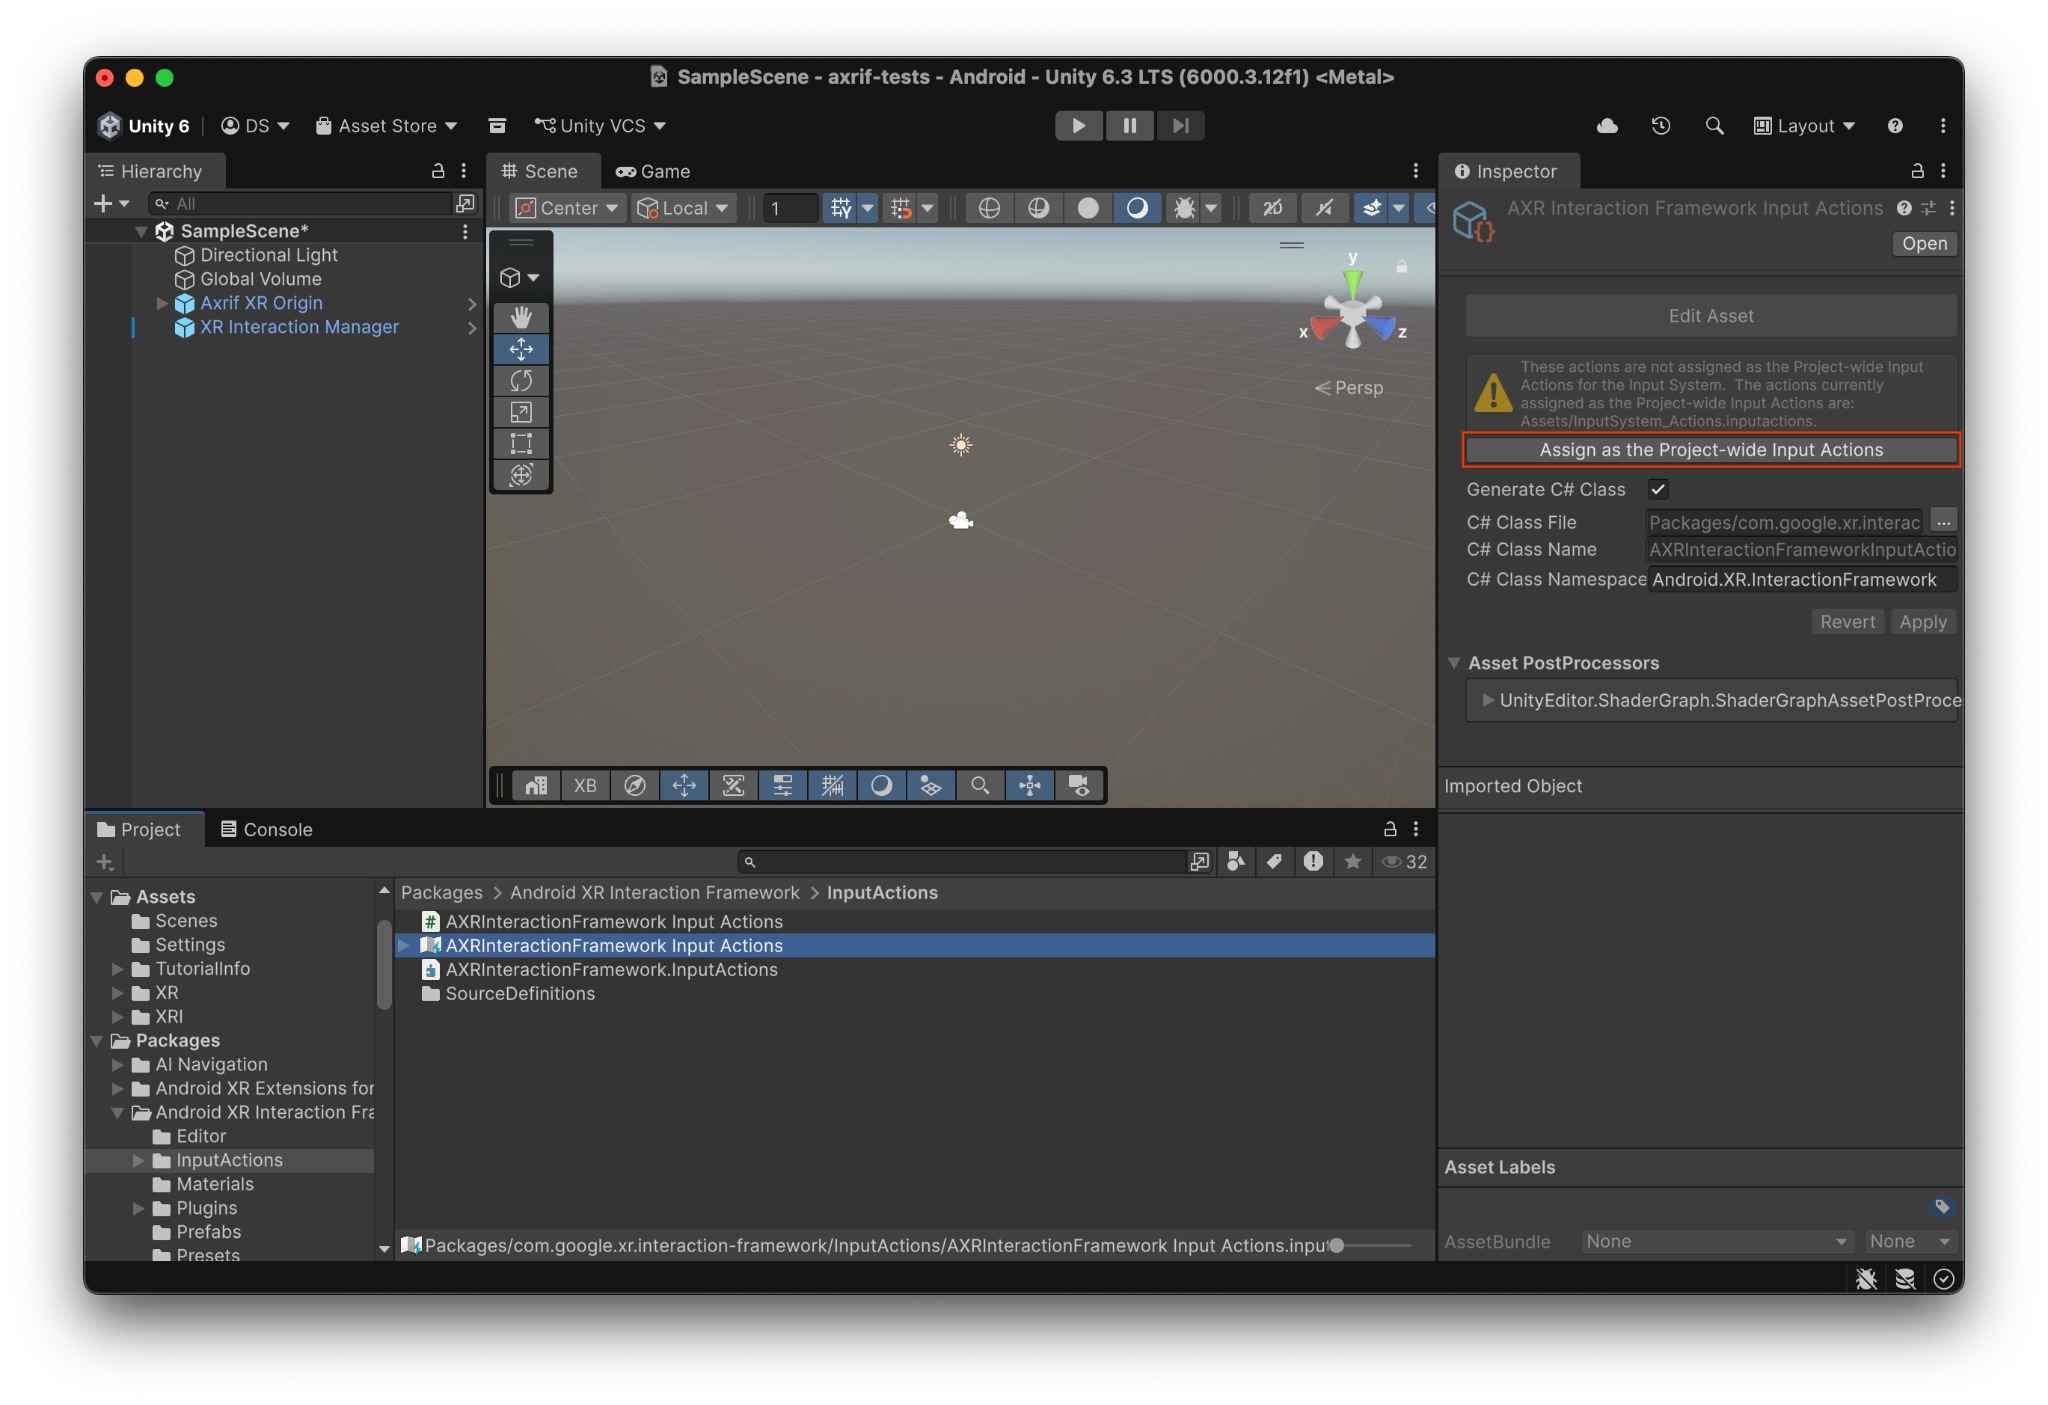
Configure input actions
To bridge the OpenXR runtime data with Unity's Input Actions, register project-wide map bindings:
- Navigate to Packages > Android XR Interaction Framework > InputActions.
- Locate AndroidXRInteractionFramework Input Actions.
Click Assign as the Project-wide Input Actions.
Modify interactions
Using the Axrif Interaction Manager prefab, you can enable or disable different input modalities. AXRIF supports the following input modalities:
- Controller Raycasting
- Pinch and Gaze
- Hand Raycasting
- Direct Hand
- Mouse Interactions.
You can configure input modalities directly inside the Inspector in the Configurations section of the Interaction Framework Manager component.
Build the sample
When you want to build the sample, click Build or Build and Run in the Unity Editor.