The following are new features in Android Studio Otter 3 Feature Drop.
App Links AI Assistant
Implementing Android App Links is essential for a seamless user experience, but writing the logic to handle intents can often be manual and tedious. The App Links Assistant—a plugin designed to help you validate and implement Android App Links—is now integrated with AI to automate the creation of App Links logic, significantly simplifying one of the most time-consuming steps of implementation.
Previously, you had to manually write code to parse incoming intents and navigate users to the correct screen. Now, you can rely on Gemini to generate the necessary code and tests for you. To provide you full control, Gemini presents a diff view of the suggested code changes, letting you review and approve the implementation before it goes live.
To get started with AI-assisted App Links, follow these steps:
- Access the App Links Assistant through Tools > App Links Assistant.
- Click Create Applink.
- In step two, "Add logic to handle the intent," choose the option "Generate code with AI assistance".
- Add a Sample URL that includes all the parameters your Activity needs to process. This allows Gemini to optimize the implementation for your specific use case.
- Click "Insert Code" and let Gemini handle the rest.
This update streamlines the process of handling deep links, so your users are seamlessly directed to the right content in your app with less manual overhead.
Journeys for Android Studio in Studio Labs
In Android Studio Otter 3 Feature Drop, Journeys for Android Studio is moving to Studio Labs as an experimental feature, making it accessible in RC and stable versions of Android Studio through the Studio Labs menu.
For more information, see Studio Labs.
UI development in Agent Mode
Gemini in Android Studio is now more deeply integrated into the UI development workflow directly within the Compose Preview, helping you go from design to a high-quality implementation faster. These new capabilities are designed to assist you at every stage, from initial code generation to iteration, refinement, and debugging, with entry points in the context of your work.
For feedback and issues on these features, file a bug.
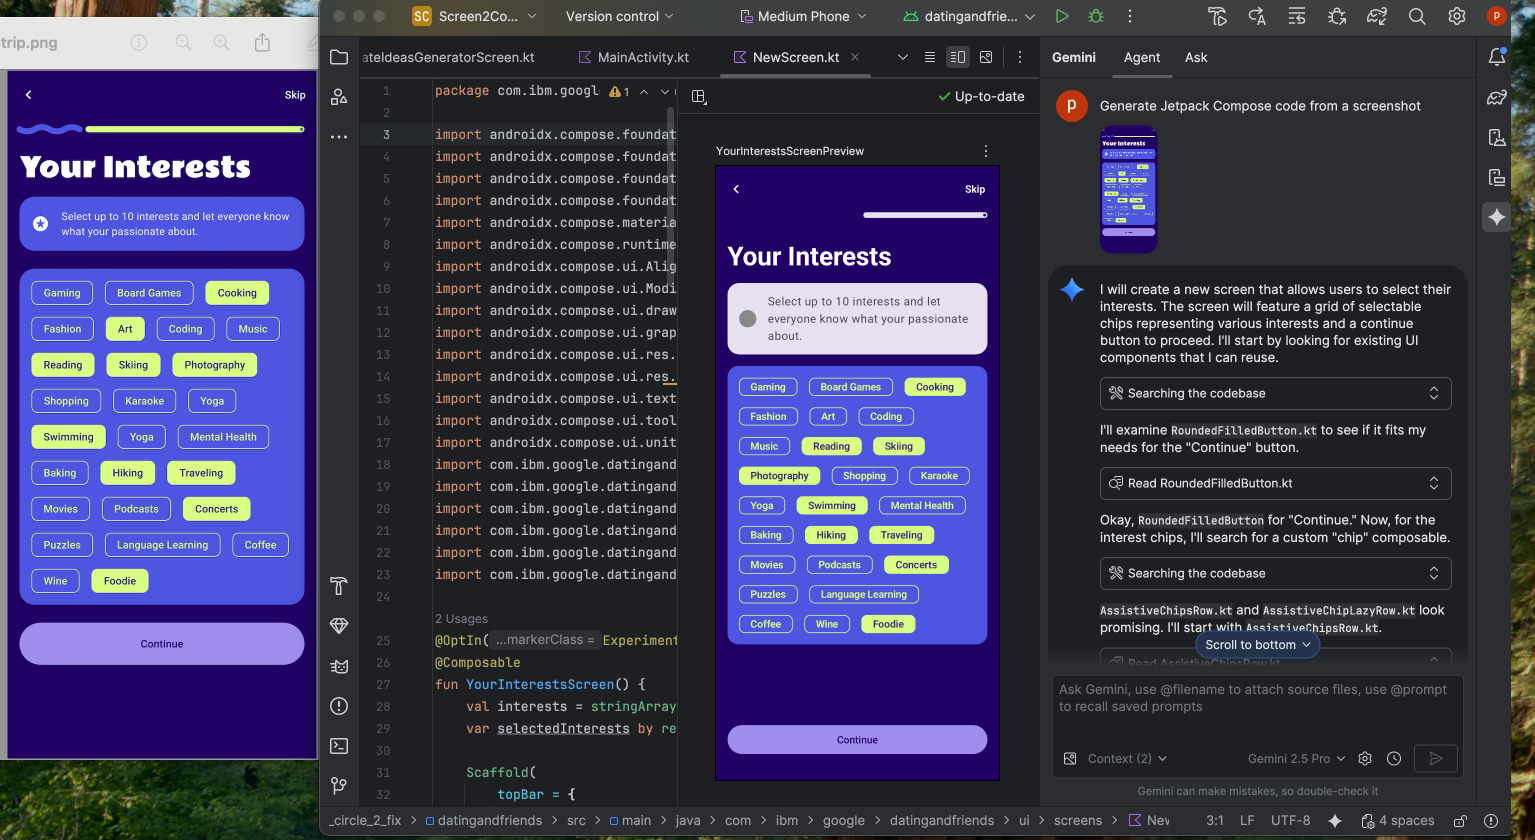
Create new UI from a design mock
To accelerate the start of your UI development process, you can now generate Compose code directly from a design mock. In a file without an existing preview, click Generate Code From Screenshot in the Preview panel. Gemini will use the provided image to generate a starting implementation, saving you from writing boilerplate code from scratch.
Match your UI with a target image
Once you have an initial implementation, you can iteratively refine it to be pixel-perfect. Right-click on your Compose Preview and select AI Actions > Match UI to Target Image. This lets you upload a reference design, and the agent will suggest code changes to make your UI match the design as closely as possible.

Iterate on your UI with natural language
For more specific or creative changes, right-click on your preview and use the AI Actions > Transform UI. This capability now leverages agent mode, making it more powerful and accurate. This upgrade lets you to modify your UI using natural language prompts, such as "change the button color to blue" or "add padding around this text," and Gemini will apply the corresponding code modifications.
![]()
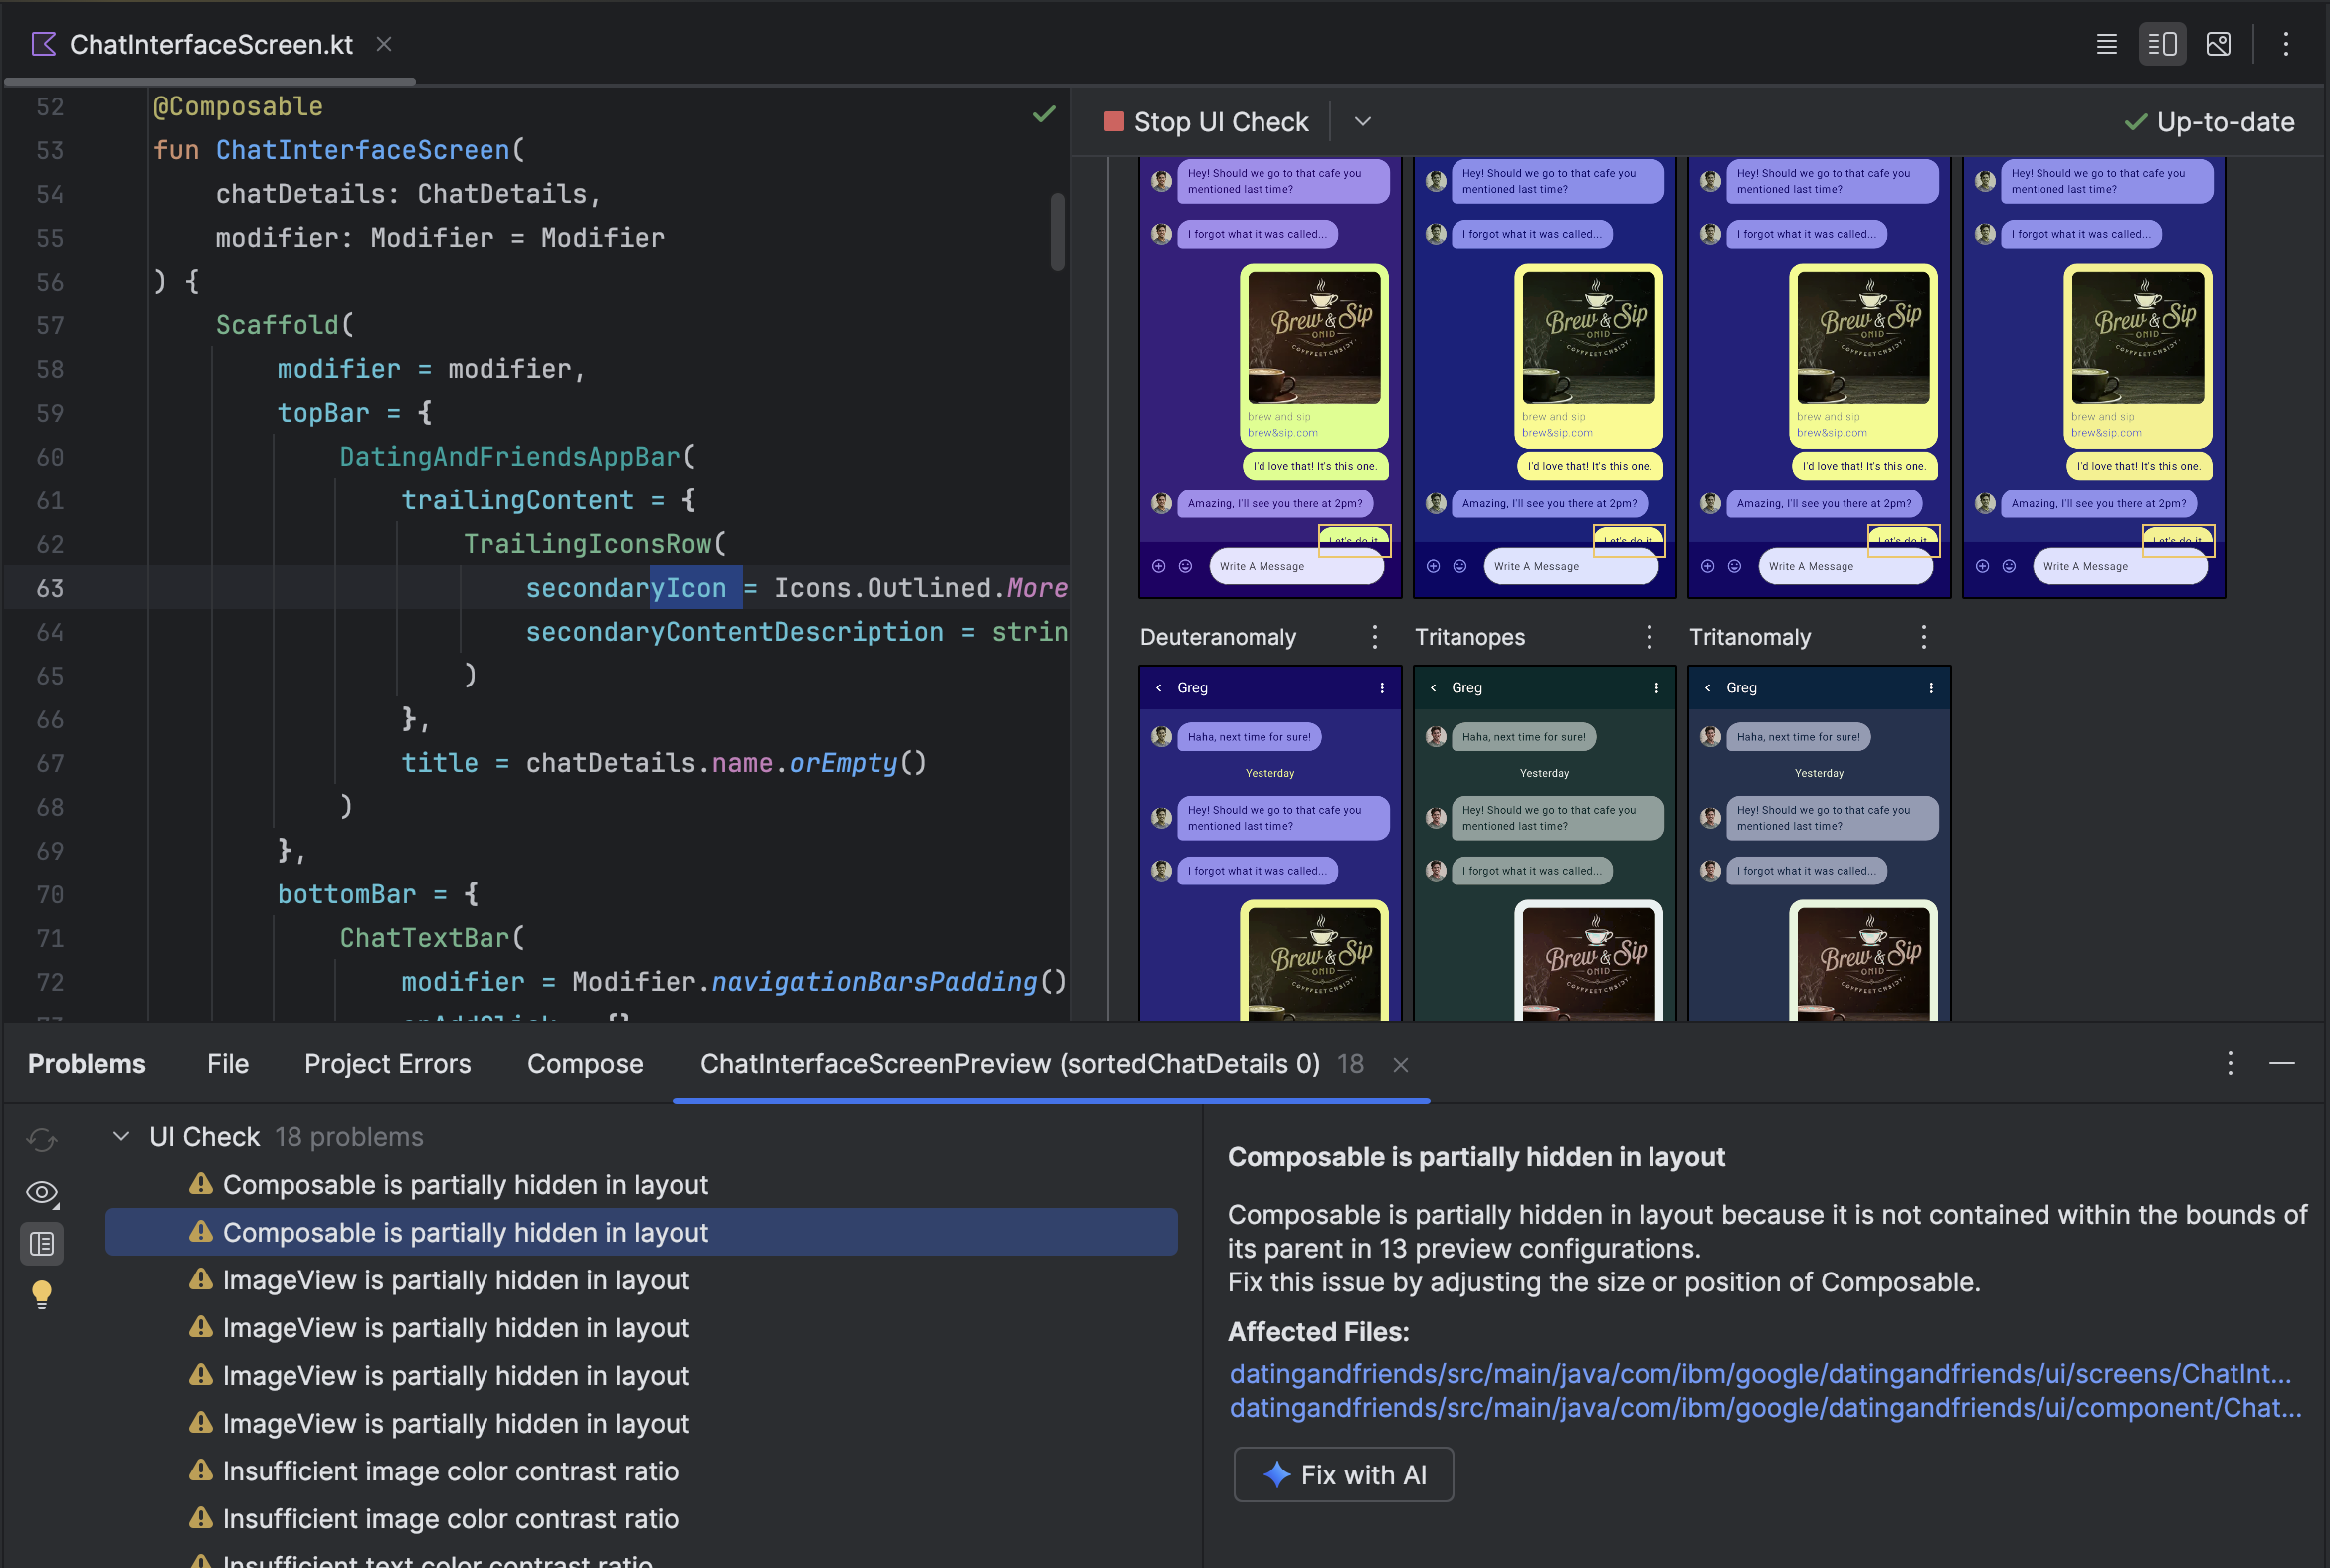
Find and fix UI quality issues
Verifying your UI is high-quality and more accessible is a critical final step. The AI Actions > Fix all UI check issues audits your UI for common problems, such as accessibility issues. The agent will then propose and apply fixes to resolve the detected issues.
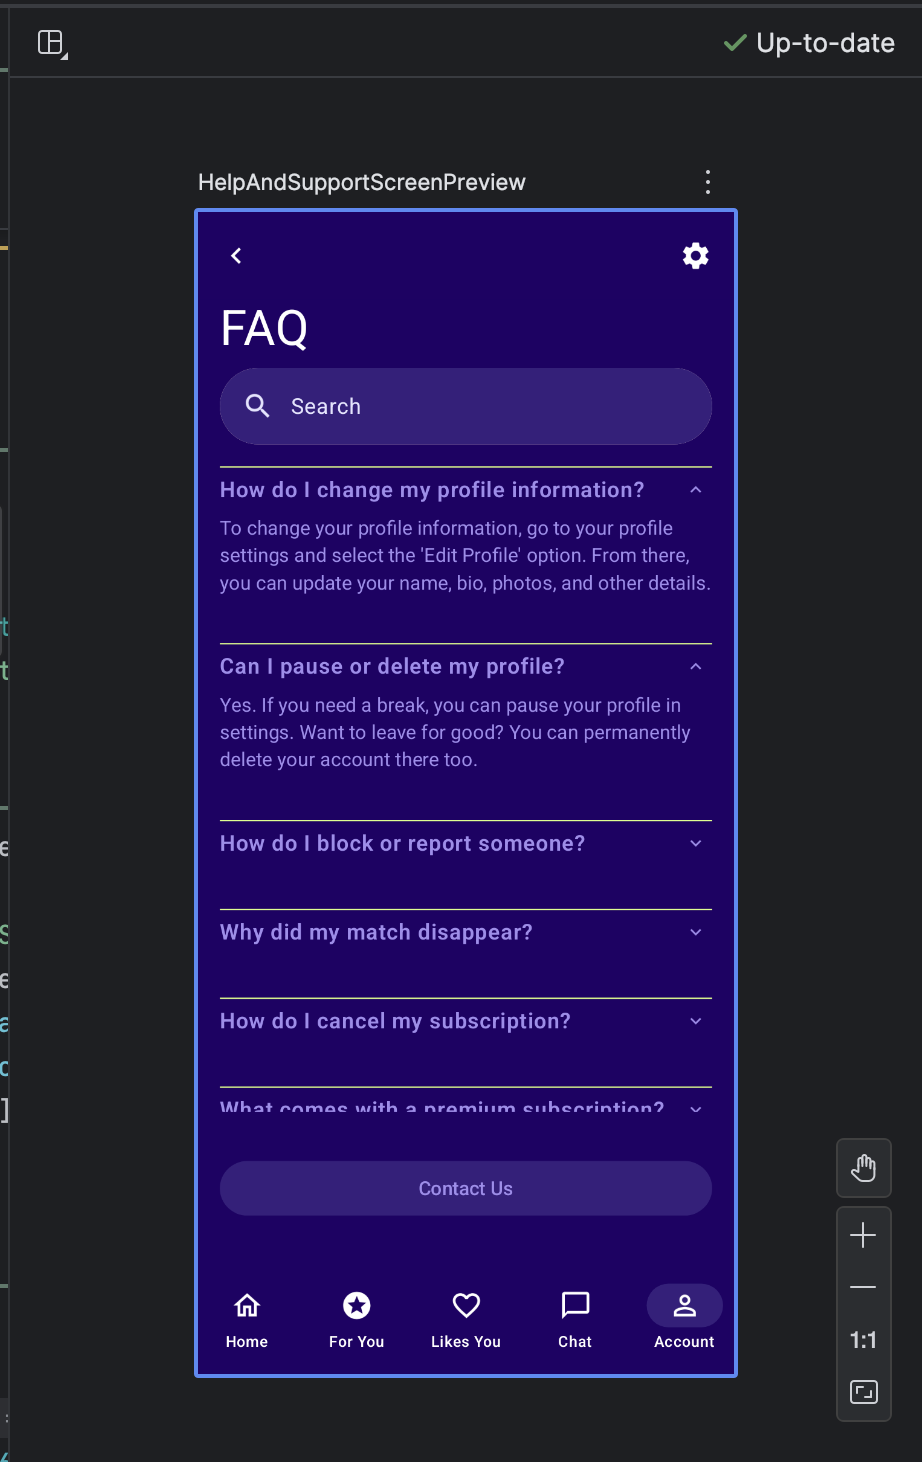
You can also find the same functionality by using the Fix with AI button in Compose UI check mode:
Beyond iterating on your UI, Gemini also helps streamline your development environment.
To accelerate your setup, you can:
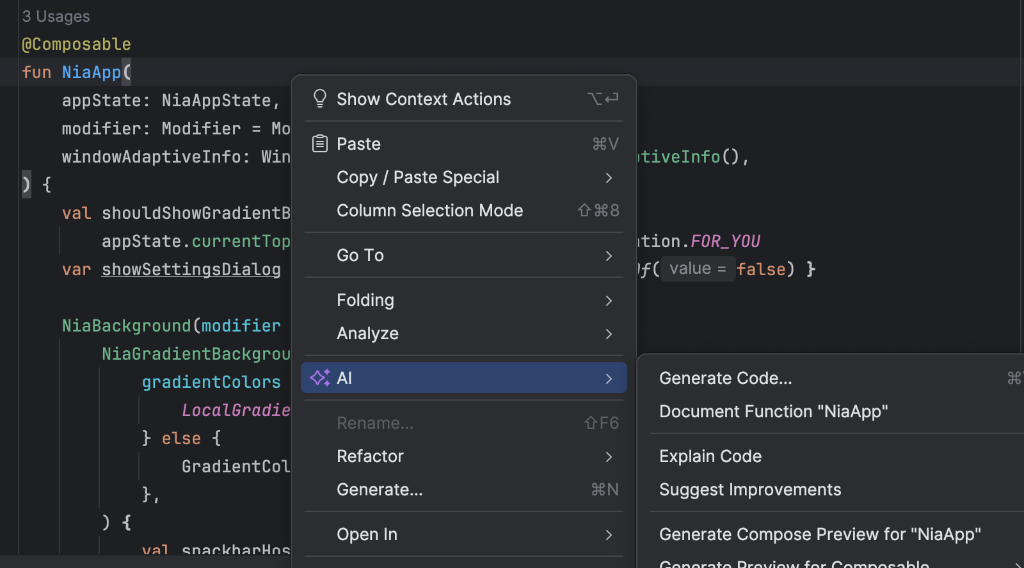
Generate Compose Preview: This feature is now enhanced by the AI agent to provide more accurate results. When working in a file that has Composable functions but no @Preview annotations, you can right-click on the Composable and select AI > Generate Preview for [Composable name]. The agent will now better analyze your composable to generate the necessary boilerplate with correct parameters, to help verify that a successfully rendered preview is added.
Entry point to generate Compose Preview Fix Preview rendering errors: When a Compose Preview fails to render, Gemini can now help you debug. Use the agent to analyze the error message and your code to find the root cause and apply a fix.
Using "Fix with AI" on Preview render error
Manage multiple conversation threads with Gemini
You can now organize your conversation with Gemini in Android Studio into multiple threads. This lets you switch between multiple ongoing tasks and search through your conversation history. Using separate threads for each task also improves response quality by limiting the scope of the AI's context to only the topic at hand.
To start a new thread, click New Chat  . To see your
conversation history, click Recent Chats.
. To see your
conversation history, click Recent Chats. 
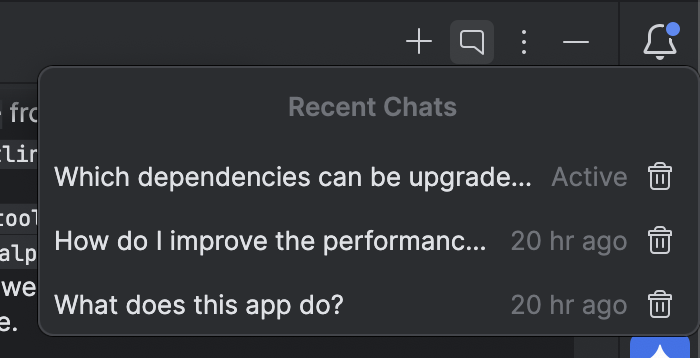
Your conversation history is saved to your account, so if you have to sign out or switch accounts you can resume right where you left off when you come back.
Use a local model
Android Studio Otter 3 Feature Drop lets you choose the large language model (LLM) that powers the IDE's AI features.
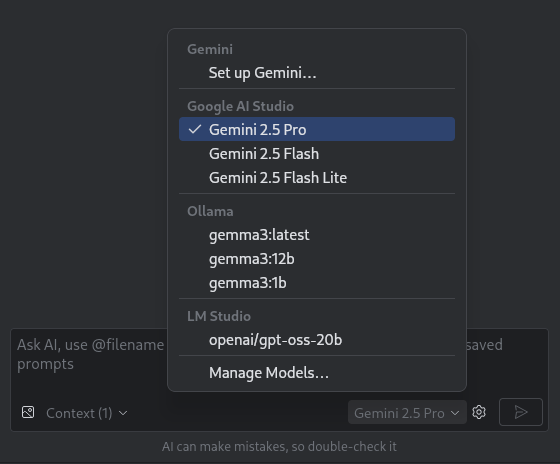
The model must be on your local machine, which is advantageous if you have limited internet connectivity or restrictions regarding the use of AI models, or you just want to experiment with open-source research models.
A local model offers an alternative to the LLM support built into Android Studio. However, Gemini in Android Studio typically provides the best Android development experience because Gemini is tuned for Android and supports all features of Android Studio. With Gemini, you can choose from a variety of models for your Android development tasks, including the no-cost default model or models accessed with a paid Gemini API key.
Support for local models requires installation of an LLM provider such as LM Studio or Ollama on your local computer along with a compatible model of your choice.
Use a remote model
Android Studio enables you to use remote models to power its AI features.
To use a remote model, configure a remote model provider in Android Studio's settings. Provide a name for the provider, the API endpoint URL, and your API key. After you've configured a provider, you can select the remote model from the model picker in the AI chat window.
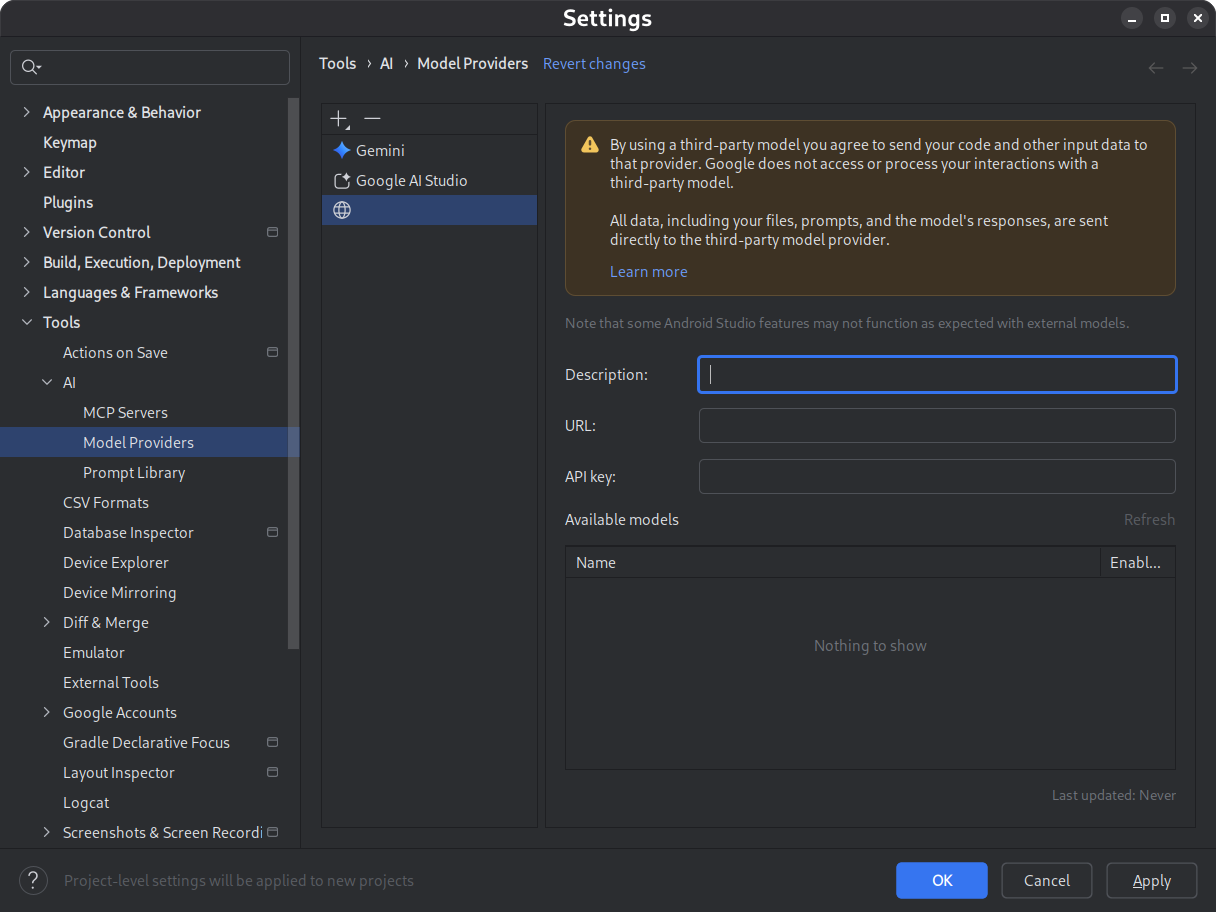
For details, see Use a remote model.
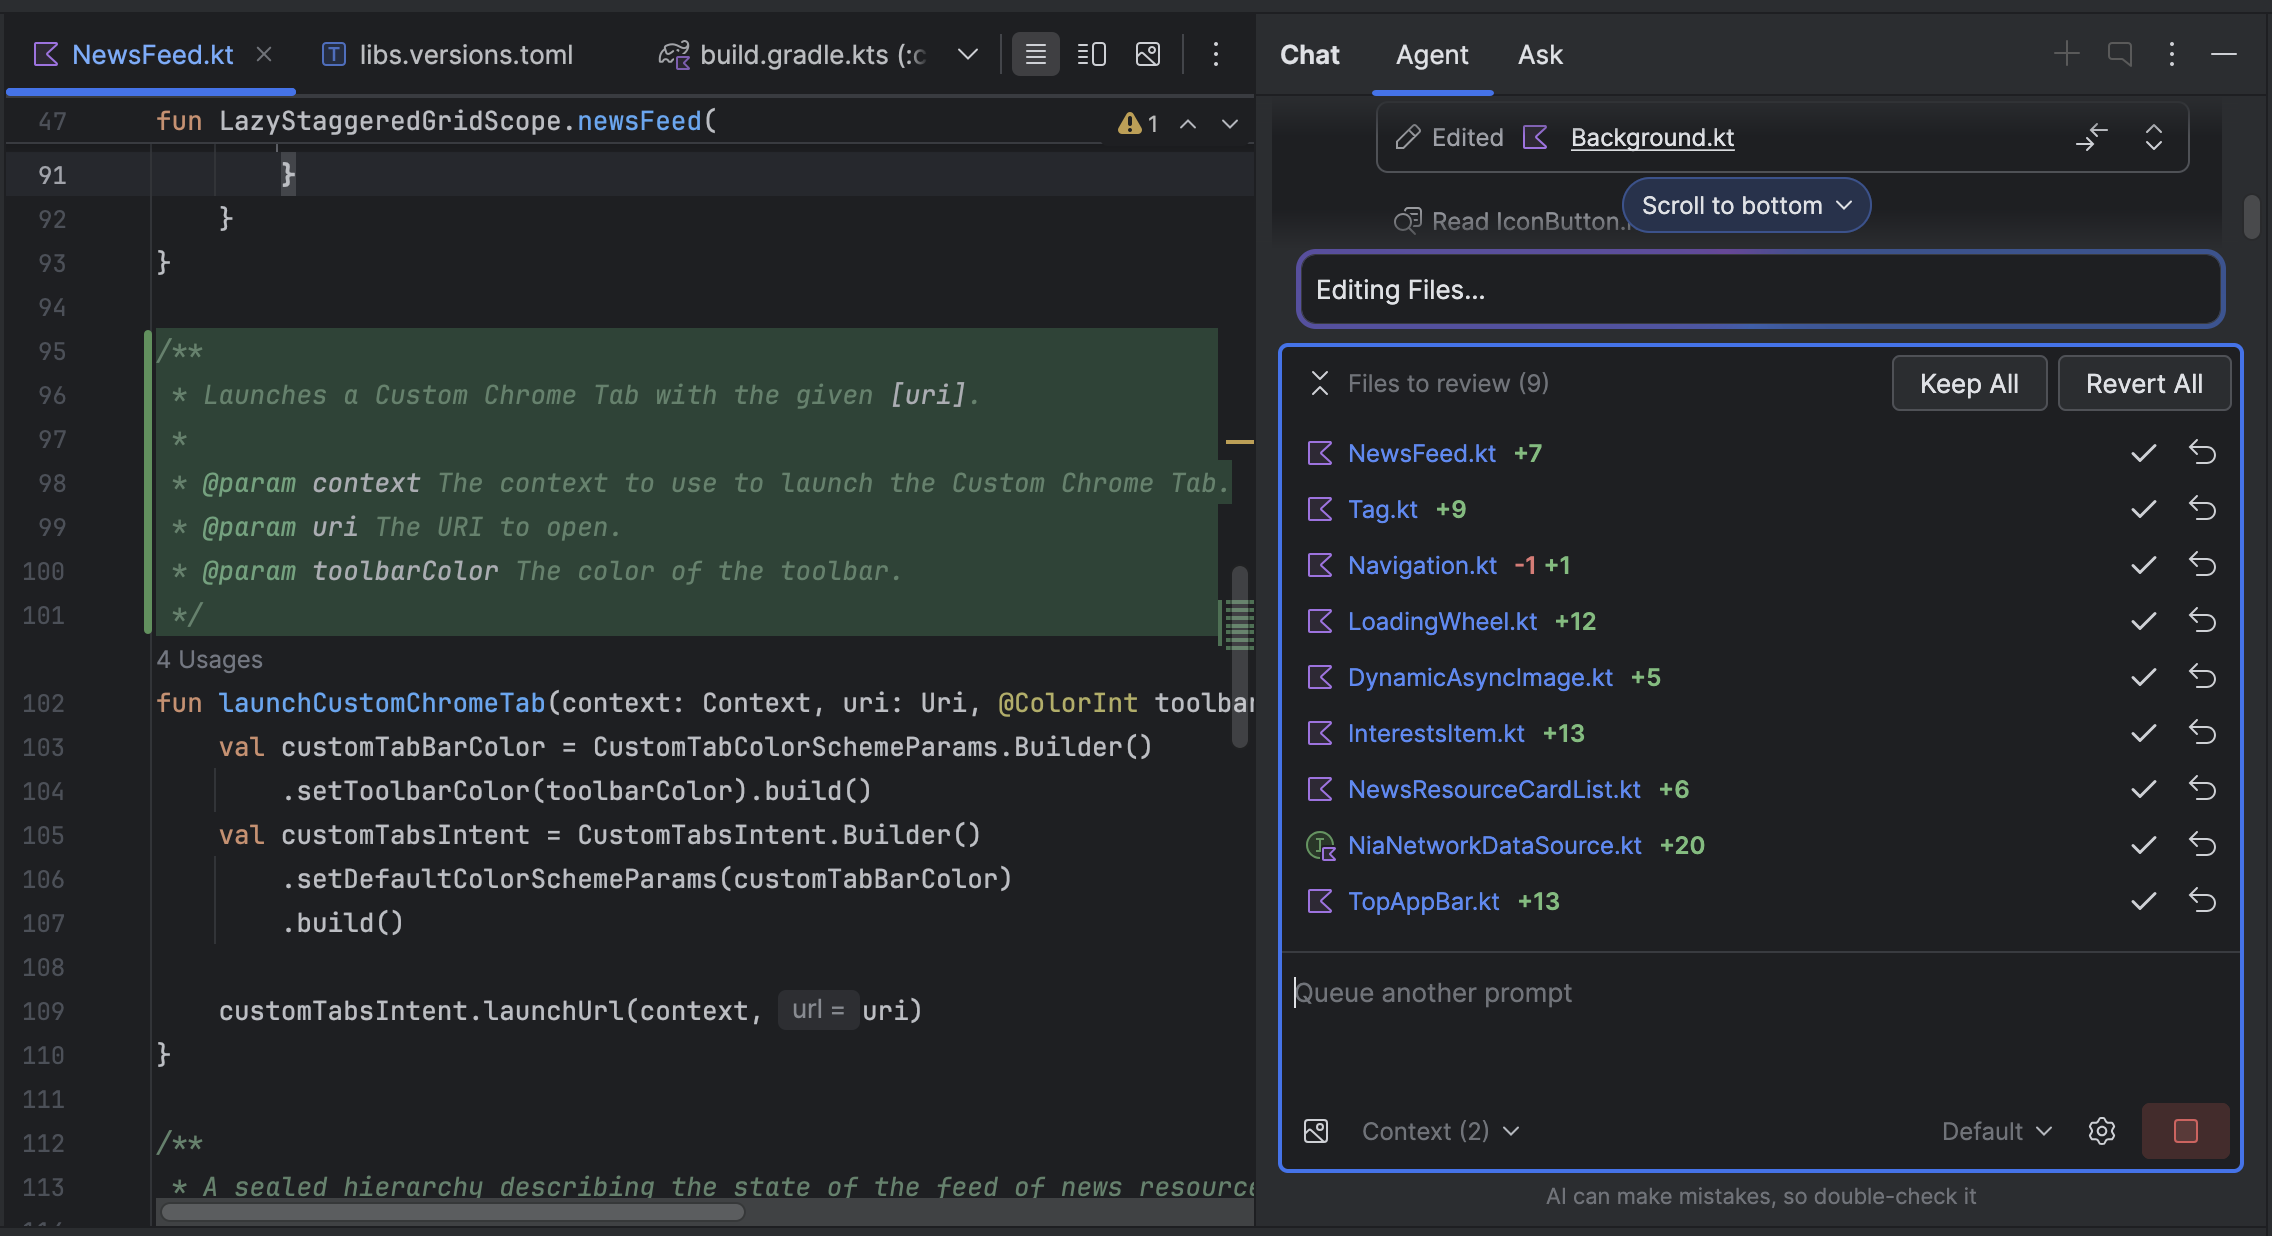
Find and review changes using the changes drawer
You can now see and manage changes made by the AI agent using the changes drawer. When the agent makes changes to your codebase, see the files that were edited in Files to review. From there, you can keep or revert the changes individually or all together. Click an individual file in the drawer to see the code diff in the editor and make refinements if needed. With the changes drawer, you can keep track of edits made by the agent during your chat and revisit specific changes without scrolling back through your conversation history.
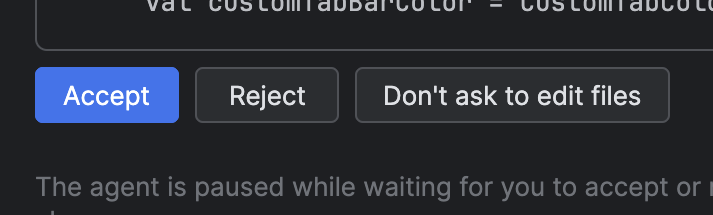
Note that if you have the agent set to ask you to edit files, you need to
Accept a change for it to show up in the changes drawer. Hence, you need to
select Don't ask to edit files for multiple files to show up in the changes
drawer at once. You can toggle this setting at any time in Agent Options
 .
.
Automatic Logcat retracing
With Android Studio Otter 3 Feature Drop and AGP 9.0, Logcat automatically
retraces stack traces when R8 is enabled (minifyEnabled = true).
Because code processed by R8 can change in various ways, the stack trace no
longer refers to the original code. For example, line numbers and the names of
classes and methods can change. Previously, to debug with the original stack
trace, developers had to use R8's retrace command-line tool.
With AGP 9.0, Android Studio automatically retraces stack traces so that you can see the original stack trace directly in Android Studio, with no extra work, improving the debugging experience when R8 is enabled.
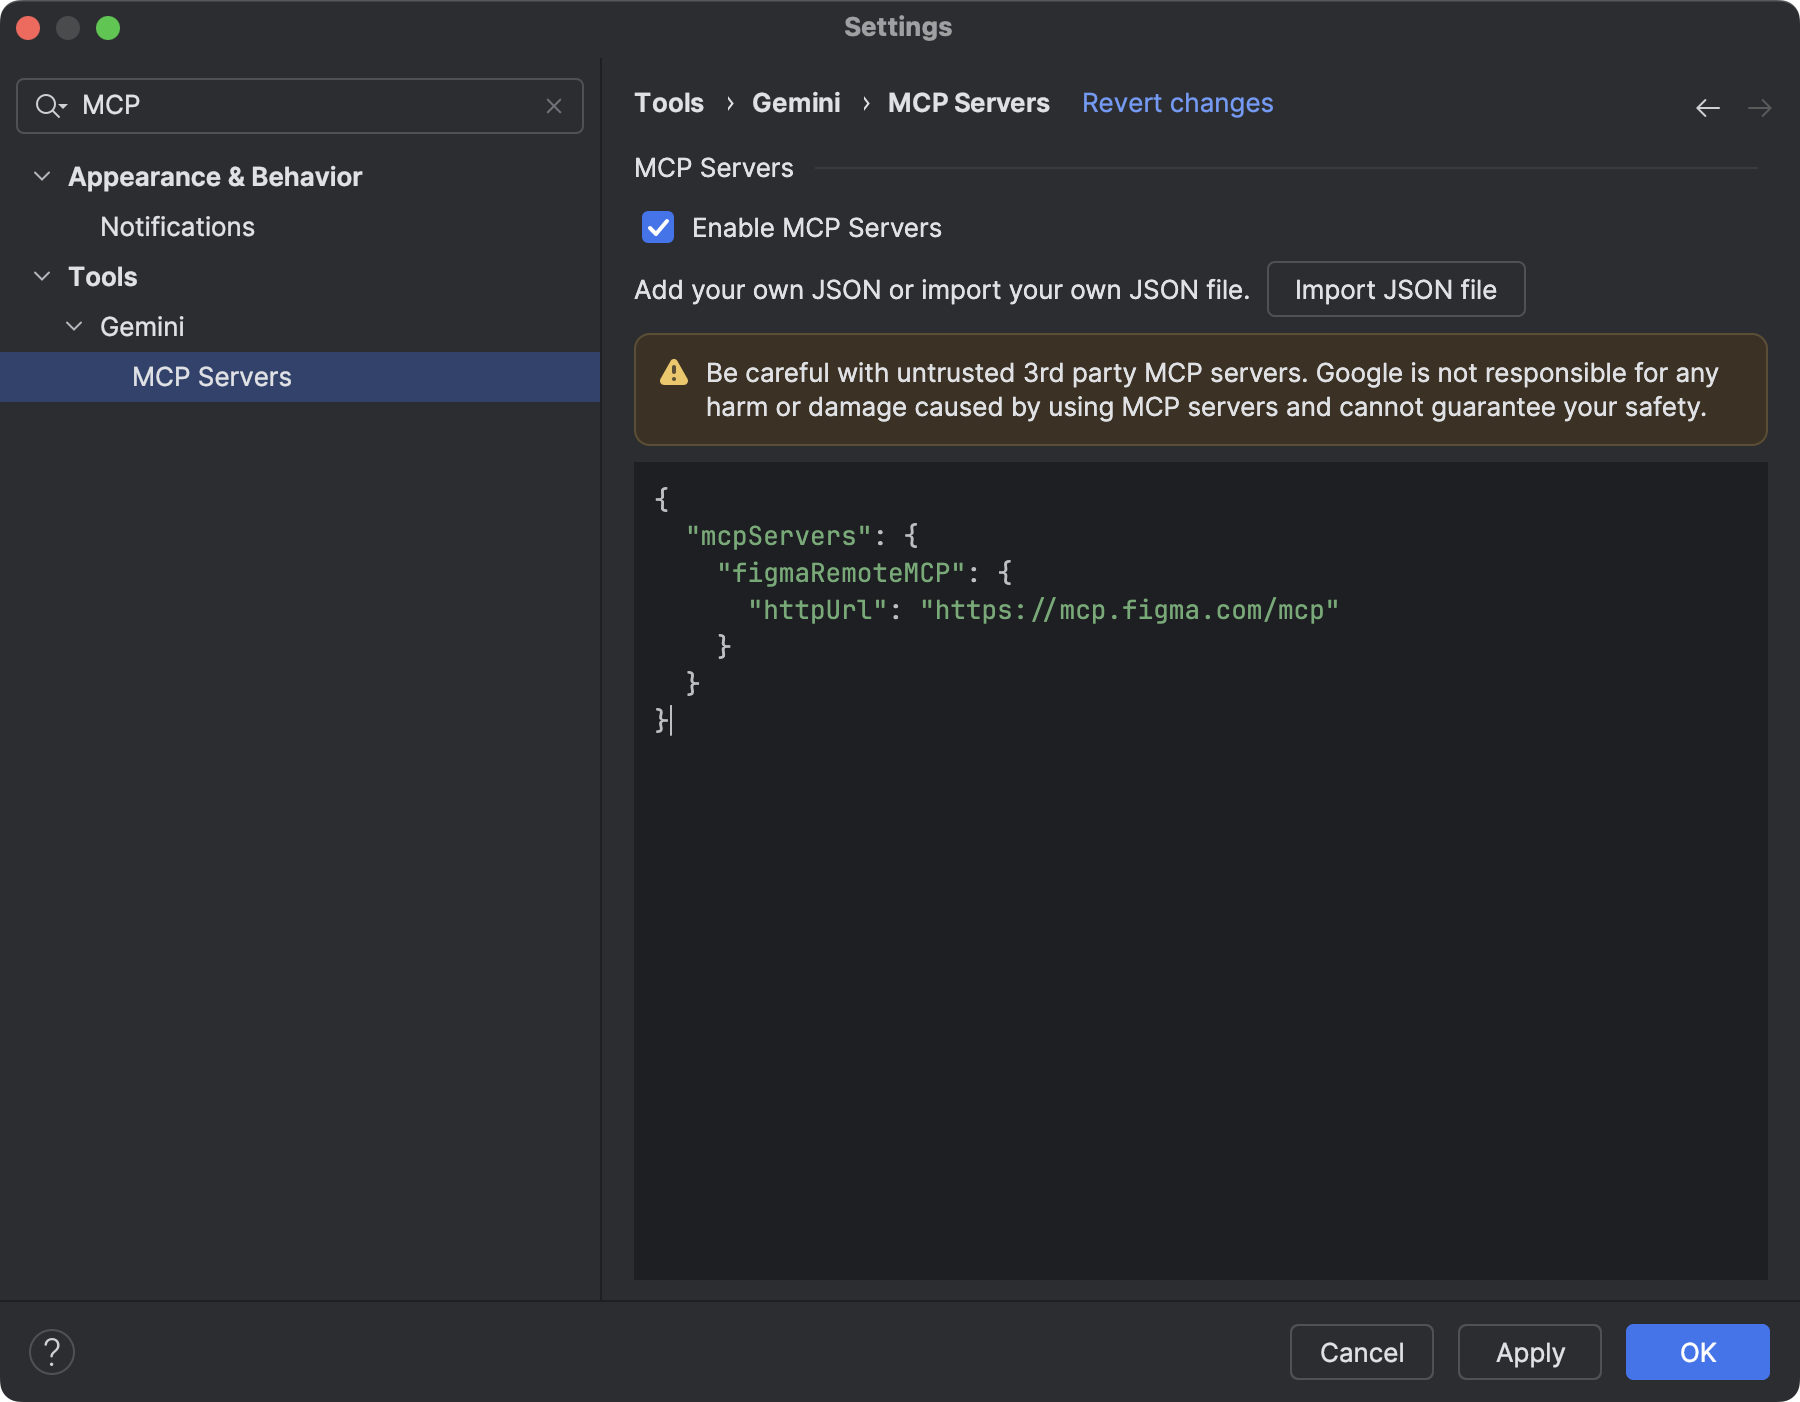
Support for remote MCP servers
Starting with Android Studio Otter 1 Canary 3, you can connect to remote MCP servers using Android Studio. With a remote MCP server, the Gemini in Android Studio agent can access external tools and resources, and you don't have to do as much work installing and maintaining the server yourself. For example, you can connect to Figma's remote MCP server to connect to Figma files without installing Figma's desktop app. To learn more about how to add an MCP server, see Add an MCP server.
Device interaction tools
AI agents in Android Studio now have access to tools to deploy an application
to the connected device, inspect what is currently shown on the screen, take
screenshots, check Logcat for errors, and interact with the running
application through adb shell input. This lets the agent help you with
changes or fixes that involve re-running the application, checking for
errors, and verifying that a particular update was made successfully
(for example, by taking and reviewing screenshots).