
Screenshot testing is a very effective way to verify your app's UI. Screenshot tests can exist in Component, Feature and Application tests.
You can use third-party tools to create both instrumented and local screenshot tests. If you use Compose, you can use the official Compose Preview Screenshot testing tool.
Definition
Screenshot tests take a screenshot of a UI and compare it with a previously-approved image, called "reference" or "golden":
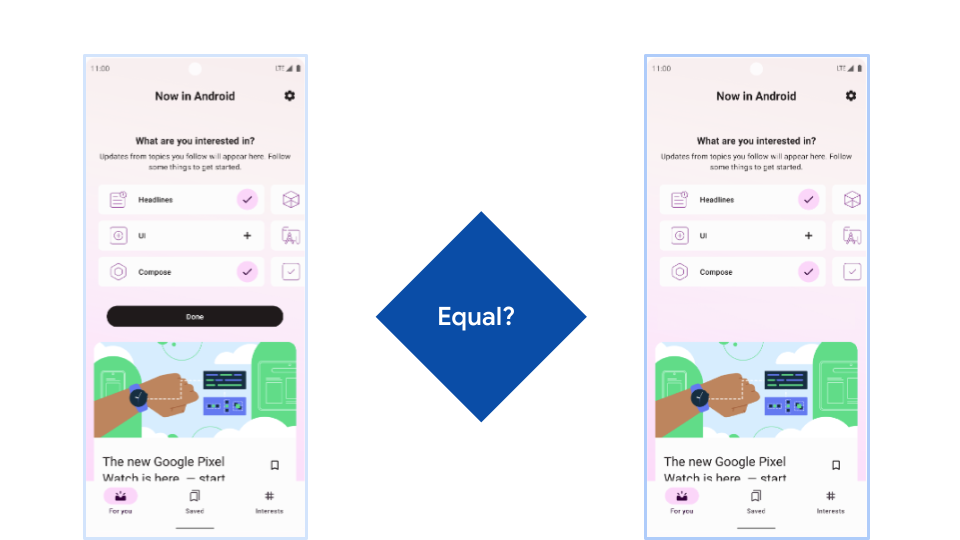
If the images are the same, the test passes. If there are differences between them, the tool creates a report:
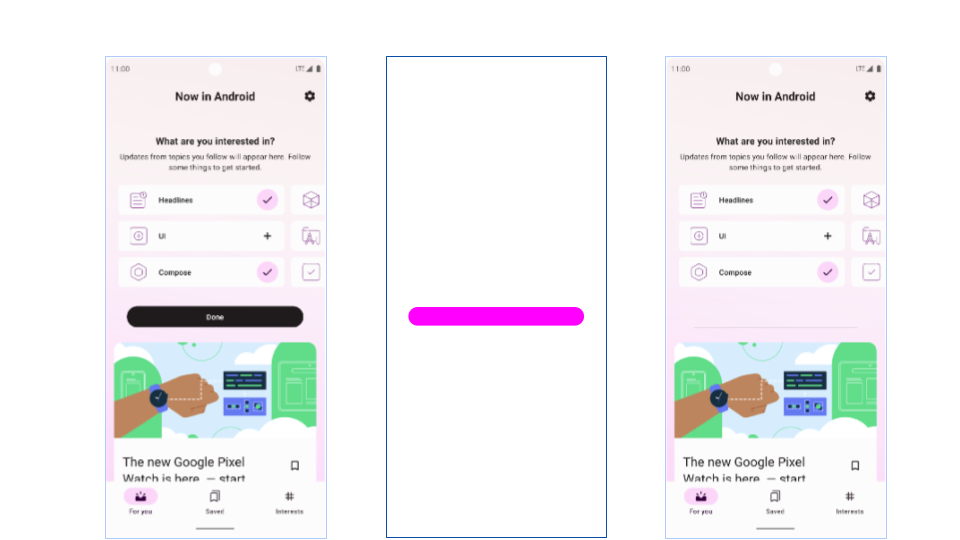
With the report, you have two possible responses:
- Realize that there is an error in the new code and fix it.
- Approve the new screenshot and replace the reference image with the new one.
Screenshot tests have a different workflow than regular tests because a failed test doesn't always mean that there is an error.
Advantages
The advantages or screenshot tests are:
- A screenshot test does multiple assertions per test. For example, a single test can check colors, margins, sizes, and fonts.
- A screenshot test is much easier to write, understand, and maintain than an equivalent behavior test.
- They are especially useful when verifying and catching regressions on different screen sizes.
Disadvantages
However, screenshot tests can also have disadvantages:
- Dealing with the reference images can be cumbersome, as a big project might end up with thousands of PNGs.
- Different platforms (Linux, Max, and Windows) produce slightly different screenshots.
- They are slower than equivalent behavior tests.
- Having a large number of screenshot tests can cause problems, for example when a single change affects thousands of screenshots.
The following sections provide recommendations on addressing these issues.
Keep screenshot tests to a minimum
You should minimize the number of screenshot tests while maximizing the feedback and coverage for regressions.
Combinations of different UI states can grow the number of tests very quickly. The following are some of the ways you can verify a part of your app's UI:
- On different themes
- Using different font sizes
- Inside different screen sizes or bounds
If you do this for every component, layout and screen of your app, you end up with thousands of screenshot files, most of which don't give you any extra feedback.
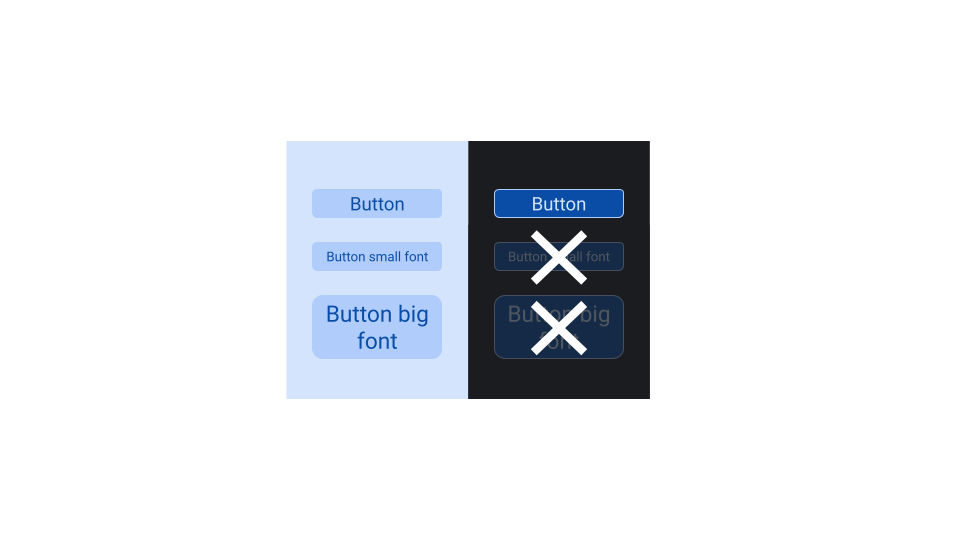
For example, if you want to test a custom button with light and dark themes, and with 3 font sizes, you don't need to create combinations of all of them. Instead, you can choose just one of the themes. This is because the way the button reacts to long words has no effect on the theme.
Store reference images
Reference (or golden) images are usually PNG files that can be checked into your source control. However Git and most source control managers are optimized for text files, not large binary files.
You have 3 options to manage these files:
- Keep using git, but trying to minimize storage use.
- Use Git LFS.
- Use a cloud service to manage the screenshots.
Platform differences
Screenshot tests rely on low-level platform APIs to draw specific features like text or shadows, and platforms can implement those in different ways. If you develop on a Mac and save new screenshots taken locally, you might see broken tests on a Linux CI machine.
There are 2 ways to work around the issue:
- Tolerate small changes
- Take screenshots on a server
Tolerate small changes
You can configure most screenshot testing libraries to allow for small differences when comparing two screenshots.
There are two approaches to this:
- Configure a tolerance based on a percentage of modified pixels or a percentage of total difference in pixel values.
- Use a smart differ—the algorithm that compares the screenshots—to verify structural and semantic similarity instead of pixels.
The disadvantage of this approach is that it could create false positives, and not catch errors that are either below the threshold, or erroneously considered similar enough.
Take screenshots on a server
To use a pixel-perfect screenshot comparator, you must make sure that your tests take screenshots in the same conditions. To do so, you can use your Continuous Integration (CI) system or employ a cloud service.
For example, you can create a step in your CI workflow that does the following:
- Runs the screenshot tests (only necessary when not using pixel-perfect matching).
- Records new screenshots if the previous step failed.
- Commits the new files into the branch.
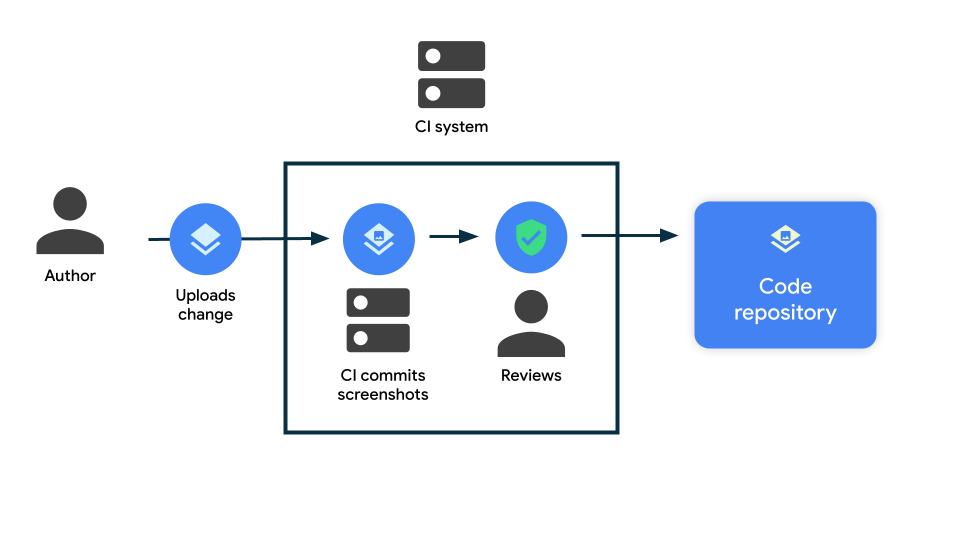
Using this approach, the screenshot tests never fail on CI, but it modifies the change for you. This way you and the change reviewers can accept the new screenshots by merging the change.
Screenshot testing tools
Consider the key following key differences between the available tools and libraries for screenshot testing:
- Environment: Local tests that run on the host, or instrumented tests that run on an emulator or device.
- Rendering engine: Host-side screenshot solutions can use Layoutlib—Android
Studio's rendering engine for previews—or Robolectric Native Graphics (RNG).
- Layoutlib-based frameworks are focused on rendering static components, using different states to show different behavior. They're typically easier to use.
- Frameworks that integrate with RNG can use all the features from Robolectric, allowing for tests with a bigger scope.