
Testing user interactions helps ensure users don't encounter unexpected results or have a poor experience when interacting with your app. You should get into the habit of creating user interface (UI) tests if you need to verify that the UI of your app is functioning correctly.
One approach to UI testing is to have a human tester perform a set of user operations on the target app and verify that it is behaving correctly. However, this manual approach can be time-consuming and error-prone. A more efficient approach is to write your UI tests such that user actions are performed in an automated way. The automated approach lets you run your tests quickly and reliably in a repeatable manner.
UI tests launch an app (or part of it), then simulate user interactions, and finally check that the app reacted appropriately. They are integration tests that can range from verifying the behavior of a small component to a large navigation test that traverses a whole user flow. They are useful to check for regressions and to verify compatibility with different API levels and physical devices.
Run UI tests
- To run instrumented UI tests using Android Studio, you implement your
test code in a separate Android test folder -
src/androidTest/java. The Android Gradle Plugin builds a test app based on your test code, then loads the test app on the same device as the target app. In your test code, you can use UI testing frameworks to simulate user interactions on the target app, in order to perform testing tasks that cover specific usage scenarios. - You can also use Robolectric to run UI tests on the JVM.
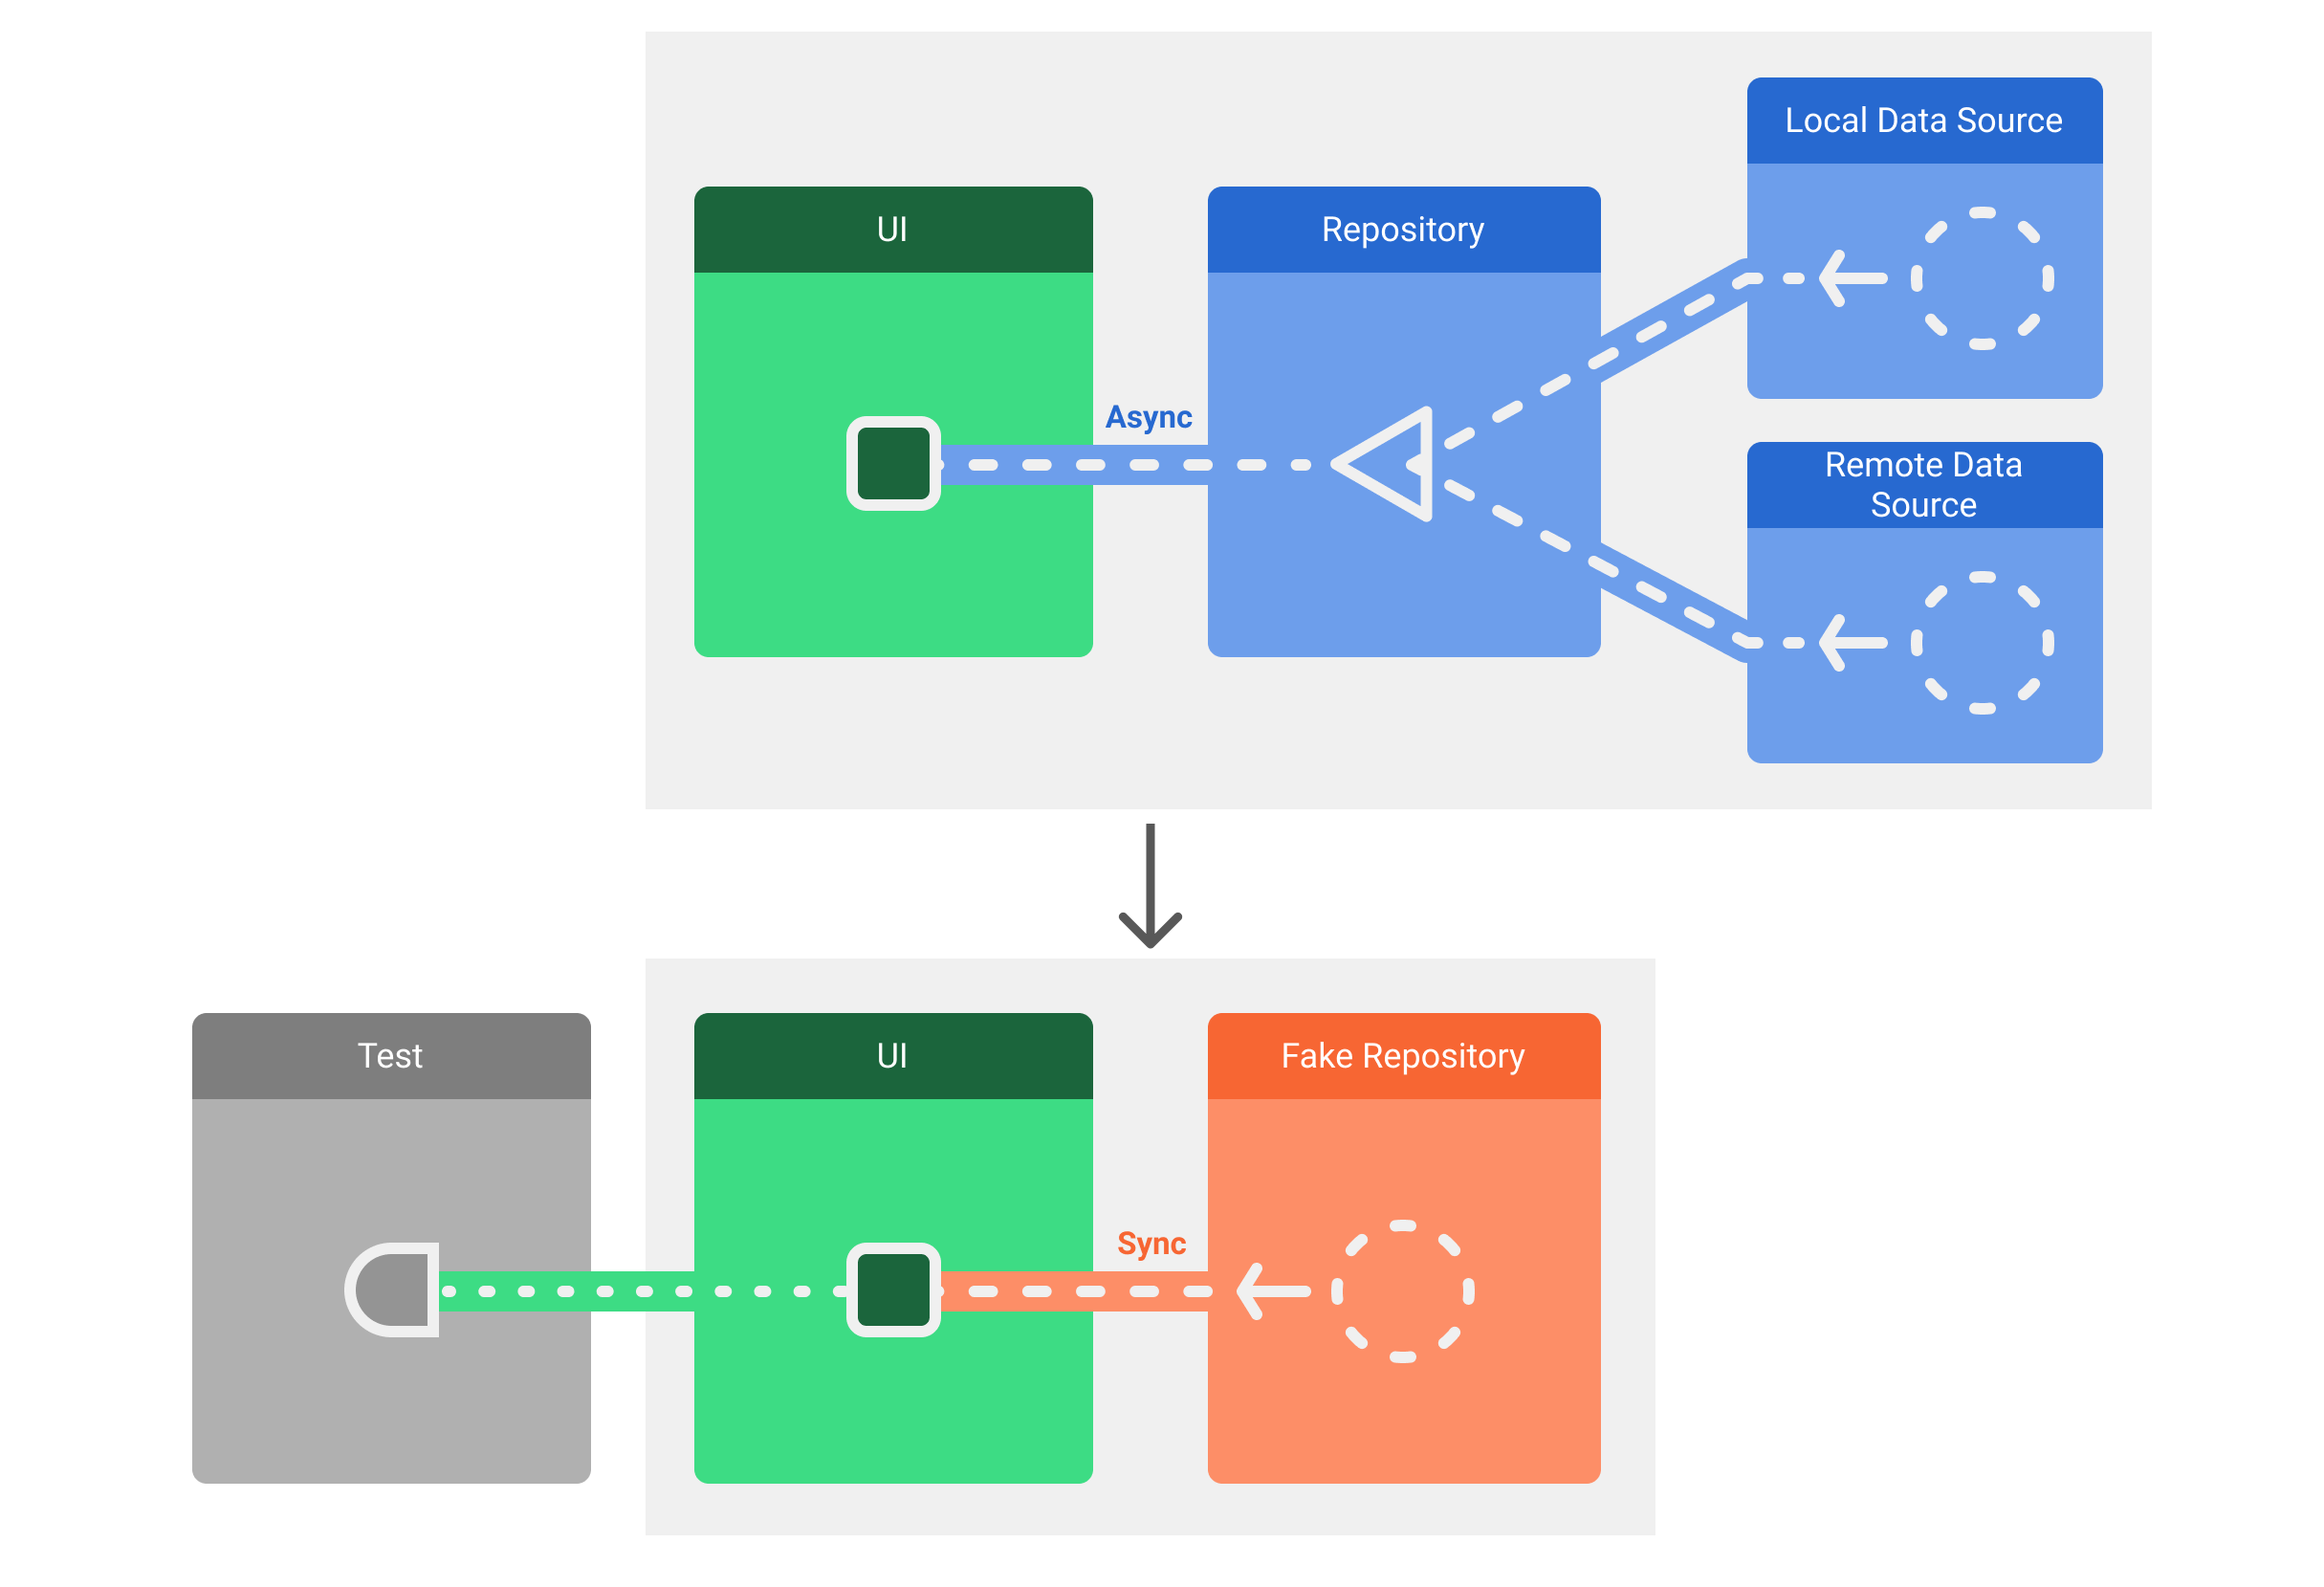
Architecture and test setup
The architecture of your app should let tests replace parts of it for testing doubles and you should use libraries that provide utilities to help with testing. For example, you can replace a data repository module with an in-memory version of it that provides fake, deterministic data to the test.
The recommended approach to replace dependencies is dependency injection. You can create your own system manually but we recommend using a DI framework like Hilt for this.
Why test UIs automatically?
An Android app can target thousands of different devices across many API levels and form factors, and the high level of customization that the OS brings to the user means your app could be rendered incorrectly or even crash on some devices.
UI testing lets you do compatibility testing, verifying the behavior of an app in different contexts. You might want to run your UI tests on devices that vary in the following ways:
- API level: 21, 25, and 30.
- Locale: English, Arabic, and Chinese.
- Orientation: Portrait, landscape.
Moreover, apps should check the behavior beyond phones. You should test on tablets, foldables, and other devices. Read more about testing different screen sizes.
Types of UI Tests
This section covers two types of UI tests:
- Behavior tests analyze the UI hierarchy to make assertions on the properties of the UI elements.
- Screenshot tests take screenshots of a UI and compares them with a previously-approved images.