
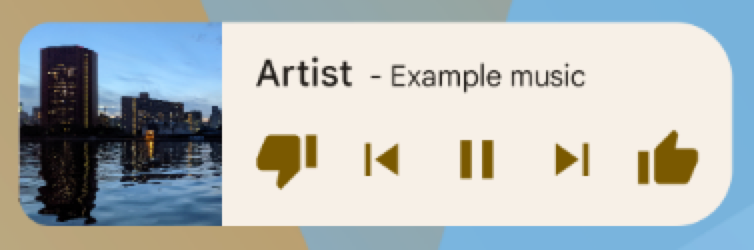
アプリ ウィジェットとは、他のアプリ(ホーム画面など)に埋め込んで定期的に更新を取得することができる小さなアプリビューです。このようなビューをユーザー インターフェースでは ウィジェットと呼び、ウィジェットはアプリ ウィジェット プロバイダ(またはウィジェット プロバイダ)を使用して公開できます。他のウィジェットを格納するアプリ コンポーネントをアプリ ウィジェット ホスト(またはウィジェット ホスト)と呼びます。 図 1 は、音楽ウィジェットの例を示しています。
このドキュメントでは、ウィジェット プロバイダを使用してウィジェットを公開する方法について説明します。アプリ ウィジェットをホストする独自の AppWidgetHost を作成する方法については、ウィジェット ホストを作成するをご覧ください。
ウィジェットの設計方法については、アプリ ウィジェットの概要をご覧ください。
ウィジェット コンポーネント
ウィジェットを作成するには、次の基本的なコンポーネントが必要です。
AppWidgetProviderInfoオブジェクト- ウィジェットのメタデータ(ウィジェットのレイアウト、更新の頻度、
AppWidgetProviderクラスなど)を記述します。AppWidgetProviderInfoは、このドキュメントで説明するように XML で定義されます。 AppWidgetProviderクラス- ウィジェットとのインターフェースをプログラムで実現する基本的なメソッドを定義します。ウィジェットが更新、有効化、無効化、削除されたときにこのクラスを介してブロードキャストが届きます。このドキュメントで説明するように、マニフェストで 宣言
AppWidgetProviderして 実装します。 - ビューのレイアウト
- ウィジェットの初期レイアウトを定義します。レイアウトは、このドキュメントで説明するように XML で定義 されます。
図 2 は、これらのコンポーネントがアプリ ウィジェットの処理フロー全体にどのように適合するかを示しています。

ウィジェットでユーザー設定が必要な場合は、アプリ ウィジェットの設定アクティビティを実装します。このアクティビティを使用すると、ユーザーはウィジェットの設定(時計ウィジェットのタイムゾーンなど)を変更できます。
- Android 12(API レベル 31)以降では、デフォルト構成を指定して、後でユーザーがウィジェットを再構成できるようにすることができます。詳しくは、Use the widget's default configurationとEnable users to reconfigure placed widgetsをご覧ください。
- Android 11(API レベル 30)以前では、ユーザーがウィジェットをホーム画面に追加するたびにこのアクティビティが起動します。
柔軟なウィジェット レイアウト、その他の機能強化、高度なウィジェット、コレクション ウィジェット、ウィジェット ホストの作成もおすすめします。
AppWidgetProviderInfo XML を宣言する
メタデータ設定(デフォルトのセルサイズ、サイズ変更の制約、更新頻度など)の定義は、従来のビューと Glance ベースのウィジェットでまったく同じです。
メタデータ XML ファイルを定義して構成する方法については、Glance ドキュメントの Compose-first AppWidgetProviderInfo XML を宣言するセクションをご覧ください。
AppWidgetProvider クラスを使用してウィジェットのブロードキャストを処理する
プラットフォームのブロードキャスト レシーバのメカニズム、マニフェスト宣言フィルタ、ライフサイクル イベント ループは、プラットフォームの下で統合されています。Compose-first 開発では、これらのブロードキャストは GlanceAppWidgetReceiver ラッパーを使用して調整されます。
マニフェストでレシーバを登録して Hilt と互換性のあるライフサイクル オーバーライドを実装する方法については、Glance ドキュメントの Compose-first Use the AppWidgetProvider class to handle broadcasts sectionをご覧ください。
ウィジェット レイアウトを作成する
ウィジェットの初期レイアウトを XML で定義し、プロジェクトの res/layout/ ディレクトリに保存する必要があります。詳しくは、設計ガイドラインをご覧ください。
レイアウトに慣れているデベロッパーであれば、ウィジェット レイアウトの作成は簡単に行えます
。ただし、ウィジェット レイアウトは
RemoteViewsをベースとしており、すべての種類のレイアウトやビューがサポートされているわけではないことに注意が必要です。
RemoteViews でサポートされているカスタムビューやビューのサブクラスは使用できません。
RemoteViews は ViewStub もサポートします。これはサイズがゼロの見えない
View で、これを使用してランタイムにレイアウト リソースを遅延インフレートすることができます。
ステートフル動作のサポート
Android 12 では、以下の既存のコンポーネントを使用したステートフル動作のサポートが追加されています。
このウィジェットはまだステートレスであるため、アプリが状態を保存し、状態変化イベントを登録できるようにする必要があります。
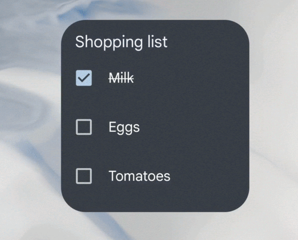
RemoteViews.setCompoundButtonChecked次のコードサンプルは、これらのコンポーネントを実装する方法を示しています。
Kotlin
// Check the view.
remoteView.setCompoundButtonChecked(R.id.my_checkbox, true)

// Check a radio group.
remoteView.setRadioGroupChecked(R.id.my_radio_group, R.id.radio_button_2)

// Listen for check changes. The intent has an extra with the key
// EXTRA_CHECKED that specifies the current checked state of the view.
remoteView.setOnCheckedChangeResponse(
        R.id.my_checkbox,
        RemoteViews.RemoteResponse.fromPendingIntent(onCheckedChangePendingIntent)
)
Java
// Check the view.
remoteView.setCompoundButtonChecked(R.id.my_checkbox, true);

// Check a radio group.
remoteView.setRadioGroupChecked(R.id.my_radio_group, R.id.radio_button_2);

// Listen for check changes. The intent has an extra with the key
// EXTRA_CHECKED that specifies the current checked state of the view.
remoteView.setOnCheckedChangeResponse(
    R.id.my_checkbox,
    RemoteViews.RemoteResponse.fromPendingIntent(onCheckedChangePendingIntent));
2 つのレイアウトを用意します。1 つは res/layout-v31 の Android 12 以降を搭載しているデバイスをターゲットにしたレイアウトで、もう 1 つはデフォルトの res/layout フォルダ内の以前の Android 11 以前をターゲットにしたレイアウトです。
角の丸みを実装する
外側の背景と内側の比例半径の計算は標準的で、共有されています。Compose-first 開発では、カスタムテーマ リソースとともに Kotlin で動的に設定できます。
角の半径を実装する、または古い Android デバイスの動的スタイルを設定する方法については、Glance ドキュメントの Compose-first 角の丸みを実装するをご覧ください。