
OpenGL ES 環境では、投影とカメラビューを使用して、描画されたオブジェクトを 目で見る物理物によく似ていますこのシミュレーションは、 実際の表示は、描画されたオブジェクト座標を数学的に変換して行います。
- 投影 - この変換は、描画されたオブジェクトの座標を
それらが表示される
GLSurfaceViewの幅と高さ。なし この計算では、OpenGL ES によって描画されたオブジェクトはビューの不均等な比率によって歪められます。 クリックします。射影変換は、通常、予測入力の比率が OpenGL ビューは、レンダラのonSurfaceChanged()メソッドで確立または変更します。OpenGL ES のプロジェクションと 座標マッピングについては、 描画用の座標のマッピング オブジェクト。 - カメラビュー - この変換では、
指定します。OpenGL ES では実際のカメラは定義されないことに注意してください。
代わりに、画像の表示を変換してカメラをシミュレートするユーティリティ メソッドが提供されています。
描画されます。カメラビューの変換は、確立したときに一度しか計算されないことがあります。
GLSurfaceViewするか、ユーザーの操作や 必要があります。
このレッスンでは、投影とカメラビューを作成し、描画した図形に適用する方法について説明します。
GLSurfaceView。
プロジェクションを定義する
射影変換のデータは onSurfaceChanged() で計算されます
GLSurfaceView.Renderer クラスのメソッドを呼び出します。次のサンプルコード
GLSurfaceView の高さと幅を受け取り、それを使用して
Matrix.frustumM() メソッドを使用して射影変換 Matrix を使用する:
Kotlin
// vPMatrix is an abbreviation for "Model View Projection Matrix"
private val vPMatrix = FloatArray(16)
private val projectionMatrix = FloatArray(16)
private val viewMatrix = FloatArray(16)

override fun onSurfaceChanged(unused: GL10, width: Int, height: Int) {
    GLES20.glViewport(0, 0, width, height)

    val ratio: Float = width.toFloat() / height.toFloat()

    // this projection matrix is applied to object coordinates
    // in the onDrawFrame() method
    Matrix.frustumM(projectionMatrix, 0, -ratio, ratio, -1f, 1f, 3f, 7f)
}
Java
// vPMatrix is an abbreviation for "Model View Projection Matrix"
private final float[] vPMatrix = new float[16];
private final float[] projectionMatrix = new float[16];
private final float[] viewMatrix = new float[16];

@Override
public void onSurfaceChanged(GL10 unused, int width, int height) {
    GLES20.glViewport(0, 0, width, height);

    float ratio = (float) width / height;

    // this projection matrix is applied to object coordinates
    // in the onDrawFrame() method
    Matrix.frustumM(projectionMatrix, 0, -ratio, ratio, -1, 1, 3, 7);
}
このコードでは、射影行列 mProjectionMatrix が入力されています。この行列は、
onDrawFrame() メソッドでカメラビュー変換を使用します。これについては次のセクションで説明します。
注: モデルに射影変換を適用するだけで、 描画オブジェクトは通常、非常に空白の画面になります。一般的には、カメラにカメラを ビュー変換が必要です
カメラビューの定義
カメラビュー変換を追加して、描画オブジェクトの変換プロセスを完了します。
レンダリング処理の一部にすぎません次のサンプルコードでは、カメラビューが
Matrix.setLookAtM() を使用して計算されます。
以前に計算した射影行列と結合します。組み合わせた
変換行列が描画されたシェイプに渡されます。
Kotlin
override fun onDrawFrame(unused: GL10) {
    ...
    // Set the camera position (View matrix)
    Matrix.setLookAtM(viewMatrix, 0, 0f, 0f, 3f, 0f, 0f, 0f, 0f, 1.0f, 0.0f)

    // Calculate the projection and view transformation
    Matrix.multiplyMM(vPMatrix, 0, projectionMatrix, 0, viewMatrix, 0)

    // Draw shape
    triangle.draw(vPMatrix)
Java
@Override
public void onDrawFrame(GL10 unused) {
    ...
    // Set the camera position (View matrix)
    Matrix.setLookAtM(viewMatrix, 0, 0, 0, 3, 0f, 0f, 0f, 0f, 1.0f, 0.0f);

    // Calculate the projection and view transformation
    Matrix.multiplyMM(vPMatrix, 0, projectionMatrix, 0, viewMatrix, 0);

    // Draw shape
    triangle.draw(vPMatrix);
}
投影とカメラ変換の適用
図に示す投影とカメラビュー変換行列を使用するには、
セクションをプレビューします。まず、事前に定義した頂点シェーダーにマトリックス変数を追加します。
Triangle クラス内:
Kotlin
class Triangle {

    private val vertexShaderCode =
            // This matrix member variable provides a hook to manipulate
            // the coordinates of the objects that use this vertex shader
            "uniform mat4 uMVPMatrix;" +
            "attribute vec4 vPosition;" +
            "void main() {" +
            // the matrix must be included as a modifier of gl_Position
            // Note that the uMVPMatrix factor *must be first* in order
            // for the matrix multiplication product to be correct.
            "  gl_Position = uMVPMatrix * vPosition;" +
            "}"

    // Use to access and set the view transformation
    private var vPMatrixHandle: Int = 0

    ...
}
Java
public class Triangle {

    private final String vertexShaderCode =
        // This matrix member variable provides a hook to manipulate
        // the coordinates of the objects that use this vertex shader
        "uniform mat4 uMVPMatrix;" +
        "attribute vec4 vPosition;" +
        "void main() {" +
        // the matrix must be included as a modifier of gl_Position
        // Note that the uMVPMatrix factor *must be first* in order
        // for the matrix multiplication product to be correct.
        "  gl_Position = uMVPMatrix * vPosition;" +
        "}";

    // Use to access and set the view transformation
    private int vPMatrixHandle;

    ...
}
次に、グラフィック オブジェクトの draw() メソッドを変更して、結合された
変換行列を作成し、それをシェイプに適用します。
Kotlin
fun draw(mvpMatrix: FloatArray) { // pass in the calculated transformation matrix
    ...

    // get handle to shape's transformation matrix
    vPMatrixHandle = GLES20.glGetUniformLocation(mProgram, "uMVPMatrix")

    // Pass the projection and view transformation to the shader
    GLES20.glUniformMatrix4fv(vPMatrixHandle, 1, false, mvpMatrix, 0)

    // Draw the triangle
    GLES20.glDrawArrays(GLES20.GL_TRIANGLES, 0, vertexCount)

    // Disable vertex array
    GLES20.glDisableVertexAttribArray(positionHandle)
}
Java
public void draw(float[] mvpMatrix) { // pass in the calculated transformation matrix
    ...

    // get handle to shape's transformation matrix
    vPMatrixHandle = GLES20.glGetUniformLocation(mProgram, "uMVPMatrix");

    // Pass the projection and view transformation to the shader
    GLES20.glUniformMatrix4fv(vPMatrixHandle, 1, false, mvpMatrix, 0);

    // Draw the triangle
    GLES20.glDrawArrays(GLES20.GL_TRIANGLES, 0, vertexCount);

    // Disable vertex array
    GLES20.glDisableVertexAttribArray(positionHandle);
}
投影とカメラビューの変換を正しく計算して適用したら、 グラフィック オブジェクトが正しい比率で描画され、次のようになります。
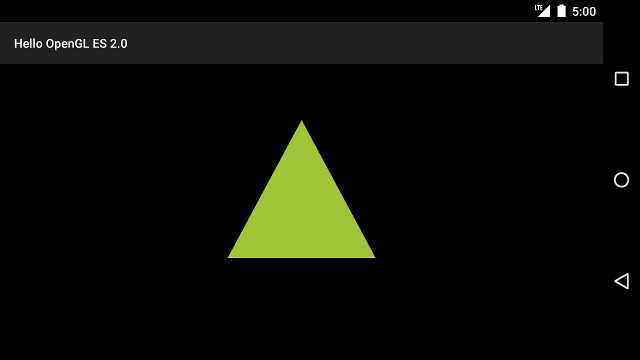
図 1. 投影とカメラビューが適用された三角形の描画。
シェイプを正しい比率で表示するアプリケーションを作成したら、次は シェイプに動きを加えることができます。