
In addition to the Canvas composable, Compose has several useful graphics
Modifiers which aid in drawing custom content. These modifiers are useful
because they can be applied to any composable.
Drawing modifiers
All drawing commands are done with a drawing modifier in Compose. There are three main drawing modifiers in Compose:
The base modifier for drawing is drawWithContent, where you can decide the
drawing order of your Composable and the drawing commands issued inside the
modifier. drawBehind is a convenient wrapper around drawWithContent which has
the drawing order set to behind the content of the composable. drawWithCache
calls either onDrawBehind or onDrawWithContent inside of it - and provides a
mechanism for caching the objects created in them.
Modifier.drawWithContent: Choose drawing order
Modifier.drawWithContent lets you
execute DrawScope operations before or after the content of the
composable. Be sure to call drawContent to then render the actual content of
the composable. With this modifier, you can decide the order of operations, if
you want your content to be drawn before or after your custom drawing
operations.
For example, if you wished to render a radial gradient on top of your content to create a flashlight keyhole effect on the UI, you could do the following:
var pointerOffset by remember { mutableStateOf(Offset(0f, 0f)) } Column( modifier = Modifier .fillMaxSize() .pointerInput("dragging") { detectDragGestures { change, dragAmount -> pointerOffset += dragAmount } } .onSizeChanged { pointerOffset = Offset(it.width / 2f, it.height / 2f) } .drawWithContent { drawContent() // draws a fully black area with a small keyhole at pointerOffset that’ll show part of the UI. drawRect( Brush.radialGradient( listOf(Color.Transparent, Color.Black), center = pointerOffset, radius = 100.dp.toPx(), ) ) } ) { // Your composables here }
Modifier.drawBehind: Drawing behind a composable
Modifier.drawBehind lets you perform
DrawScope operations behind the composable content that is drawn on screen. If
you take a look at the implementation of Canvas, you might notice that it
is just a convenient wrapper around Modifier.drawBehind.
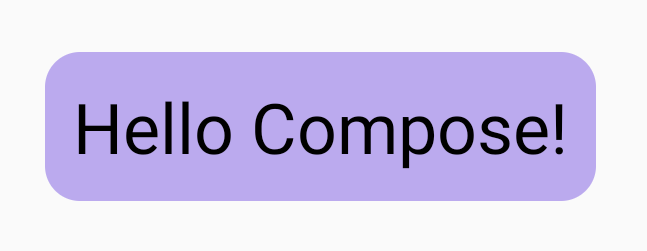
To draw a rounded rectangle behind Text:
Text( "Hello Compose!", modifier = Modifier .drawBehind { drawRoundRect( Color(0xFFBBAAEE), cornerRadius = CornerRadius(10.dp.toPx()) ) } .padding(4.dp) )
Which produces the following result:
Modifier.drawWithCache: Drawing and caching draw objects
Modifier.drawWithCache keeps the objects
that are created inside of it cached. The objects are cached as long as the size
of the drawing area is the same, or any state objects that are read have not
changed. This modifier is useful for improving performance of drawing calls as
it avoids the need to reallocate objects (such as: Brush, Shader, Path etc.)
that are created on draw.
Alternatively, you could also cache objects using remember, outside of the
modifier. However, this is not always possible as you don't always have access
to the composition. It can be more performant to use drawWithCache if the
objects are only used for drawing.
For example, if you create a Brush to draw a gradient behind a Text, using
drawWithCache caches the Brush object until the size of the drawing area
changes:
Text( "Hello Compose!", modifier = Modifier .drawWithCache { val brush = Brush.linearGradient( listOf( Color(0xFF9E82F0), Color(0xFF42A5F5) ) ) onDrawBehind { drawRoundRect( brush, cornerRadius = CornerRadius(10.dp.toPx()) ) } } )

Graphics modifiers
Modifier.graphicsLayer: Apply transformations to composables
Modifier.graphicsLayer
is a modifier that makes the content of the composable draw into a draw layer. A
layer provides a few different functions, such as:
- Isolation for its drawing instructions (similar to
RenderNode). Drawing instructions captured as part of a layer can be re-issued efficiently by the rendering pipeline without re-executing application code. - Transformations that apply to all the drawing instructions contained within a layer.
- Rasterization for composition capabilities. When a layer is rasterized, its drawing instructions are executed and the output is captured into an offscreen buffer. Compositing such a buffer for subsequent frames is faster than executing the individual instructions, but it will behave as a bitmap when transforms like scaling or rotation are applied.
Transformations
Modifier.graphicsLayer provides isolation for its drawing instructions; for
instance, various transformations can be applied using Modifier.graphicsLayer.
These can be animated or modified without needing to re-execute the drawing
lambda.
Modifier.graphicsLayer does not change the measured size or placement of your
composable, as it only affects the draw phase. This means that your composable
might overlap others if it ends up drawing outside of its layout bounds.
The following transformations can be applied with this modifier:
Scale - increase size
scaleX and scaleY enlarges or shrinks content in the horizontal or vertical
direction, respectively. A value of 1.0f indicates no change in scale, a value
of 0.5f means half of the dimension.
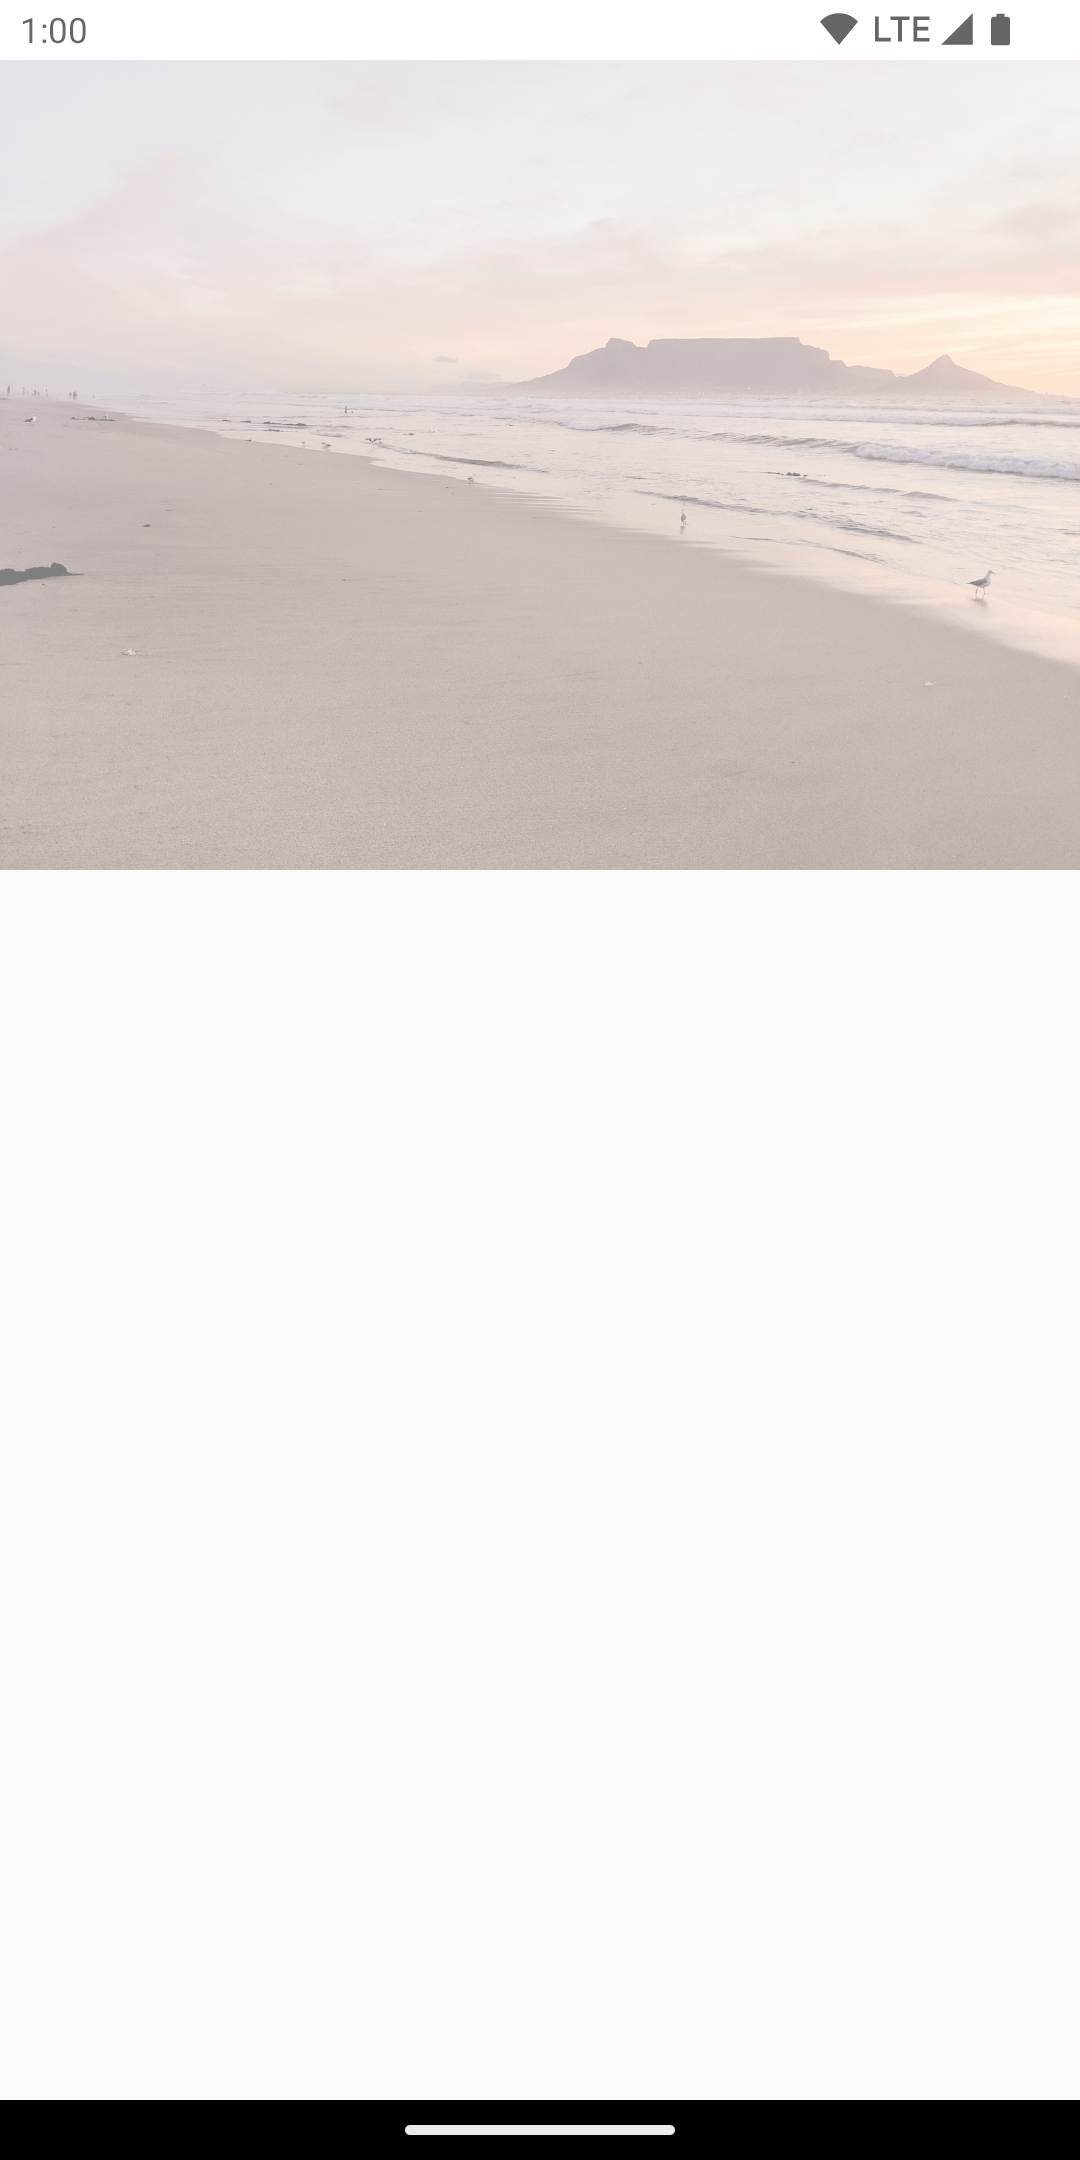
Image( painter = painterResource(id = R.drawable.sunset), contentDescription = "Sunset", modifier = Modifier .graphicsLayer { this.scaleX = 1.2f this.scaleY = 0.8f } )
Translation
translationX and translationY can be changed with graphicsLayer,
translationX moves the composable left or right. translationY moves the
composable up or down.
Image( painter = painterResource(id = R.drawable.sunset), contentDescription = "Sunset", modifier = Modifier .graphicsLayer { this.translationX = 100.dp.toPx() this.translationY = 10.dp.toPx() } )
Rotation
Set rotationX to rotate horizontally, rotationY to rotate vertically and
rotationZ to rotate on the Z axis (standard rotation). This value is specified
in degrees (0-360).
Image( painter = painterResource(id = R.drawable.sunset), contentDescription = "Sunset", modifier = Modifier .graphicsLayer { this.rotationX = 90f this.rotationY = 275f this.rotationZ = 180f } )
Origin
A transformOrigin can be specified. It is then used as the point from which
transformations take place. All the examples so far have used
TransformOrigin.Center, which is at (0.5f, 0.5f). If you specify the origin at
(0f, 0f), the transformations then start from the top-left corner of the
composable.
If you change the origin with a rotationZ transformation, you can see that the
item rotates around the top left of the composable:
Image( painter = painterResource(id = R.drawable.sunset), contentDescription = "Sunset", modifier = Modifier .graphicsLayer { this.transformOrigin = TransformOrigin(0f, 0f) this.rotationX = 90f this.rotationY = 275f this.rotationZ = 180f } )
Clip and Shape
Shape specifies the outline that the content clips to when clip = true. In
this example, we set two boxes to have two different clips - one using
graphicsLayer clip variable, and the other using the convenient wrapper
Modifier.clip.
Column(modifier = Modifier.padding(16.dp)) { Box( modifier = Modifier .size(200.dp) .graphicsLayer { clip = true shape = CircleShape } .background(Color(0xFFF06292)) ) { Text( "Hello Compose", style = TextStyle(color = Color.Black, fontSize = 46.sp), modifier = Modifier.align(Alignment.Center) ) } Box( modifier = Modifier .size(200.dp) .clip(CircleShape) .background(Color(0xFF4DB6AC)) ) }
The contents of the first box (the text saying “Hello Compose”) are clipped to the circle shape:
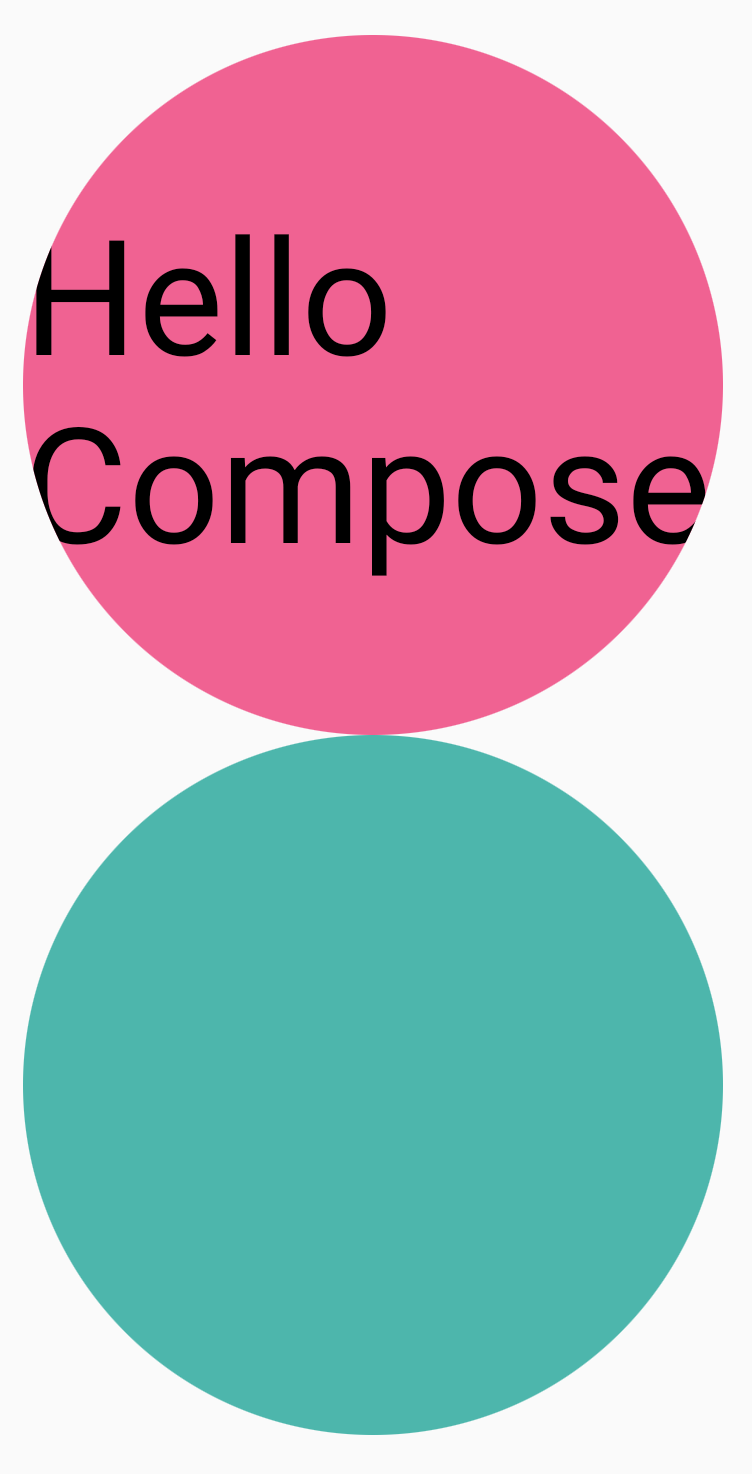
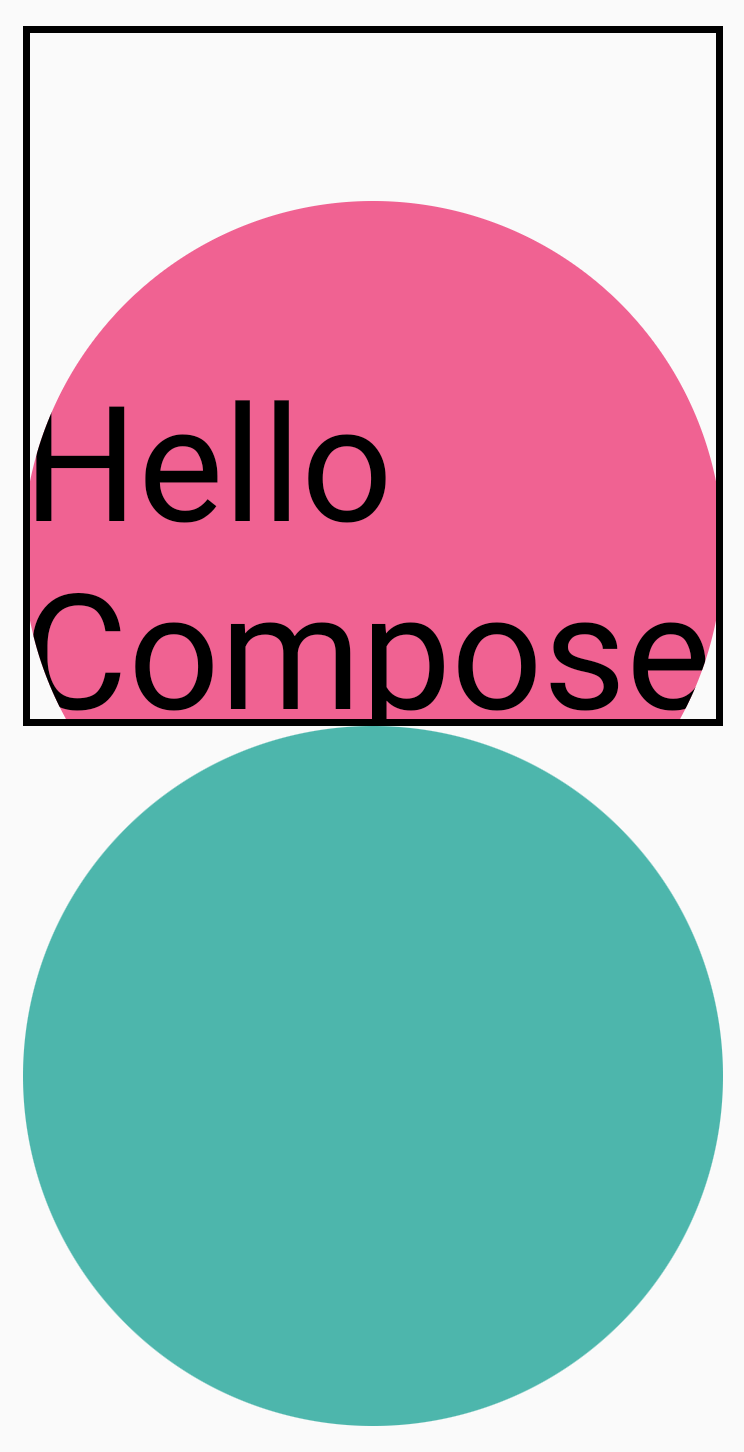
If you then apply a translationY to the top pink circle, you see that the bounds
of the Composable are still the same, but the circle draws underneath the bottom
circle (and outside of its bounds).
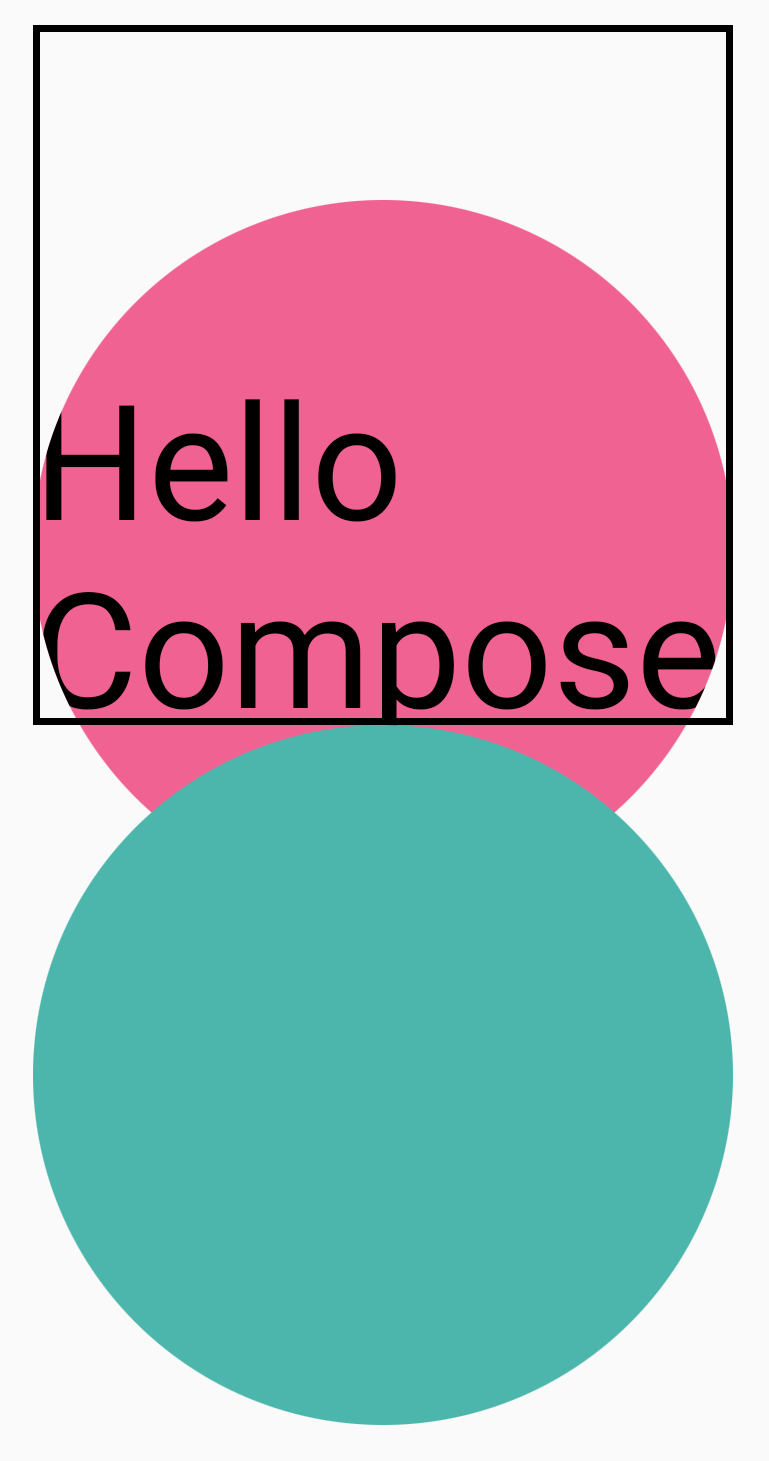
To clip the composable to the region it's drawn in, you can add another
Modifier.clip(RectangleShape) at the start of the modifier chain. The content
then remains inside of the original bounds.
Column(modifier = Modifier.padding(16.dp)) { Box( modifier = Modifier .clip(RectangleShape) .size(200.dp) .border(2.dp, Color.Black) .graphicsLayer { clip = true shape = CircleShape translationY = 50.dp.toPx() } .background(Color(0xFFF06292)) ) { Text( "Hello Compose", style = TextStyle(color = Color.Black, fontSize = 46.sp), modifier = Modifier.align(Alignment.Center) ) } Box( modifier = Modifier .size(200.dp) .clip(RoundedCornerShape(500.dp)) .background(Color(0xFF4DB6AC)) ) }
Alpha
Modifier.graphicsLayer can be used to set an alpha (opacity) for the whole
layer. 1.0f is fully opaque and 0.0f is invisible.
Image( painter = painterResource(id = R.drawable.sunset), contentDescription = "clock", modifier = Modifier .graphicsLayer { this.alpha = 0.5f } )
Compositing strategy
Working with alpha and transparency might not be as simple as changing a single
alpha value. In addition to changing an alpha, there is also the option to set a
CompositingStrategy on a graphicsLayer. A CompositingStrategy determines how the
content of the composable is composited (put together) with the other
content already drawn on screen.
The different strategies are:
Auto (default)
The compositing strategy is determined by the rest of the graphicsLayer
parameters. It renders the layer into an offscreen buffer if alpha is less than
1.0f or a RenderEffect is set. Whenever the alpha is less than 1f, a
compositing layer is created automatically to render the contents and then draw
this offscreen buffer to the destination with the corresponding alpha. Setting a
RenderEffect or overscroll always renders content into an offscreen
buffer regardless of the CompositingStrategy set.
Offscreen
The contents of the composable are always rasterized to an offscreen
texture or bitmap before rendering to the destination. This is useful for
applying BlendMode operations to mask content, and for performance when
rendering complex sets of drawing instructions.
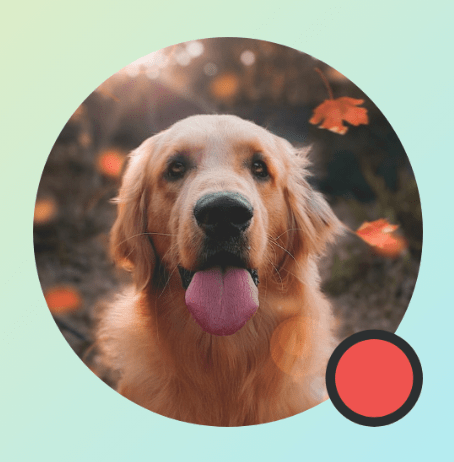
An example of using CompositingStrategy.Offscreen is with BlendModes. Taking a look at the example below,
say you want to remove parts of an Image composable by issuing a draw command that
uses BlendMode.Clear. If you do not set the compositingStrategy to
CompositingStrategy.Offscreen, the BlendMode interacts with all the contents
below it.
Image( painter = painterResource(id = R.drawable.dog), contentDescription = "Dog", contentScale = ContentScale.Crop, modifier = Modifier .size(120.dp) .aspectRatio(1f) .background( Brush.linearGradient( listOf( Color(0xFFC5E1A5), Color(0xFF80DEEA) ) ) ) .padding(8.dp) .graphicsLayer { compositingStrategy = CompositingStrategy.Offscreen } .drawWithCache { val path = Path() path.addOval( Rect( topLeft = Offset.Zero, bottomRight = Offset(size.width, size.height) ) ) onDrawWithContent { clipPath(path) { // this draws the actual image - if you don't call drawContent, it wont // render anything this@onDrawWithContent.drawContent() } val dotSize = size.width / 8f // Clip a white border for the content drawCircle( Color.Black, radius = dotSize, center = Offset( x = size.width - dotSize, y = size.height - dotSize ), blendMode = BlendMode.Clear ) // draw the red circle indication drawCircle( Color(0xFFEF5350), radius = dotSize * 0.8f, center = Offset( x = size.width - dotSize, y = size.height - dotSize ) ) } } )
By setting the CompositingStrategy to Offscreen, it creates an offscreen
texture to execute the commands to (applying the BlendMode only to the
contents of this composable). It then renders it on top of what is already
rendered on screen, not affecting the content already drawn.

If you didn't use CompositingStrategy.Offscreen, the results of applying
BlendMode.Clear clears all the pixels in the destination, regardless of what
was already set– leaving the window’s rendering buffer (black) visible. Many of
the BlendModes that involve alpha won't work as expected without an
offscreen buffer. Note the black ring around the red circle indicator:
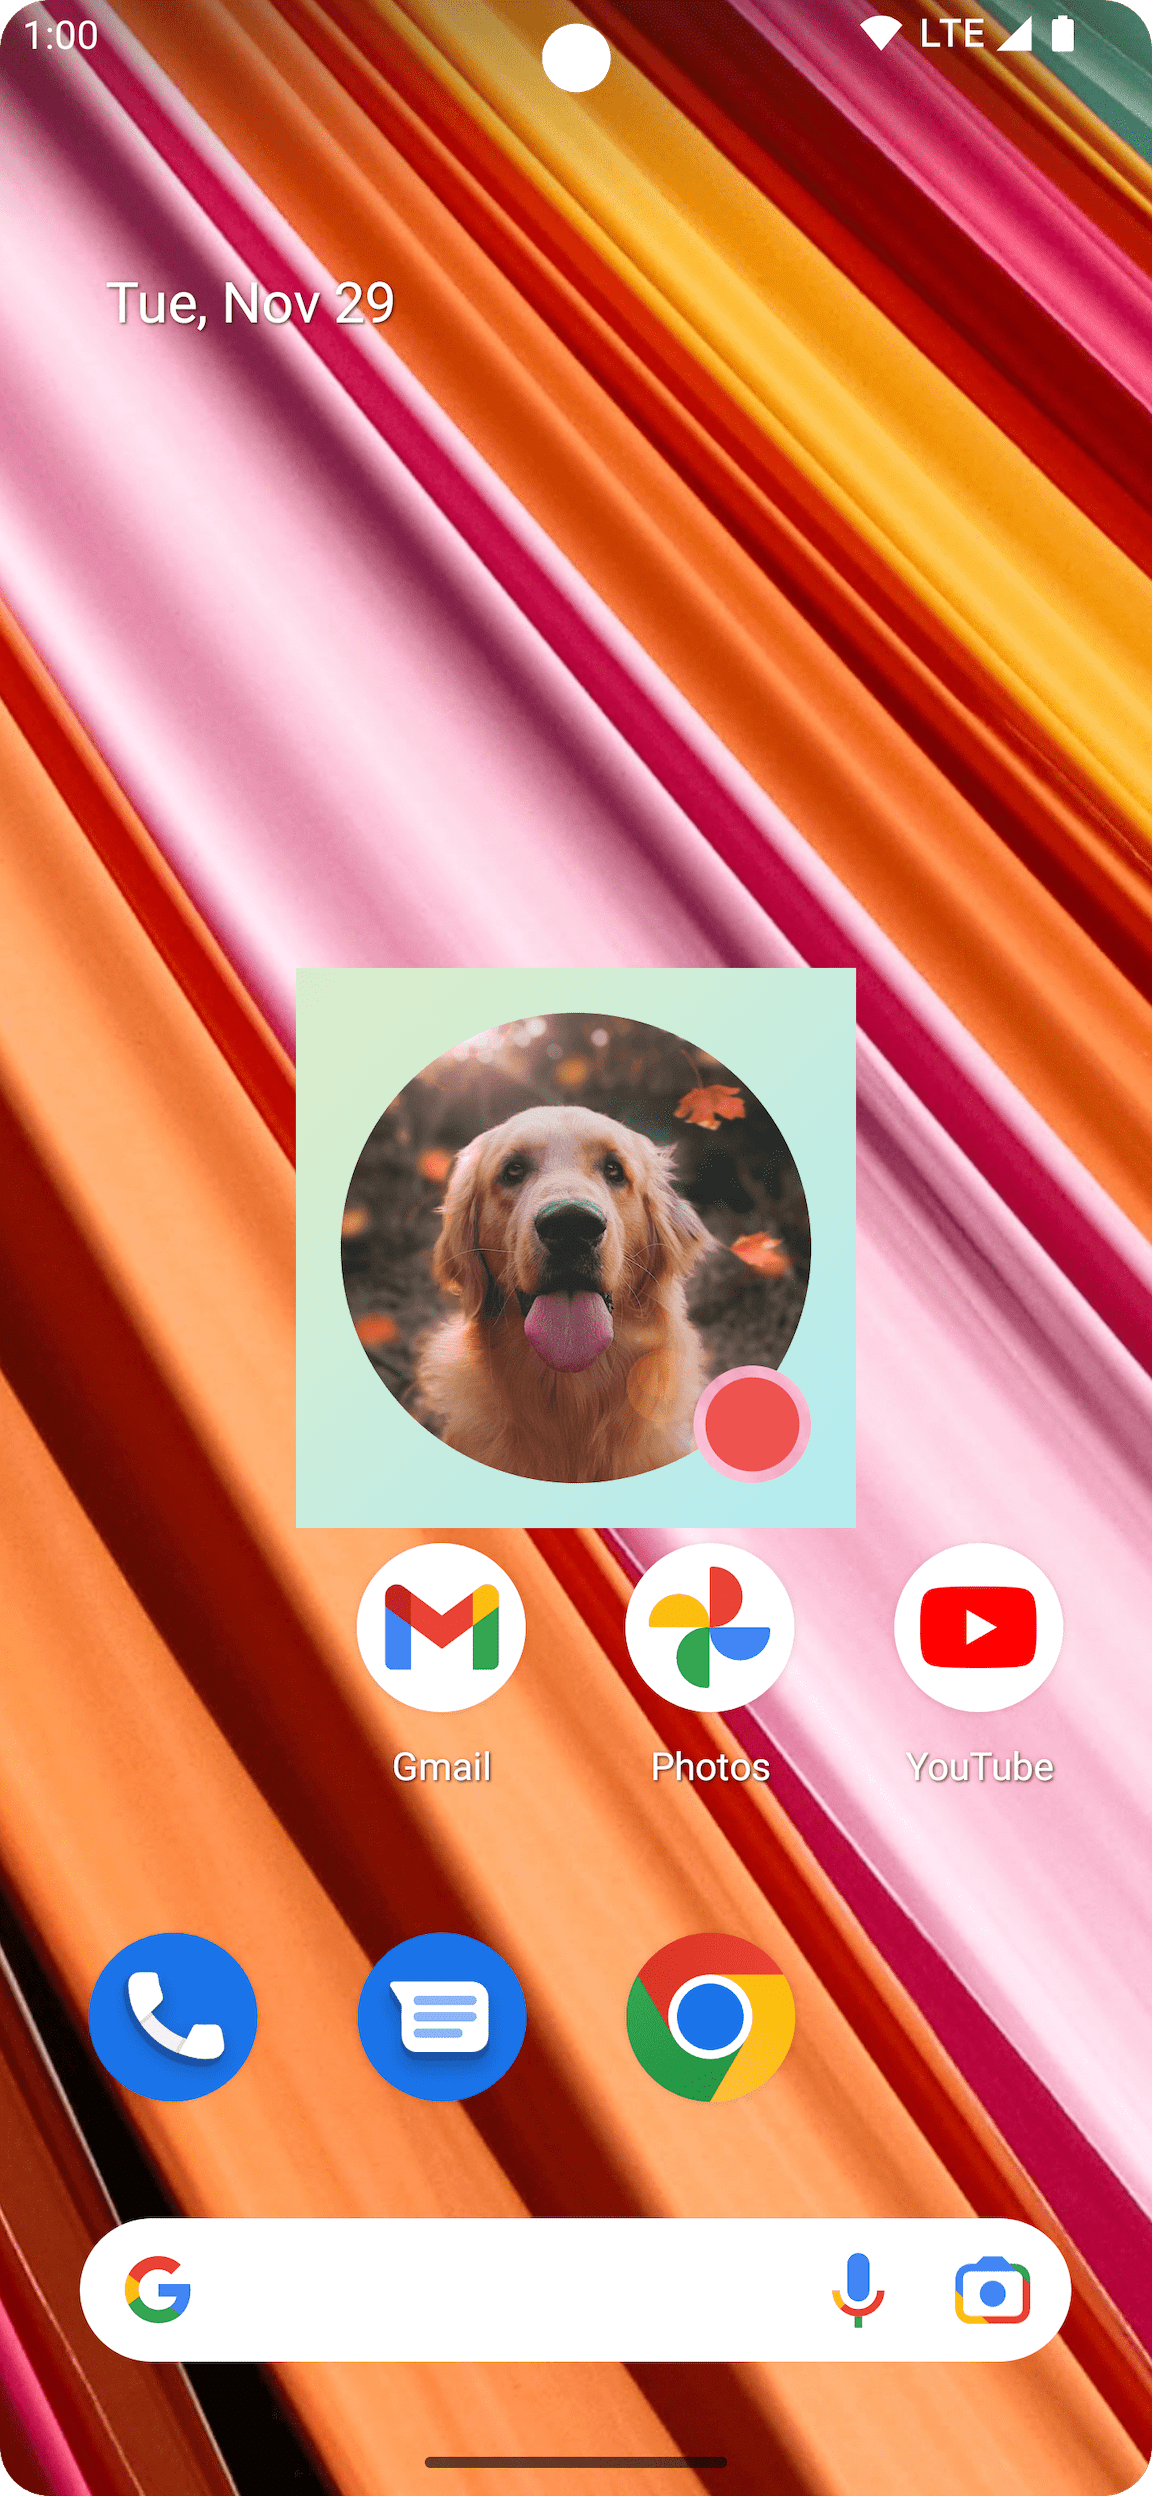
To understand this a bit further: if the app had a translucent window
background, and you did not use the CompositingStrategy.Offscreen, the
BlendMode would interact with the whole app. It would clear all of the pixels to show
the app or wallpaper underneath, as in this example:
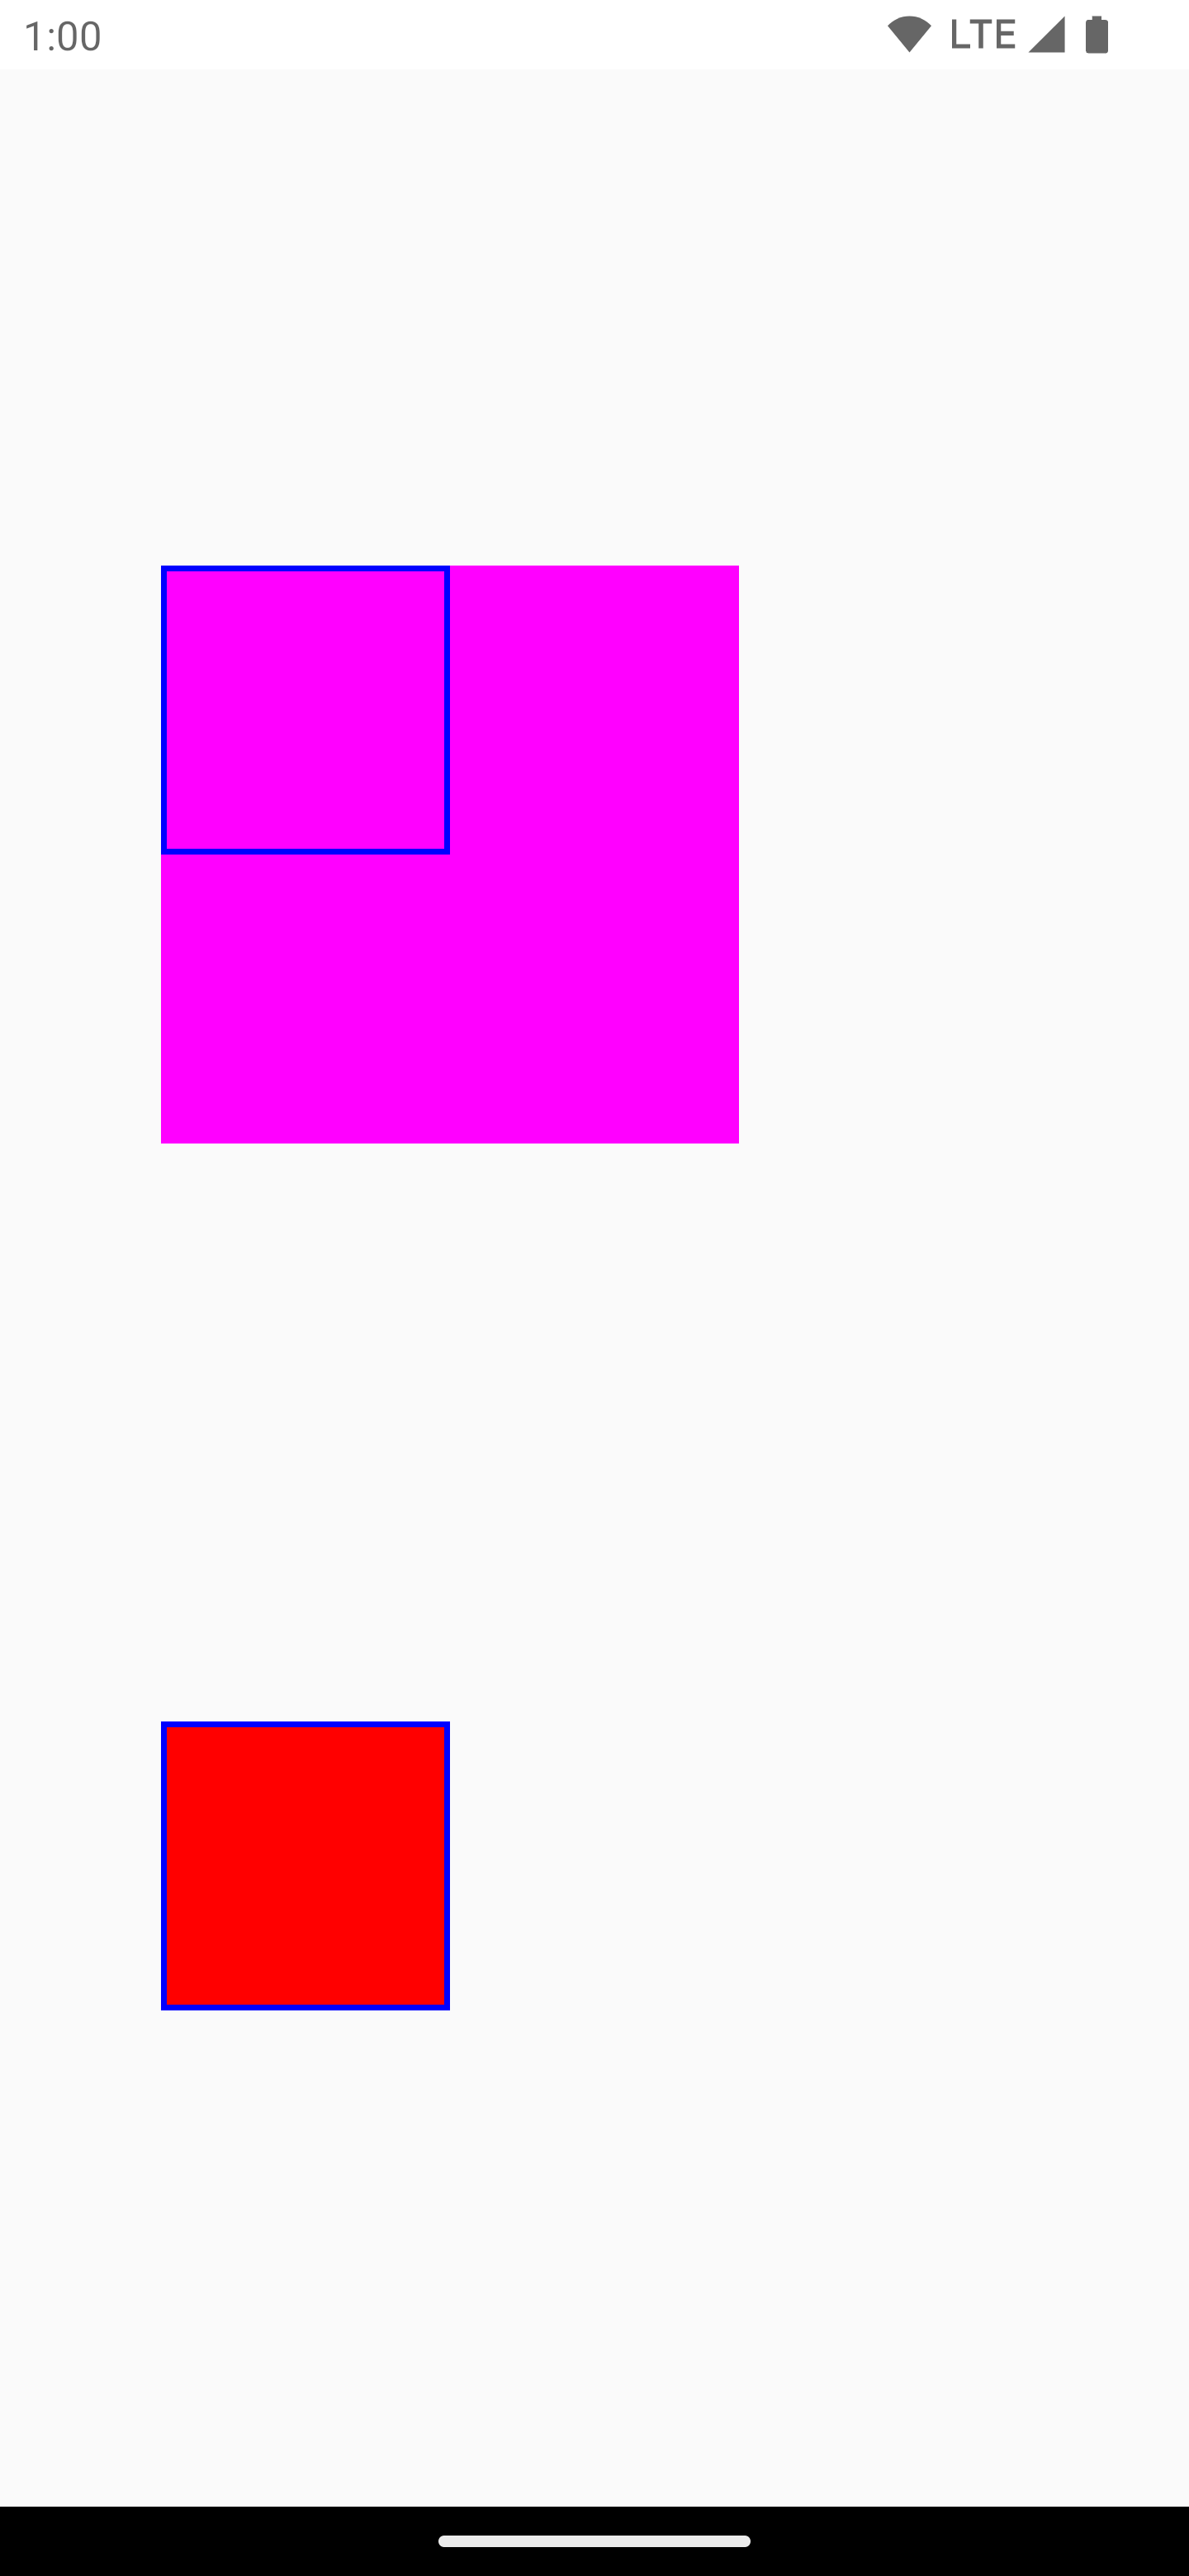
It's worth noting that when using CompositingStrategy.Offscreen, an offscreen
texture that is the size of the drawing area is created and rendered back on
screen. Any drawing commands that are done with this strategy, are by default be
clipped to this region. The below code snippet illustrates the differences when
switching to using offscreen textures:
@Composable fun CompositingStrategyExamples() { Column( modifier = Modifier .fillMaxSize() .wrapContentSize(Alignment.Center) ) { // Does not clip content even with a graphics layer usage here. By default, graphicsLayer // does not allocate + rasterize content into a separate layer but instead is used // for isolation. That is draw invalidations made outside of this graphicsLayer will not // re-record the drawing instructions in this composable as they have not changed Canvas( modifier = Modifier .graphicsLayer() .size(100.dp) // Note size of 100 dp here .border(2.dp, color = Color.Blue) ) { // ... and drawing a size of 200 dp here outside the bounds drawRect(color = Color.Magenta, size = Size(200.dp.toPx(), 200.dp.toPx())) } Spacer(modifier = Modifier.size(300.dp)) /* Clips content as alpha usage here creates an offscreen buffer to rasterize content into first then draws to the original destination */ Canvas( modifier = Modifier // force to an offscreen buffer .graphicsLayer(compositingStrategy = CompositingStrategy.Offscreen) .size(100.dp) // Note size of 100 dp here .border(2.dp, color = Color.Blue) ) { /* ... and drawing a size of 200 dp. However, because of the CompositingStrategy.Offscreen usage above, the content gets clipped */ drawRect(color = Color.Red, size = Size(200.dp.toPx(), 200.dp.toPx())) } } }
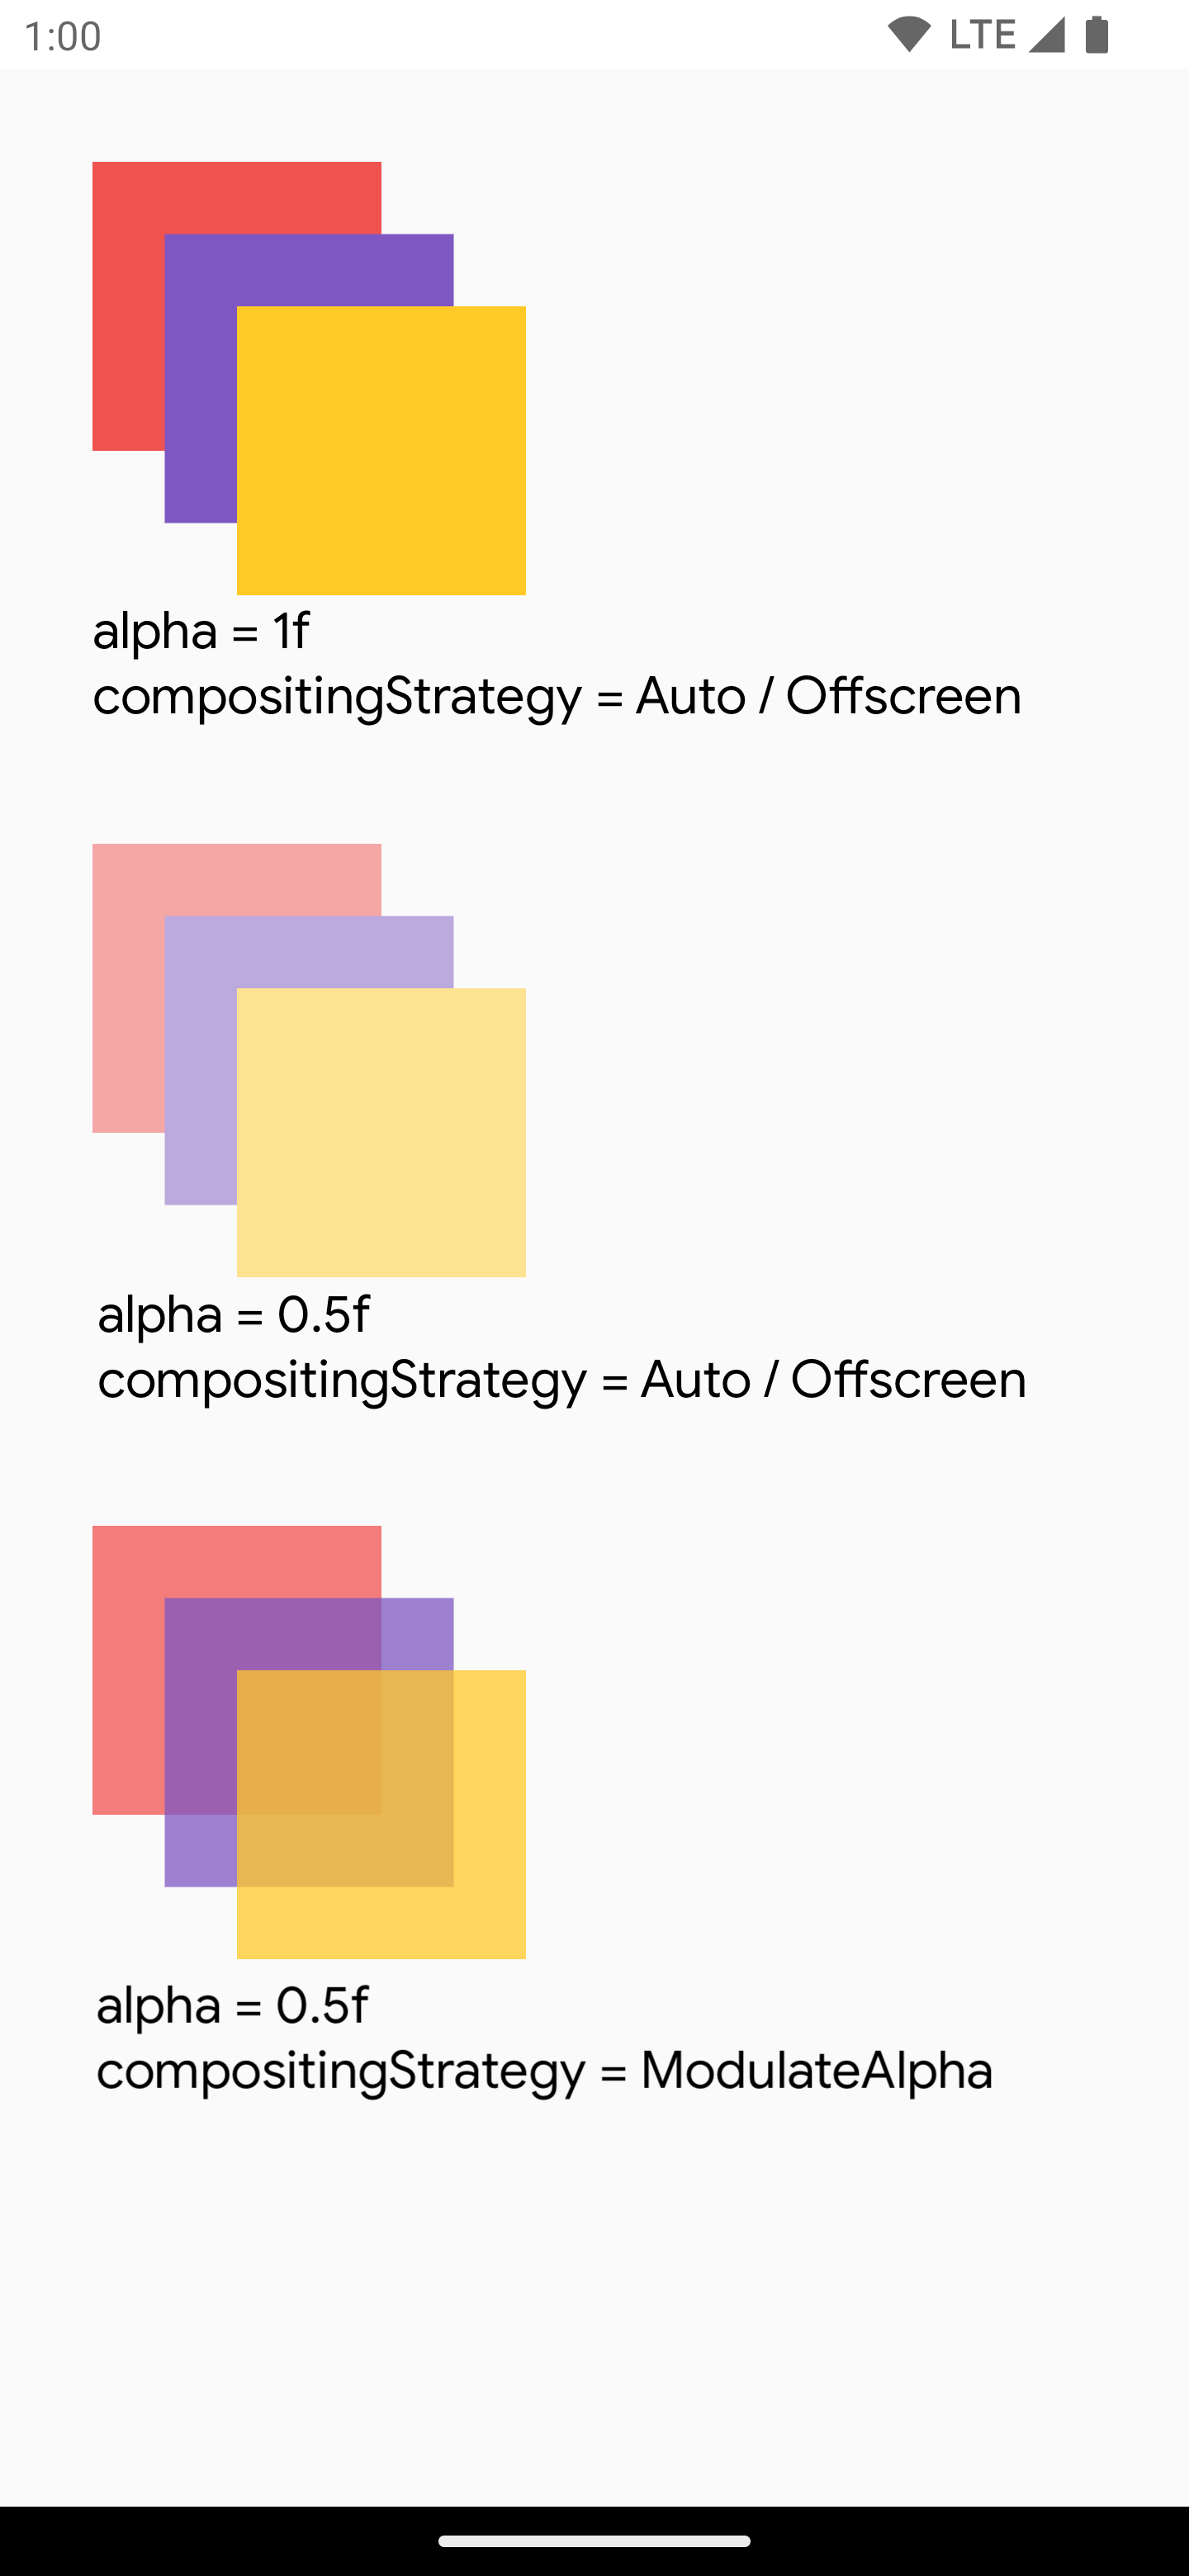
ModulateAlpha
This composition strategy modulates the alpha for each of the drawing
instructions recorded within the graphicsLayer. It won't create an
offscreen buffer for alpha below 1.0f unless a RenderEffect is set, so it can
be more efficient for alpha rendering. However, it can provide different results
for overlapping content. For use cases where it is known in advance that content
is not overlapping, this can provide better performance than
CompositingStrategy.Auto with alpha values less than 1.
Another example of different composition strategies is below - applying different
alphas to different parts of the composables, and applying a Modulate
strategy:
@Preview @Composable fun CompositingStrategy_ModulateAlpha() { Column( modifier = Modifier .fillMaxSize() .padding(32.dp) ) { // Base drawing, no alpha applied Canvas( modifier = Modifier.size(200.dp) ) { drawSquares() } Spacer(modifier = Modifier.size(36.dp)) // Alpha 0.5f applied to whole composable Canvas( modifier = Modifier .size(200.dp) .graphicsLayer { alpha = 0.5f } ) { drawSquares() } Spacer(modifier = Modifier.size(36.dp)) // 0.75f alpha applied to each draw call when using ModulateAlpha Canvas( modifier = Modifier .size(200.dp) .graphicsLayer { compositingStrategy = CompositingStrategy.ModulateAlpha alpha = 0.75f } ) { drawSquares() } } } private fun DrawScope.drawSquares() { val size = Size(100.dp.toPx(), 100.dp.toPx()) drawRect(color = Red, size = size) drawRect( color = Purple, size = size, topLeft = Offset(size.width / 4f, size.height / 4f) ) drawRect( color = Yellow, size = size, topLeft = Offset(size.width / 4f * 2f, size.height / 4f * 2f) ) } val Purple = Color(0xFF7E57C2) val Yellow = Color(0xFFFFCA28) val Red = Color(0xFFEF5350)
Write contents of a composable to a bitmap
A common use case is to create a Bitmap from a composable. To copy the
contents of your composable to a Bitmap, create a GraphicsLayer using
rememberGraphicsLayer().
Redirect the drawing commands to the new layer using drawWithContent() and
graphicsLayer.record{}. Then draw the layer in the visible canvas using
drawLayer:
val coroutineScope = rememberCoroutineScope() val graphicsLayer = rememberGraphicsLayer() Box( modifier = Modifier .drawWithContent { // call record to capture the content in the graphics layer graphicsLayer.record { // draw the contents of the composable into the graphics layer this@drawWithContent.drawContent() } // draw the graphics layer on the visible canvas drawLayer(graphicsLayer) } .clickable { coroutineScope.launch { val bitmap = graphicsLayer.toImageBitmap() // do something with the newly acquired bitmap } } .background(Color.White) ) { Text("Hello Android", fontSize = 26.sp) }
You can save the bitmap to disk and share it. For more details, see the full example snippet. Be sure to check for on device permissions before trying to save to disk.
Custom drawing modifier
To create your own custom modifier, implement the DrawModifier interface. This
gives you access to a ContentDrawScope, which is the same as what is exposed
when using Modifier.drawWithContent(). You can then extract common drawing
operations to custom drawing modifiers to clean up the code and provide
convenient wrappers; for example, Modifier.background() is a convenient
DrawModifier.
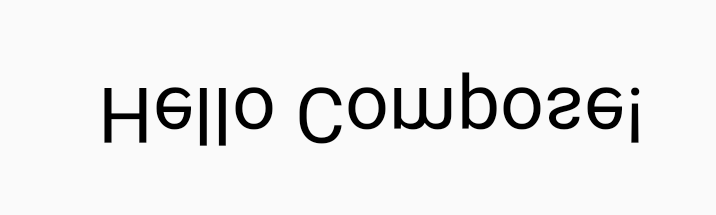
For example, if you wanted to implement a Modifier that vertically flips
content, you can create one as follows:
class FlippedModifier : DrawModifier { override fun ContentDrawScope.draw() { scale(1f, -1f) { this@draw.drawContent() } } } fun Modifier.flipped() = this.then(FlippedModifier())
Then use this flipped modifier applied on Text:
Text( "Hello Compose!", modifier = Modifier .flipped() )
Additional resources
For more examples using graphicsLayer and custom drawing, check out the
following resources:
Recommended for you
- Note: link text is displayed when JavaScript is off
- Graphics in Compose
- Customize an image {:#customize-image}
- Kotlin for Jetpack Compose