
회전하는 삼각형과 같이 미리 설정된 프로그램에 따라 객체를 움직이게 하는 것은 다음에 유용합니다.
사용자가 OpenGL ES 그래픽과 상호작용하게 하려면 어떻게 해야 할까요?
OpenGL ES 애플리케이션을 터치 인터랙티브로 만들기 위한 핵심은
GLSurfaceView:
터치 이벤트를 수신 대기하는 onTouchEvent()
이 학습 과정에서는 사용자가 OpenGL ES 객체를 회전할 수 있도록 터치 이벤트를 수신 대기하는 방법을 보여줍니다.
터치 리스너 설정
OpenGL ES 애플리케이션이 터치 이벤트에 응답하도록 하려면
onTouchEvent() 메서드를
GLSurfaceView 클래스. 아래 구현 예는
MotionEvent.ACTION_MOVE 이벤트를 다음 언어로 번역
도형의 회전 각도
Kotlin
private const val TOUCH_SCALE_FACTOR: Float = 180.0f / 320f
...
private var previousX: Float = 0f
private var previousY: Float = 0f

override fun onTouchEvent(e: MotionEvent): Boolean {
    // MotionEvent reports input details from the touch screen
    // and other input controls. In this case, you are only
    // interested in events where the touch position changed.

    val x: Float = e.x
    val y: Float = e.y

    when (e.action) {
        MotionEvent.ACTION_MOVE -> {

            var dx: Float = x - previousX
            var dy: Float = y - previousY

            // reverse direction of rotation above the mid-line
            if (y > height / 2) {
                dx *= -1
            }

            // reverse direction of rotation to left of the mid-line
            if (x < width / 2) {
                dy *= -1
            }

            renderer.angle += (dx + dy) * TOUCH_SCALE_FACTOR
            requestRender()
        }
    }

    previousX = x
    previousY = y
    return true
}
자바
private final float TOUCH_SCALE_FACTOR = 180.0f / 320;
private float previousX;
private float previousY;

@Override
public boolean onTouchEvent(MotionEvent e) {
    // MotionEvent reports input details from the touch screen
    // and other input controls. In this case, you are only
    // interested in events where the touch position changed.

    float x = e.getX();
    float y = e.getY();

    switch (e.getAction()) {
        case MotionEvent.ACTION_MOVE:

            float dx = x - previousX;
            float dy = y - previousY;

            // reverse direction of rotation above the mid-line
            if (y > getHeight() / 2) {
              dx = dx * -1 ;
            }

            // reverse direction of rotation to left of the mid-line
            if (x < getWidth() / 2) {
              dy = dy * -1 ;
            }

            renderer.setAngle(
                    renderer.getAngle() +
                    ((dx + dy) * TOUCH_SCALE_FACTOR));
            requestRender();
    }

    previousX = x;
    previousY = y;
    return true;
}
회전 각도를 계산한 후 이 메서드는
requestRender():
프레임을 렌더링할 때임을 알려야 합니다. 이 예시에서는
회전이 변경되지 않는 한 프레임을 다시 그릴 필요가 없기 때문입니다. 하지만
효율성에 아무런 영향을 미치지 않습니다. 다만, 효율성에 영향을 미치지 않습니다.
setRenderMode()를 사용하여 데이터가 변경됩니다.
메서드를 사용하여 렌더기에서 다음 행의 주석 처리를 삭제하세요.
Kotlin
class MyGlSurfaceView(context: Context) : GLSurfaceView(context) {

    init {
        // Render the view only when there is a change in the drawing data
        renderMode = GLSurfaceView.RENDERMODE_WHEN_DIRTY
    }
}
자바
public MyGLSurfaceView(Context context) {
    ...
    // Render the view only when there is a change in the drawing data
    setRenderMode(GLSurfaceView.RENDERMODE_WHEN_DIRTY);
}
회전 각도 노출
위의 코드 예에서는 다음과 같이 렌더기를 통해 회전 각도를 노출해야 합니다.
공개 회원 추가하기 렌더기 코드가 기본 사용자와 별도의 스레드에서 실행되기 때문입니다.
인터페이스 스레드를 사용하려면 이 공개 변수를 volatile로 선언해야 합니다.
다음 코드에서는 변수를 선언하고 getter와 setter 쌍을 노출합니다.
Kotlin
class MyGLRenderer4 : GLSurfaceView.Renderer {

    @Volatile
    var angle: Float = 0f
}
자바
public class MyGLRenderer implements GLSurfaceView.Renderer {
    ...

    public volatile float mAngle;

    public float getAngle() {
        return mAngle;
    }

    public void setAngle(float angle) {
        mAngle = angle;
    }
}
회전 적용
터치 입력으로 생성된 회전을 적용하려면 각도를 생성하는 코드를 주석 처리하고 터치 입력으로 생성된 각도가 포함된 변수를 추가합니다.
Kotlin
override fun onDrawFrame(gl: GL10) {
    ...
    val scratch = FloatArray(16)

    // Create a rotation for the triangle
    // long time = SystemClock.uptimeMillis() % 4000L;
    // float angle = 0.090f * ((int) time);
    Matrix.setRotateM(rotationMatrix, 0, angle, 0f, 0f, -1.0f)

    // Combine the rotation matrix with the projection and camera view
    // Note that the mvpMatrix factor *must be first* in order
    // for the matrix multiplication product to be correct.
    Matrix.multiplyMM(scratch, 0, mvpMatrix, 0, rotationMatrix, 0)

    // Draw triangle
    triangle.draw(scratch)
}
자바
public void onDrawFrame(GL10 gl) {
    ...
    float[] scratch = new float[16];

    // Create a rotation for the triangle
    // long time = SystemClock.uptimeMillis() % 4000L;
    // float angle = 0.090f * ((int) time);
    Matrix.setRotateM(rotationMatrix, 0, mAngle, 0, 0, -1.0f);

    // Combine the rotation matrix with the projection and camera view
    // Note that the vPMatrix factor *must be first* in order
    // for the matrix multiplication product to be correct.
    Matrix.multiplyMM(scratch, 0, vPMatrix, 0, rotationMatrix, 0);

    // Draw triangle
    mTriangle.draw(scratch);
}
위에 설명된 단계를 완료하면 프로그램을 실행하고 삼각형을 회전합니다.
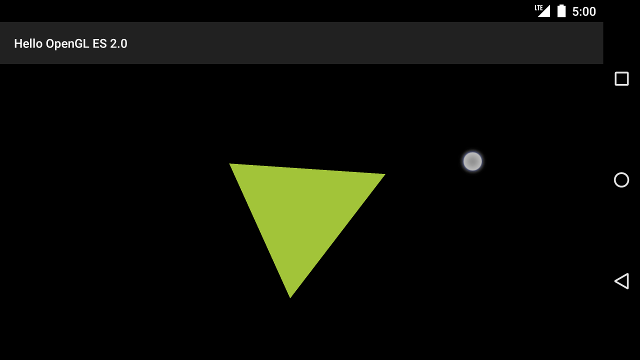
그림 1. 터치 입력으로 회전되는 삼각형 (원은 터치를 나타냄) 위치).