
Wear OS provides several ways to capture the Wear OS UI:
- Android Studio: use Logcat to take screenshots.
- Companion app: on Google Pixel Watch devices, use the Take wearable screenshot option to take screenshots.
- Screen record for Wear OS: record a video of the screen.
Capture screenshots and screen recordings in Android Studio
Capture screenshots and record videos of your wearable app's UI directly from Android Studio. The process is the same as for other form factors and can be done from several places within the IDE.
- Open your app in Android Studio.
- Run your app on a device or an emulator.
- Navigate to the screen you want to capture.
- Initiate the screen capture from one of the following tool windows:
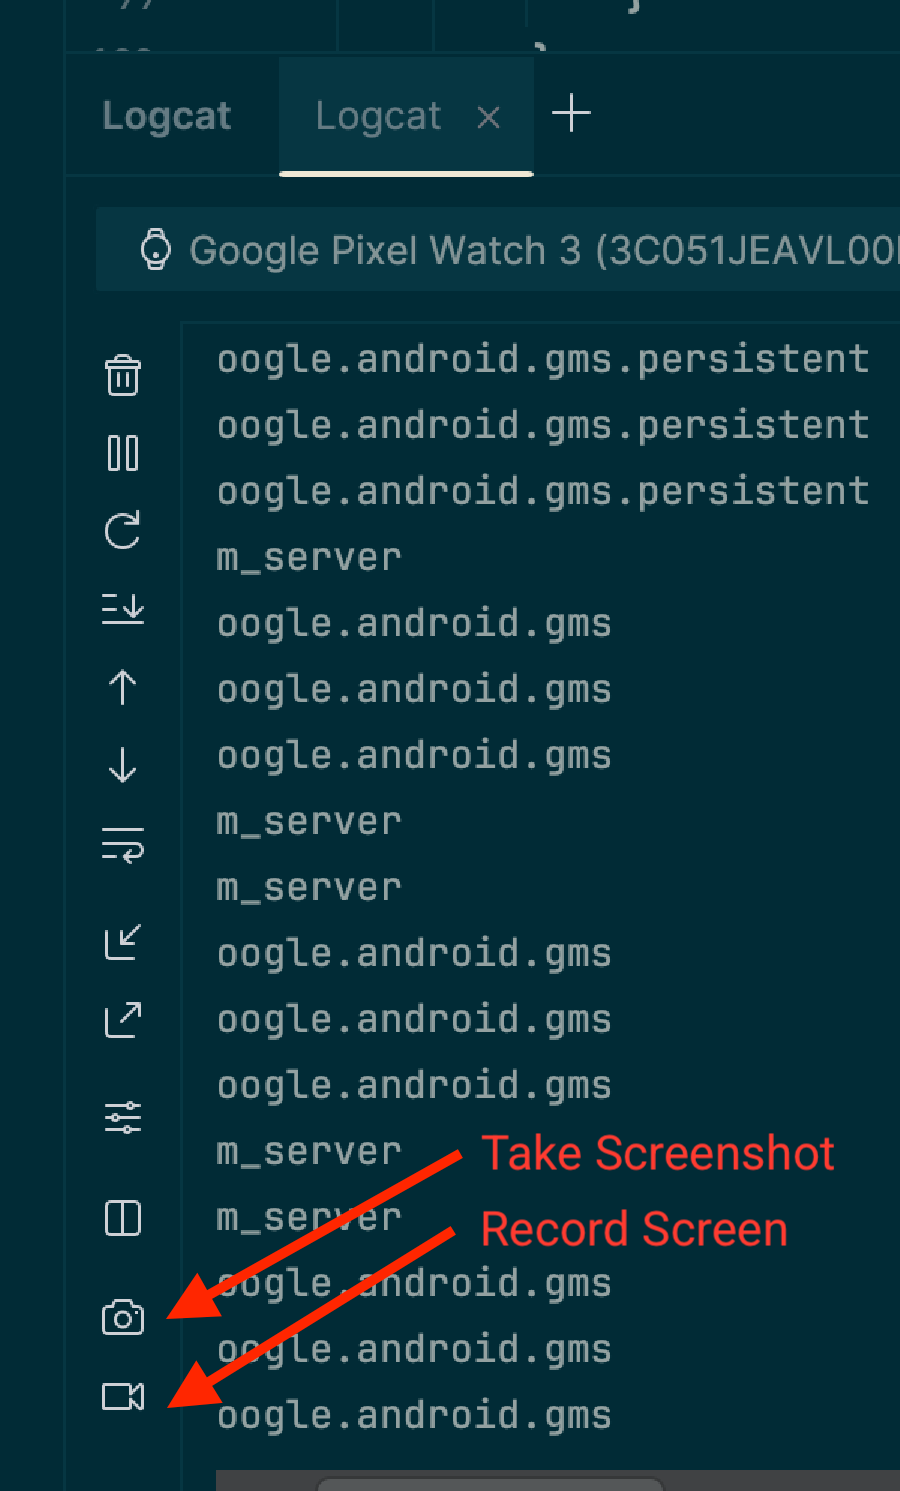
- The Logcat window: In the toolbar, click the
Take Screenshot icon to take a screenshot, or the Record Screen
icon to record a video. These icons might be located under the overflow
menu.
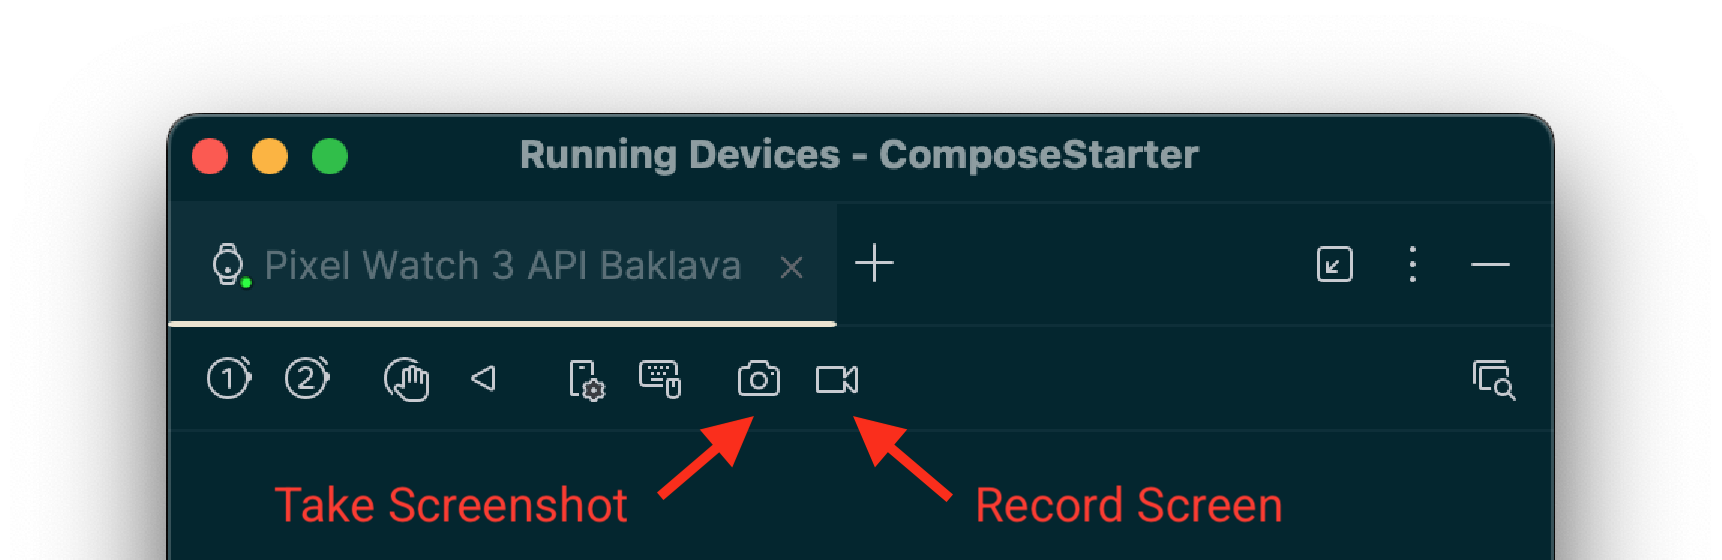
- The Running Devices window: The toolbar for your device also
provides Take Screenshot and Record Screen icons. Note:
These controls are only available if you are using device mirroring
to stream the device's display into this window.
- The Logcat window: In the toolbar, click the
Take Screenshot icon to take a screenshot, or the Record Screen
icon to record a video. These icons might be located under the overflow
menu.
- Finalize the capture:
- For screenshots: An editor window appears after the capture. You can make adjustments, such as adding a device frame, before you click Save.
- For screen recordings: After clicking the record button, select video options and click Start Recording. Interact with your app, and then click Stop Recording when you're finished. A dialog appears, allowing you to save the resulting file.
Capture screenshots and screen recordings using adb
You can use the Android Debug Bridge (adb) for capturing screen content from
the command line.
Screenshots
Use the screencap command to capture a screenshot of your Wear OS
device's display. It works just like it does for mobile.
# Use 'exec-out' instead of 'shell' to get raw data
$ adb exec-out screencap -p > screen.png
One specific consideration for Wear OS is that this command captures the raw, square frame buffer, which doesn't include a circular mask. For polished screenshots, you can apply a circular mask using an image editing tool. For example, using ImageMagick:
# Use ImageMagick to apply a circular mask
$ adb exec-out screencap -p | magick - \
    -alpha set -background none -fill white \
      \( +clone -channel A -evaluate set 0 +channel -draw "circle %[fx:(w-1)/2],%[fx:(h-1)/2] %[fx:(w-1)/2],0.5" \) \
    -compose dstin -composite \
    png:screen.png
Screen recordings
Unlike on mobile, the standard adb screenrecord command is not supported
on Wear OS.
Instead, we recommend the open source scrcpy tool. For basic usage to record a video file from your device's screen, run the following command:
# Record the screen to a file named video.mp4. Use Ctrl+C to stop.
scrcpy --no-audio --no-window --record video.mp4
To automatically stop recording after 30 seconds, use the --time-limit option:
# Record the screen to a file named video.mp4, stopping after 30 seconds.
scrcpy --no-audio --no-window --record video.mp4 --time-limit=30
Capture screenshots with the companion app
To take screenshots of a Google Pixel Watch device, you can use the Google Pixel Watch companion app. Follow these steps:
- On your UI, find the screen that you want to capture.
- On the Android phone, enable Developer options, if you haven't already, by going to Settings > About phone, and tapping Build number seven times.
- Open the Wear companion app on your phone.
- Tap the three dot overflow button in the upper-righthand corner to open the menu.
- Tap Take wearable screenshot. The following message appears: Screenshot request sent. Then you receive the following notifications: Ready to send watch screenshot and tap to send.
- Tap the notification to receive options for sending or sharing the screenshot using Bluetooth, Gmail, or other options.