

โมเดลเลย์เอาต์ Compose ช่วยให้คุณใช้ AlignmentLine เพื่อสร้างเส้นการจัดแนวที่กำหนดเองซึ่งเลย์เอาต์หลักสามารถใช้เพื่อจัดแนวและจัดตำแหน่งองค์ประกอบย่อยได้ เช่น Row สามารถใช้เส้นการจัดแนวที่กำหนดเองขององค์ประกอบย่อยเพื่อจัดแนวองค์ประกอบเหล่านั้นได้
เมื่อเลย์เอาต์ระบุค่าสำหรับ AlignmentLine หนึ่งๆ ระดับบนของเลย์เอาต์จะอ่านค่านี้ได้หลังจากวัดค่า โดยใช้โอเปอเรเตอร์ Placeable.get ในอินสแตนซ์ Placeable ที่เกี่ยวข้อง ผู้ปกครองจะตัดสินใจเลือกตำแหน่งของบุตรหลานได้โดยอิงตามตำแหน่งของ AlignmentLine
คอมโพสิเบิลบางรายการใน Compose มีเส้นจัดแนวอยู่แล้ว เช่น Composable BasicText จะแสดงเส้นการจัดแนว FirstBaseline และ LastBaseline
ในตัวอย่างต่อไปนี้ LayoutModifier ที่กำหนดเองชื่อ firstBaselineToTop จะอ่าน FirstBaseline เพื่อเพิ่มระยะห่างจากขอบให้กับ Text โดยเริ่มจากเส้นฐานแรก

fun Modifier.firstBaselineToTop( firstBaselineToTop: Dp, ) = layout { measurable, constraints -> // Measure the composable val placeable = measurable.measure(constraints) // Check the composable has a first baseline check(placeable[FirstBaseline] != AlignmentLine.Unspecified) val firstBaseline = placeable[FirstBaseline] // Height of the composable with padding - first baseline val placeableY = firstBaselineToTop.roundToPx() - firstBaseline val height = placeable.height + placeableY layout(placeable.width, height) { // Where the composable gets placed placeable.placeRelative(0, placeableY) } } @Preview @Composable private fun TextWithPaddingToBaseline() { MaterialTheme { Text("Hi there!", Modifier.firstBaselineToTop(32.dp)) } }
ในการอ่าน FirstBaseline ในตัวอย่าง ระบบจะใช้ placeable [FirstBaseline] ในระยะการวัด
ตัวอย่างต่อไปนี้ใช้ paddingFrom เพื่อวางบรรทัดฐานแรกของ Text ให้ห่างจากด้านบน 32 dp เช่นเดียวกับตัวอย่าง firstBaselineToTop หากต้องการเพิ่มระยะห่างจากบรรทัดฐานแรกและบรรทัดฐานสุดท้ายของข้อความ ให้ใช้ paddingFromBaseline
@Composable private fun TextWithPaddingFromBaseline() { MaterialTheme { Text("Hi there!", Modifier.paddingFrom(FirstBaseline, before = 32.dp)) } }
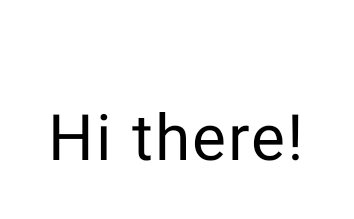
Text โดยมีระยะห่างจากขอบ 32 dp ก่อนบรรทัดฐานแรกจัดแนวรายการย่อยของแถว
ใน Row ตัวแก้ไข alignByBaseline และ alignBy จะจัดแนวองค์ประกอบย่อยให้ตรงกันบนเส้นแนวเดียวกัน ตัวแก้ไขทั้ง 2 ตัวเป็นสมาชิกของ RowScope คุณจึงใช้ได้เฉพาะภายใน RowScope เช่น เนื้อหาของ Row ใช้ตัวแก้ไขกับรายการย่อยแต่ละรายการที่ต้องสอดคล้องกัน เด็กที่ไม่มีแท็กนี้และไม่มี align จะเป็นไปตาม verticalAlignment ของ Row
ตัวอย่างต่อไปนี้จัดแนวข้อความ 2 รายการที่มีขนาดต่างกันบนเส้นฐานแรก
@Composable private fun TitleWithSubtitle() { MaterialTheme { Row(horizontalArrangement = Arrangement.spacedBy(8.dp)) { Text( "Title", modifier = Modifier.alignByBaseline(), style = MaterialTheme.typography.headlineMedium ) Text( "Subtitle", modifier = Modifier.alignByBaseline(), style = MaterialTheme.typography.bodySmall ) } } }
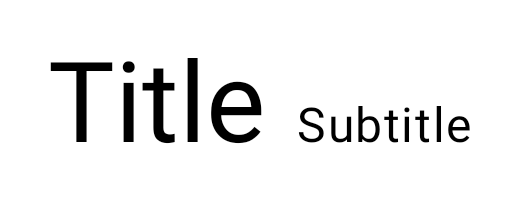
Text 2 รายการที่มีขนาดต่างกันจัดแนวตามเส้นฐานแรกalignByBaseline เหมือนกับ alignBy(FirstBaseline) หากต้องการจัดแนวในตำแหน่งที่ไม่ใช่เส้นจัดแนว ให้ส่งบล็อกไปยัง alignBy บล็อกจะรับองค์ประกอบย่อยที่วัดค่าแล้วและแสดงผลระยะทางเป็นพิกเซลจากด้านบนขององค์ประกอบย่อยไปยังเส้นที่จะจัดแนว ในตัวอย่างต่อไปนี้ ตรงกลางของกล่องขนาดเล็กจะอยู่บนเส้นฐานของข้อความที่อยู่ติดกัน
@Composable private fun BoxMiddleOnBaseline() { MaterialTheme { Row(horizontalArrangement = Arrangement.spacedBy(8.dp)) { Box( modifier = Modifier .size(8.dp) .background(Color.Gray) // Aligns the middle of the box with the text baseline. .alignBy { it.measuredHeight / 2 } ) Text( "Label", modifier = Modifier.alignByBaseline() ) } } }
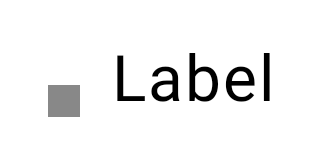
Box สีเทาที่มีจุดกึ่งกลางแนวตั้งตรงกับเส้นฐานของ Text ที่อยู่ติดกันเด็กที่ใช้ตัวแก้ไขเหล่านี้จะรวมกันเป็นกลุ่มเดียว Row จะวางบุตรหลานอย่างน้อย 1 รายการของกลุ่มราวกับว่ามี Alignment.Top และจัดตำแหน่งรายการอื่นๆ เพื่อให้เส้นตรงกัน ระบบจะวางองค์ประกอบย่อยที่อยู่โดดเดี่ยวในกลุ่มราวกับว่ามี Alignment.Top จึงไม่จัดแนวกับสิ่งใดเลย alignBy เป็นรูปแบบหนึ่งของ align ดังนั้นตัวแก้ไขทั้ง 2 รายการจึงไม่ทำงานร่วมกันในคอมโพสิเบิลย่อยเดียวกัน
paddingFrom และ alignBy แก้ปัญหาที่แตกต่างกัน โดย paddingFrom จะเพิ่มระยะห่างจากขอบให้กับองค์ประกอบหนึ่งโดยอิงตามเส้นการจัดแนวขององค์ประกอบนั้น และ alignBy จะจัดแนวองค์ประกอบข้างเคียงให้ตรงกัน
ใน Column alignBy จะใช้ VerticalAlignmentLine หรือบล็อก และจัดแนวองค์ประกอบย่อยในแนวนอน ColumnScope ไม่มี alignByBaseline
สร้างเส้นจัดแนวที่กำหนดเอง
เมื่อสร้าง Composable Layout ที่กำหนดเองหรือ LayoutModifier ที่กำหนดเอง คุณสามารถระบุเส้นการจัดแนวที่กำหนดเองเพื่อให้ Composable ระดับบนอื่นๆ สามารถใช้เส้นดังกล่าวเพื่อจัดแนวและจัดตำแหน่งองค์ประกอบย่อยตามความเหมาะสมได้
ตัวอย่างต่อไปนี้แสดง Composable BarChart ที่กำหนดเองซึ่งแสดงเส้นการจัดแนว 2 เส้น ได้แก่ MaxChartValue และ MinChartValue เพื่อให้ Composable อื่นๆ สามารถจัดแนวตามค่าข้อมูลสูงสุดและต่ำสุดของแผนภูมิได้ องค์ประกอบของข้อความ 2 รายการ ได้แก่ Max และ Min ได้รับการจัดแนวให้อยู่ตรงกลางของเส้นการจัดแนวที่กำหนดเอง

BarChart Composable ที่มีข้อความซึ่งจัดแนวตามค่าข้อมูลสูงสุดและต่ำสุดเส้นจัดแนวที่กำหนดเองจะกำหนดเป็นตัวแปรระดับบนสุดในโปรเจ็กต์
/** * AlignmentLine defined by the maximum data value in a [BarChart] */ private val MaxChartValue = HorizontalAlignmentLine(merger = { old, new -> min(old, new) }) /** * AlignmentLine defined by the minimum data value in a [BarChart] */ private val MinChartValue = HorizontalAlignmentLine(merger = { old, new -> max(old, new) })
เส้นการจัดแนวที่กำหนดเองเพื่อสร้างตัวอย่างของเราเป็นประเภท HorizontalAlignmentLine เนื่องจากใช้เพื่อจัดแนวองค์ประกอบย่อยในแนวตั้ง ระบบจะส่งนโยบายการผสานเป็นพารามิเตอร์ในกรณีที่เลย์เอาต์หลายรายการระบุค่าสำหรับเส้นการจัดแนวเหล่านี้ เนื่องจากพิกัดของระบบเลย์เอาต์ Compose และพิกัด Canvas แสดงถึง[0, 0] มุมซ้ายบน และแกน x และ y เป็นค่าบวกที่ชี้ลง ดังนั้นค่า MaxChartValue จะน้อยกว่า MinChartValue เสมอ ดังนั้น นโยบายการผสานจึงเป็น min สำหรับเส้นฐานค่าข้อมูลแผนภูมิสูงสุด และ max สำหรับเส้นฐานค่าข้อมูลแผนภูมิต่ำสุด
เมื่อสร้าง Layout หรือ LayoutModifier ที่กำหนดเอง ให้ระบุเส้นการจัดแนวที่กำหนดเองในเมธอด MeasureScope.layout ซึ่งใช้พารามิเตอร์ alignmentLines: Map<AlignmentLine, Int>
@Composable private fun BarChart( dataPoints: List<Int>, modifier: Modifier = Modifier, ) { val maxValue: Float = remember(dataPoints) { dataPoints.maxOrNull()!! * 1.2f } BoxWithConstraints(modifier = modifier) { val density = LocalDensity.current with(density) { // ... // Calculate baselines val maxYBaseline = // ... val minYBaseline = // ... Layout( content = {}, modifier = Modifier.drawBehind { // ... } ) { _, constraints -> with(constraints) { layout( width = if (hasBoundedWidth) maxWidth else minWidth, height = if (hasBoundedHeight) maxHeight else minHeight, // Custom AlignmentLines are set here. These are propagated // to direct and indirect parent composables. alignmentLines = mapOf( MinChartValue to minYBaseline.roundToInt(), MaxChartValue to maxYBaseline.roundToInt() ) ) {} } } } } }
องค์ประกอบหลักโดยตรงและโดยอ้อมของ Composable นี้สามารถใช้เส้นการจัดแนวได้ Composable ต่อไปนี้จะสร้างเลย์เอาต์ที่กำหนดเองซึ่งใช้พารามิเตอร์เป็นช่อง Text 2 ช่องและจุดข้อมูล และจัดแนวข้อความทั้ง 2 ข้อความให้ตรงกับค่าข้อมูลแผนภูมิสูงสุดและต่ำสุด ตัวอย่างของ Composable นี้คือสิ่งที่แสดงในรูปที่ 5
@Composable private fun BarChartMinMax( dataPoints: List<Int>, maxText: @Composable () -> Unit, minText: @Composable () -> Unit, modifier: Modifier = Modifier, ) { Layout( content = { maxText() minText() // Set a fixed size to make the example easier to follow BarChart(dataPoints, Modifier.size(200.dp)) }, modifier = modifier ) { measurables, constraints -> check(measurables.size == 3) val placeables = measurables.map { it.measure(constraints.copy(minWidth = 0, minHeight = 0)) } val maxTextPlaceable = placeables[0] val minTextPlaceable = placeables[1] val barChartPlaceable = placeables[2] // Obtain the alignment lines from BarChart to position the Text val minValueBaseline = barChartPlaceable[MinChartValue] val maxValueBaseline = barChartPlaceable[MaxChartValue] layout(constraints.maxWidth, constraints.maxHeight) { maxTextPlaceable.placeRelative( x = 0, y = maxValueBaseline - (maxTextPlaceable.height / 2) ) minTextPlaceable.placeRelative( x = 0, y = minValueBaseline - (minTextPlaceable.height / 2) ) barChartPlaceable.placeRelative( x = max(maxTextPlaceable.width, minTextPlaceable.width) + 20, y = 0 ) } } } @Preview @Composable private fun ChartDataPreview() { MaterialTheme { BarChartMinMax( dataPoints = listOf(4, 24, 15), maxText = { Text("Max") }, minText = { Text("Min") }, modifier = Modifier.padding(24.dp) ) } }
แนะนำสำหรับคุณ
- หมายเหตุ: ข้อความลิงก์จะแสดงเมื่อ JavaScript ปิดอยู่
- กราฟิกใน Compose
- เลย์เอาต์ที่กำหนดเอง {:#custom-layouts }
- การวัดค่าภายในในเลย์เอาต์ Compose