
It is important to test your app's navigation logic before you ship in order to verify that your application works as you expect.
The Navigation component handles all the work of managing navigation between
destinations, passing arguments, and working with the
FragmentManager. These capabilities are already
rigorously tested, so there is no need to test them again in your app. What is
important to test, however, are the interactions between the app-specific code
in your fragments and their NavController.
Test in isolation
To test fragment interactions with their NavController in isolation,
Navigation 2.3 and higher provides a
TestNavHostController that provides APIs for
setting the current destination and verifying the back stack after
NavController.navigate() operations.
You can add the Navigation Testing artifact to your project by adding the
following dependency in your app module's build.gradle file:
Groovy
dependencies {
  def nav_version = "2.9.8"

  androidTestImplementation "androidx.navigation:navigation-testing:$nav_version"
}
Kotlin
dependencies {
  val nav_version = "2.9.8"

  androidTestImplementation("androidx.navigation:navigation-testing:$nav_version")
}
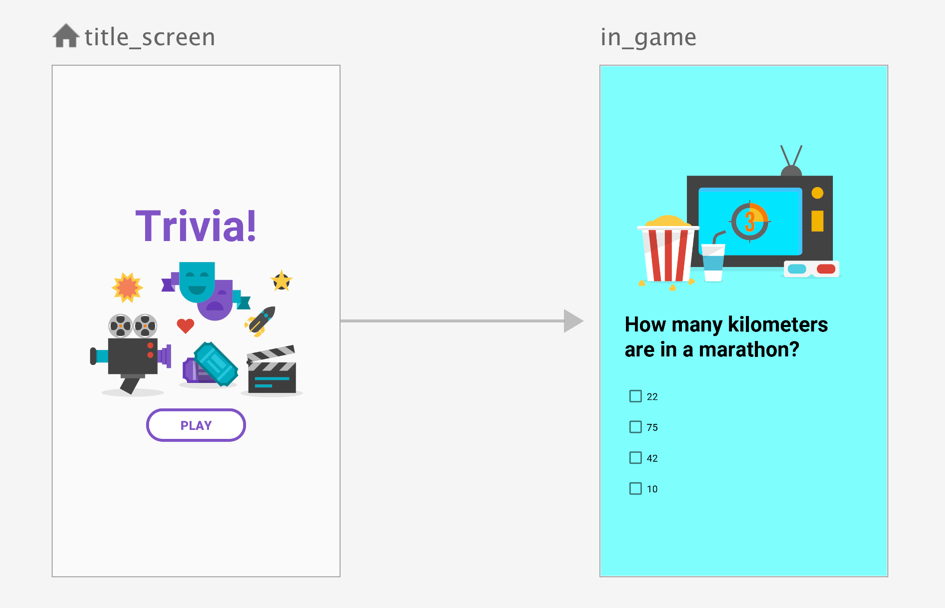
Consider a trivia game. The game starts with a title_screen and navigates to an in_game screen when the user clicks play.
The fragment representing the title_screen might look something like this:
Kotlin
class TitleScreen : Fragment() {
    override fun onCreateView(
        inflater: LayoutInflater,
        container: ViewGroup?,
        savedInstanceState: Bundle?
    ) = inflater.inflate(R.layout.fragment_title_screen, container, false)

    override fun onViewCreated(view: View, savedInstanceState: Bundle?) {
        view.findViewById<Button>(R.id.play_btn).setOnClickListener {
            view.findNavController().navigate(R.id.action_title_screen_to_in_game)
        }
    }
}
Java
public class TitleScreen extends Fragment {

    @Nullable
    @Override
    public View onCreateView(@NonNull LayoutInflater inflater,
            @Nullable ViewGroup container, @Nullable Bundle savedInstanceState) {
        return inflater.inflate(R.layout.fragment_title_screen, container, false);
    }

    @Override
    public void onViewCreated(@NonNull View view, @Nullable Bundle savedInstanceState) {
        view.findViewById(R.id.play_btn).setOnClickListener(v -> {
            Navigation.findNavController(view).navigate(R.id.action_title_screen_to_in_game);
        });
    }
}
To test that the app properly navigates the user to the in_game screen when
the user clicks Play, your test needs to verify that this fragment
correctly moves the NavController to the R.id.in_game screen.
Using a combination of FragmentScenario, Espresso,
and TestNavHostController, you can recreate the conditions necessary to test
this scenario, as shown in the following example:
Kotlin
@RunWith(AndroidJUnit4::class)
class TitleScreenTest {

    @Test
    fun testNavigationToInGameScreen() {
        // Create a TestNavHostController
        val navController = TestNavHostController(
            ApplicationProvider.getApplicationContext())

        // Create a graphical FragmentScenario for the TitleScreen
        val titleScenario = launchFragmentInContainer<TitleScreen>()

        titleScenario.onFragment { fragment ->
            // Set the graph on the TestNavHostController
            navController.setGraph(R.navigation.trivia)

            // Make the NavController available using the findNavController() APIs
            Navigation.setViewNavController(fragment.requireView(), navController)
        }

        // Verify that performing a click changes the NavController's state
        onView(ViewMatchers.withId(R.id.play_btn)).perform(ViewActions.click())
        assertThat(navController.currentDestination?.id).isEqualTo(R.id.in_game)
    }
}
Java
@RunWith(AndroidJUnit4::class)
public class TitleScreenTestJava {

    @Test
    fun testNavigationToInGameScreen() {

        // Create a TestNavHostController
        TestNavHostController navController = new TestNavHostController(
            ApplicationProvider.getApplicationContext());

        // Create a graphical FragmentScenario for the TitleScreen
        FragmentScenario<TitleScreen> titleScenario = FragmentScenario.launchInContainer(TitleScreen.class);

        titleScenario.onFragment(fragment ->
                // Set the graph on the TestNavHostController
                navController.setGraph(R.navigation.trivia);

                // Make the NavController available using the findNavController() APIs
                Navigation.setViewNavController(fragment.requireView(), navController)
        );

        // Verify that performing a click changes the NavController's state
        onView(ViewMatchers.withId(R.id.play_btn)).perform(ViewActions.click());
        assertThat(navController.currentDestination.id).isEqualTo(R.id.in_game);
    }
}
The preceding example creates an instance of TestNavHostController and assigns
it to the fragment. It then uses Espresso to drive the UI and verifies that the
appropriate navigation action is taken.
Just like a real NavController, you must call setGraph to initialize the
TestNavHostController. In this example, the fragment being tested was the
start destination of our graph. TestNavHostController provides a
setCurrentDestination method that
lets you set the current destination (and optionally, arguments for that
destination) so that the NavController is in the correct state before your
test begins.
Unlike a NavHostController instance that a NavHostFragment would use,
TestNavHostController does not trigger the underlying navigate()
behavior (such as the FragmentTransaction that FragmentNavigator does) when
you call navigate() - it only updates the state of the
TestNavHostController.
Test NavigationUI with FragmentScenario
In the preceding example, the callback provided to
titleScenario.onFragment() is called after the fragment has moved through its
lifecycle to the RESUMED state. By this time, the
fragment's view has already been created and attached, so it may be too late
in the lifecycle to test properly. For example, when using NavigationUI with
views in your fragment, such as with a Toolbar controlled by your fragment,
you can call setup methods with your NavController before the fragment
reaches the RESUMED state. Thus, you need a way to to set your
TestNavHostController earlier in the lifecycle.
A fragment that owns its own Toolbar can be written as follows:
Kotlin
class TitleScreen : Fragment(R.layout.fragment_title_screen) {
    override fun onViewCreated(view: View, savedInstanceState: Bundle?) {
        val navController = view.findNavController()
        view.findViewById<Toolbar>(R.id.toolbar).setupWithNavController(navController)
    }
}
Java
public class TitleScreen extends Fragment {
    public TitleScreen() {
        super(R.layout.fragment_title_screen);
    }

    @Override
    public void onViewCreated(@NonNull View view, @Nullable Bundle savedInstanceState) {
        NavController navController = Navigation.findNavController(view);
        view.findViewById(R.id.toolbar).setupWithNavController(navController);
    }
}
Here we need the NavController created by the time onViewCreated() is
called. Using the previous approach of onFragment() would set our
TestNavHostController too late in the lifecycle, causing the
findNavController() call to fail.
FragmentScenario offers a FragmentFactory
interface which can be used to register callbacks for lifecycle events. This can
be combined with Fragment.getViewLifecycleOwnerLiveData() to receive a
callback that immediately follows onCreateView(), as shown in the following
example:
Kotlin
val scenario = launchFragmentInContainer {
    TitleScreen().also { fragment ->

        // In addition to returning a new instance of our Fragment,
        // get a callback whenever the fragment's view is created
        // or destroyed so that we can set the NavController
        fragment.viewLifecycleOwnerLiveData.observeForever { viewLifecycleOwner ->
            if (viewLifecycleOwner != null) {
                // The fragment's view has just been created
                navController.setGraph(R.navigation.trivia)
                Navigation.setViewNavController(fragment.requireView(), navController)
            }
        }
    }
}
Java
FragmentScenario<TitleScreen> scenario =
FragmentScenario.launchInContainer(
       TitleScreen.class, null, new FragmentFactory() {
    @NonNull
    @Override
    public Fragment instantiate(@NonNull ClassLoader classLoader,
            @NonNull String className,
            @Nullable Bundle args) {
        TitleScreen titleScreen = new TitleScreen();

        // In addition to returning a new instance of our fragment,
        // get a callback whenever the fragment's view is created
        // or destroyed so that we can set the NavController
        titleScreen.getViewLifecycleOwnerLiveData().observeForever(new Observer<LifecycleOwner>() {
            @Override
            public void onChanged(LifecycleOwner viewLifecycleOwner) {

                // The fragment's view has just been created
                if (viewLifecycleOwner != null) {
                    navController.setGraph(R.navigation.trivia);
                    Navigation.setViewNavController(titleScreen.requireView(), navController);
                }

            }
        });
        return titleScreen;
    }
});
By using this technique, the NavController is available before
onViewCreated() is called, allowing the fragment to use NavigationUI
methods without crashing.
Testing interactions with back stack entries
When interacting with the back stack entries, the
TestNavHostController lets you connect the controller to your own test
LifecycleOwner, ViewModelStore, and OnBackPressedDispatcher by using the
APIs it inherits from NavHostController.
For example, when testing a fragment that uses a
navigation scoped ViewModel, you must call
setViewModelStore on the
TestNavHostController:
Kotlin
val navController = TestNavHostController(ApplicationProvider.getApplicationContext())

// This allows fragments to use by navGraphViewModels()
navController.setViewModelStore(ViewModelStore())
Java
TestNavHostController navController = new TestNavHostController(ApplicationProvider.getApplicationContext());

// This allows fragments to use new ViewModelProvider() with a NavBackStackEntry
navController.setViewModelStore(new ViewModelStore())
Related topics
- Build instrumented unit tests - Learn how to set up your instrumented test suite and run tests on an Android-powered device.
- Espresso - Test your app's UI with Espresso.
- JUnit4 rules with AndroidX Test - Use JUnit 4 rules with the AndroidX Test libraries to provide more flexibility and reduce the boilerplate code required in tests.
- Test your app's fragments - Learn how to
test your app's fragments in isolation with
FragmentScenario. - Set up project for AndroidX Test - Learn how to declare needed libraries in your app's project files to use AndroidX Test.