
Dependency injection (DI) is a technique widely used in programming and well suited to Android development. By following the principles of DI, you lay the groundwork for good app architecture.
Implementing dependency injection provides you with the following advantages:
- Reusability of code
- Ease of refactoring
- Ease of testing
Fundamentals of dependency injection
Before covering dependency injection in Android specifically, this page provides a more general overview of how dependency injection works.
What is dependency injection?
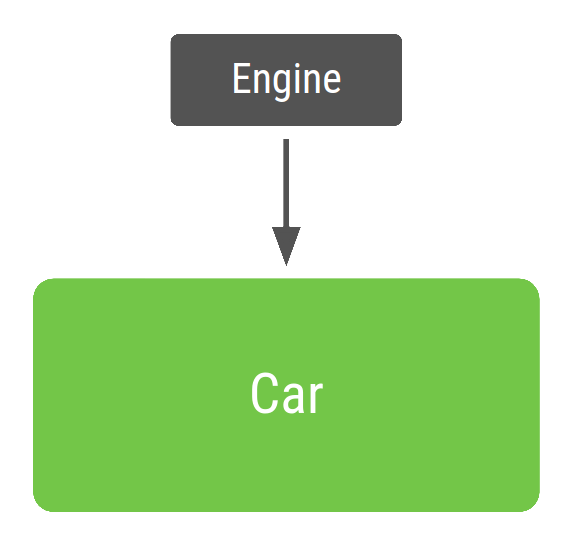
Classes often require references to other classes. For example, a Car class
might need a reference to an Engine class. These required classes are called
dependencies, and in this example the Car class is dependent on
having an instance of the Engine class to run.
There are three ways for a class to get an object it needs:
- The class constructs the dependency it needs. In the example above,
Carwould create and initialize its own instance ofEngine. - Grab it from somewhere else. Some Android APIs, such as
Contextgetters andgetSystemService(), work this way. - Have it supplied as a parameter. The app can provide these
dependencies when the class is constructed or pass them in to the functions
that need each dependency. In the example above, the
Carconstructor would receiveEngineas a parameter.
The third option is dependency injection! With this approach you take the dependencies of a class and provide them rather than having the class instance obtain them itself.
Here's an example. Without dependency injection, representing a Car that
creates its own Engine dependency in code looks like this:
Kotlin
class Car {

    private val engine = Engine()

    fun start() {
        engine.start()
    }
}

fun main(args: Array) {
    val car = Car()
    car.start()
}
Java
class Car {

    private Engine engine = new Engine();

    public void start() {
        engine.start();
    }
}


class MyApp {
    public static void main(String[] args) {
        Car car = new Car();
        car.start();
    }
}

This is not an example of dependency injection because the Car class is
constructing its own Engine. This can be problematic because:
CarandEngineare tightly coupled - an instance ofCaruses one type ofEngine, and no subclasses or alternative implementations can easily be used. If theCarwere to construct its ownEngine, you would have to create two types ofCarinstead of just reusing the sameCarfor engines of typeGasandElectric.The hard dependency on
Enginemakes testing more difficult.Caruses a real instance ofEngine, thus preventing you from using a test double to modifyEnginefor different test cases.
What does the code look like with dependency injection? Instead of each instance
of Car constructing its own Engine object on initialization, it receives an
Engine object as a parameter in its constructor:
Kotlin
class Car(private val engine: Engine) {
    fun start() {
        engine.start()
    }
}

fun main(args: Array) {
    val engine = Engine()
    val car = Car(engine)
    car.start()
}
Java
class Car {

    private final Engine engine;

    public Car(Engine engine) {
        this.engine = engine;
    }

    public void start() {
        engine.start();
    }
}


class MyApp {
    public static void main(String[] args) {
        Engine engine = new Engine();
        Car car = new Car(engine);
        car.start();
    }
}
The main function uses Car. Because Car depends on Engine, the app creates an
instance of Engine and then uses it to construct an instance of Car. The
benefits of this DI-based approach are:
Reusability of
Car. You can pass in different implementations ofEnginetoCar. For example, you might define a new subclass ofEnginecalledElectricEnginethat you wantCarto use. If you use DI, all you need to do is pass in an instance of the updatedElectricEnginesubclass, andCarstill works without any further changes.Easy testing of
Car. You can pass in test doubles to test your different scenarios. For example, you might create a test double ofEnginecalledFakeEngineand configure it for different tests.
There are two major ways to do dependency injection in Android:
Constructor Injection. This is the way described above. You pass the dependencies of a class to its constructor.
Field Injection (or Setter Injection). Certain Android framework classes such as activities and fragments are instantiated by the system, so constructor injection is not possible. With field injection, dependencies are instantiated after the class is created. The code would look like this:
Kotlin
class Car {
    lateinit var engine: Engine

    fun start() {
        engine.start()
    }
}

fun main(args: Array) {
    val car = Car()
    car.engine = Engine()
    car.start()
}
Java
class Car {

    private Engine engine;

    public void setEngine(Engine engine) {
        this.engine = engine;
    }

    public void start() {
        engine.start();
    }
}

class MyApp {
    public static void main(String[] args) {
        Car car = new Car();
        car.setEngine(new Engine());
        car.start();
    }
}
Automated dependency injection
In the previous example, you created, provided, and managed the dependencies
of the different classes yourself, without relying on a library. This is called
dependency injection by hand, or manual dependency injection. In the Car
example, there was only one dependency, but more dependencies and classes can
make manual injection of dependencies more tedious. Manual dependency injection
also presents several problems:
For big apps, taking all the dependencies and connecting them correctly can require a large amount of boilerplate code. In a multi-layered architecture, in order to create an object for a top layer, you have to provide all the dependencies of the layers below it. As a concrete example, to build a real car you might need an engine, a transmission, a chassis, and other parts; and an engine in turn needs cylinders and spark plugs.
When you're not able to construct dependencies before passing them in — for example when using lazy initializations or scoping objects to flows of your app — you need to write and maintain a custom container (or graph of dependencies) that manages the lifetimes of your dependencies in memory.
There are libraries that solve this problem by automating the process of creating and providing dependencies. They fit into two categories:
Reflection-based solutions that connect dependencies at runtime.
Static solutions that generate the code to connect dependencies at compile time.
Dagger is a popular dependency injection library for Java, Kotlin, and Android that is maintained by Google. Dagger facilitates using DI in your app by creating and managing the graph of dependencies for you. It provides fully static and compile-time dependencies addressing many of the development and performance issues of reflection-based solutions such as Guice.
Alternatives to dependency injection
An alternative to dependency injection is using a service locator. The service locator design pattern also improves decoupling of classes from concrete dependencies. You create a class known as the service locator that creates and stores dependencies and then provides those dependencies on demand.
Kotlin
object ServiceLocator {
    fun getEngine(): Engine = Engine()
}

class Car {
    private val engine = ServiceLocator.getEngine()

    fun start() {
        engine.start()
    }
}

fun main(args: Array) {
    val car = Car()
    car.start()
}
Java
class ServiceLocator {

    private static ServiceLocator instance = null;

    private ServiceLocator() {}

    public static ServiceLocator getInstance() {
        if (instance == null) {
            synchronized(ServiceLocator.class) {
                instance = new ServiceLocator();
            }
        }
        return instance;
    }

    public Engine getEngine() {
        return new Engine();
    }
}

class Car {

    private Engine engine = ServiceLocator.getInstance().getEngine();

    public void start() {
        engine.start();
    }
}

class MyApp {
    public static void main(String[] args) {
        Car car = new Car();
        car.start();
    }
}
The service locator pattern is different from dependency injection in the way the elements are consumed. With the service locator pattern, classes have control and ask for objects to be injected; with dependency injection, the app has control and proactively injects the required objects.
Compared to dependency injection:
The collection of dependencies required by a service locator makes code harder to test because all the tests have to interact with the same global service locator.
Dependencies are encoded in the class implementation, not in the API surface. As a result, it's harder to know what a class needs from the outside. As a result, changes to
Caror the dependencies available in the service locator might result in runtime or test failures by causing references to fail.Managing lifetimes of objects is more difficult if you want to scope to anything other than the lifetime of the entire app.
Use Hilt in your Android app
Hilt is Jetpack's recommended library for dependency injection in Android. Hilt defines a standard way to do DI in your application by providing containers for every Android class in your project and managing their lifecycles automatically for you.
Hilt is built on top of the popular DI library Dagger to benefit from the compile time correctness, runtime performance, scalability, and Android Studio support that Dagger provides.
To learn more about Hilt see Dependency Injection with Hilt.
Conclusion
Dependency injection provides your app with the following advantages:
Reusability of classes and decoupling of dependencies: It's easier to swap out implementations of a dependency. Code reuse is improved because of inversion of control, and classes no longer control how their dependencies are created, but instead work with any configuration.
Ease of refactoring: The dependencies become a verifiable part of the API surface, so they can be checked at object-creation time or at compile time rather than being hidden as implementation details.
Ease of testing: A class doesn't manage its dependencies, so when you're testing it, you can pass in different implementations to test all of your different cases.
To fully understand the benefits of dependency injection, you should try it manually in your app as shown in Manual dependency injection.
Additional resources
To learn more about dependency injection, see the following additional resources.