
The Fragment API provides two ways to use motion effects and transformations
to visually connect fragments during navigation. One of these is the
Animation Framework, which uses both
Animation and
Animator. The
other is the Transition Framework, which includes
shared element transitions.
You can specify custom effects for entering and exiting fragments and for transitions of shared elements between fragments.
- An enter effect determines how a fragment enters the screen. For example, you can create an effect to slide the fragment in from the edge of the screen when you navigate to it.
- An exit effect determines how a fragment exits the screen. For example, you can create an effect to fade the fragment out when navigating away from it.
- A shared element transition determines how a view that is shared between
two fragments moves between them. For example, an image displayed
in an
ImageViewin fragment A transitions to fragment B once B becomes visible.
Set animations
First, you need to create animations for your enter and exit effects, which are run when navigating to a new fragment. You can define animations as tween animation resources. These resources allow you to define how fragments should rotate, stretch, fade, and move during the animation. For example, you might want the current fragment to fade out and the new fragment to slide in from the right edge of the screen, as shown in figure 1.

These animations can be defined in the res/anim directory:
<!-- res/anim/fade_out.xml -->
<?xml version="1.0" encoding="utf-8"?>
<alpha xmlns:android="http://schemas.android.com/apk/res/android"
    android:duration="@android:integer/config_shortAnimTime"
    android:interpolator="@android:anim/decelerate_interpolator"
    android:fromAlpha="1"
    android:toAlpha="0" />
<!-- res/anim/slide_in.xml -->
<?xml version="1.0" encoding="utf-8"?>
<translate xmlns:android="http://schemas.android.com/apk/res/android"
    android:duration="@android:integer/config_shortAnimTime"
    android:interpolator="@android:anim/decelerate_interpolator"
    android:fromXDelta="100%"
    android:toXDelta="0%" />
You can also specify animations for the enter and exit effects that are run
when popping the back stack, which can happen when the user taps the Up or
Back button. These are called the popEnter and popExit animations. For
example, when a user pops back to a previous screen, you might want the
current fragment to slide off the right edge of the screen and the previous
fragment to fade in.

popEnter and
popExit animations. The current fragment slides off the screen
to the right while the previous fragment fades in.These animations can be defined as follows:
<!-- res/anim/slide_out.xml -->
<translate xmlns:android="http://schemas.android.com/apk/res/android"
    android:duration="@android:integer/config_shortAnimTime"
    android:interpolator="@android:anim/decelerate_interpolator"
    android:fromXDelta="0%"
    android:toXDelta="100%" />
<!-- res/anim/fade_in.xml -->
<alpha xmlns:android="http://schemas.android.com/apk/res/android"
    android:duration="@android:integer/config_shortAnimTime"
    android:interpolator="@android:anim/decelerate_interpolator"
    android:fromAlpha="0"
    android:toAlpha="1" />
Once you've defined your animations, use them by calling
FragmentTransaction.setCustomAnimations(),
passing in your animation resources by their resource ID, as shown in the
following example:
Kotlin
supportFragmentManager.commit {
    setCustomAnimations(
        R.anim.slide_in, // enter
        R.anim.fade_out, // exit
        R.anim.fade_in, // popEnter
        R.anim.slide_out // popExit
    )
    replace(R.id.fragment_container, fragment)
    addToBackStack(null)
}
Java
Fragment fragment = new FragmentB();
getSupportFragmentManager().beginTransaction()
    .setCustomAnimations(
        R.anim.slide_in,  // enter
        R.anim.fade_out,  // exit
        R.anim.fade_in,   // popEnter
        R.anim.slide_out  // popExit
    )
    .replace(R.id.fragment_container, fragment)
    .addToBackStack(null)
    .commit();
Set transitions
You can also use transitions to define enter and exit effects. These transitions can be defined in XML resource files. For example, you might want the current fragment to fade out and the new fragment to slide in from the right edge of the screen. These transitions can be defined as follows:
<!-- res/transition/fade.xml -->
<fade xmlns:android="http://schemas.android.com/apk/res/android"
    android:duration="@android:integer/config_shortAnimTime"/>
<!-- res/transition/slide_right.xml -->
<slide xmlns:android="http://schemas.android.com/apk/res/android"
    android:duration="@android:integer/config_shortAnimTime"
    android:slideEdge="right" />
Once you've defined your transitions, apply them by calling
setEnterTransition()
on the entering fragment and
setExitTransition()
on the exiting fragment, passing in your inflated transition resources
by their resource ID, as shown in the following example:
Kotlin
class FragmentA : Fragment() {
    override fun onCreate(savedInstanceState: Bundle?) {
        super.onCreate(savedInstanceState)
        val inflater = TransitionInflater.from(requireContext())
        exitTransition = inflater.inflateTransition(R.transition.fade)
    }
}

class FragmentB : Fragment() {
    override fun onCreate(savedInstanceState: Bundle?) {
        super.onCreate(savedInstanceState)
        val inflater = TransitionInflater.from(requireContext())
        enterTransition = inflater.inflateTransition(R.transition.slide_right)
    }
}
Java
public class FragmentA extends Fragment {
    @Override
    public void onCreate(Bundle savedInstanceState) {
        super.onCreate(savedInstanceState);
        TransitionInflater inflater = TransitionInflater.from(requireContext());
        setExitTransition(inflater.inflateTransition(R.transition.fade));
    }
}

public class FragmentB extends Fragment {
    @Override
    public void onCreate(Bundle savedInstanceState) {
        super.onCreate(savedInstanceState);
        TransitionInflater inflater = TransitionInflater.from(requireContext());
        setEnterTransition(inflater.inflateTransition(R.transition.slide_right));
    }
}
Fragments support AndroidX transitions. While fragments also support framework transitions, we strongly recommend using AndroidX transitions, as they are supported in API levels 14 and higher and contain bug fixes that are not present in older versions of framework transitions.
Use shared element transitions
Part of the Transition Framework,
shared element transitions determine how corresponding views move between
two fragments during a fragment transition. For example, you might want an
image displayed in an ImageView on fragment A to transition to fragment B
once B becomes visible, as shown in figure 3.
At a high level, here's how to make a fragment transition with shared elements:
- Assign a unique transition name to each shared element view.
- Add shared element views and transition names to the
FragmentTransaction. - Set a shared element transition animation.
First, you must assign a unique transition name to each shared element view
to allow the views to be mapped from one fragment to the next. Set a
transition name on shared elements in each fragment layout using
ViewCompat.setTransitionName(),
which provides compatibility for API levels 14 and above.
As an example, the transition name for an ImageView in fragments A and B
can be assigned as follows:
Kotlin
class FragmentA : Fragment() {
    override fun onViewCreated(view: View, savedInstanceState: Bundle?) {
        ...
        val itemImageView = view.findViewById<ImageView>(R.id.item_image)
        ViewCompat.setTransitionName(itemImageView, “item_image”)
    }
}

class FragmentB : Fragment() {
    override fun onViewCreated(view: View, savedInstanceState: Bundle?) {
        ...
        val heroImageView = view.findViewById<ImageView>(R.id.hero_image)
        ViewCompat.setTransitionName(heroImageView, “hero_image”)
    }
}
Java
public class FragmentA extends Fragment {
    @Override
    public void onViewCreated(@NonNull View view, Bundle savedInstanceState) {
        ...
        ImageView itemImageView = view.findViewById(R.id.item_image);
        ViewCompat.setTransitionName(itemImageView, “item_image”);
    }
}

public class FragmentB extends Fragment {
    @Override
    public void onViewCreated(@NonNull View view, Bundle savedInstanceState) {
        ...
        ImageView heroImageView = view.findViewById(R.id.hero_image);
        ViewCompat.setTransitionName(heroImageView, “hero_image”);
    }
}
To include your shared elements in the fragment transition, your
FragmentTransaction must know how each shared element's views map from one
fragment to the next. Add each of your shared elements to your
FragmentTransaction by calling
FragmentTransaction.addSharedElement(),
passing in the view and the transition name of the corresponding view in the
next fragment, as shown in the following example:
Kotlin
val fragment = FragmentB()
supportFragmentManager.commit {
    setCustomAnimations(...)
    addSharedElement(itemImageView, “hero_image”)
    replace(R.id.fragment_container, fragment)
    addToBackStack(null)
}
Java
Fragment fragment = new FragmentB();
getSupportFragmentManager().beginTransaction()
    .setCustomAnimations(...)
    .addSharedElement(itemImageView, “hero_image”)
    .replace(R.id.fragment_container, fragment)
    .addToBackStack(null)
    .commit();
To specify how your shared elements transition from one fragment to the next,
you must set an enter transition on the fragment being
navigated to. Call
Fragment.setSharedElementEnterTransition()
in the fragment's onCreate() method, as shown in the following example:
Kotlin
class FragmentB : Fragment() {
    override fun onCreate(savedInstanceState: Bundle?) {
        super.onCreate(savedInstanceState)
        sharedElementEnterTransition = TransitionInflater.from(requireContext())
             .inflateTransition(R.transition.shared_image)
    }
}
Java
public class FragmentB extends Fragment {
    @Override
    public void onCreate(Bundle savedInstanceState) {
        super.onCreate(savedInstanceState);
        Transition transition = TransitionInflater.from(requireContext())
            .inflateTransition(R.transition.shared_image);
        setSharedElementEnterTransition(transition);
    }
}
The shared_image transition is defined as follows:
<!-- res/transition/shared_image.xml -->
<transitionSet>
    <changeImageTransform />
</transitionSet>
All subclasses of Transition are supported as shared element transitions. If
you want to create a custom Transition, see
Create a custom transition animation.
changeImageTransform, used in the previous example, is one of the available
prebuilt translations that you can use. You can find additional Transition
subclasses in the API reference for the
Transition class.
By default, the shared element enter transition is also used as the
return transition for shared elements. The return transition determines how
shared elements transition back to the previous fragment when the fragment
transaction is popped off the back stack. If you'd like to specify a different
return transition, you can do so using
Fragment.setSharedElementReturnTransition()
in the fragment's onCreate() method.
Predictive back compatibility
You can use predictive back with many, but not all, cross-fragment animations. When implementing predictive back, keep the following considerations in mind:
- Import
Transitions 1.5.0or later andFragments 1.7.0or later. - The
Animatorclass and subclasses and AndroidX Transition library are supported. - The
Animationclass and frameworkTransitionlibrary are not supported. - Predictive fragment animations only work on devices that run Android 14 or higher.
setCustomAnimations,setEnterTransition,setExitTransition,setReenterTransition,setReturnTransition,setSharedElementEnterTransition, andsetSharedElementReturnTransitionare supported with predictive back.
To learn more, see Add support for predictive back animations.
Postponing transitions
In some cases, you might need to postpone your fragment transition for a short period of time. For example, you might need to wait until all views in the entering fragment have been measured and laid out so that Android can accurately capture their start and end states for the transition.
Additionally, your transition might need to be postponed until some necessary data has been loaded. For example, you might need to wait until images have been loaded for shared elements. Otherwise, the transition might be jarring if an image finishes loading during or after the transition.
To postpone a transition, you must first ensure that the fragment
transaction allows reordering of fragment state changes. To allow reordering
fragment state changes, call
FragmentTransaction.setReorderingAllowed(),
as shown in the following example:
Kotlin
val fragment = FragmentB()
supportFragmentManager.commit {
    setReorderingAllowed(true)
    setCustomAnimation(...)
    addSharedElement(view, view.transitionName)
    replace(R.id.fragment_container, fragment)
    addToBackStack(null)
}
Java
Fragment fragment = new FragmentB();
getSupportFragmentManager().beginTransaction()
    .setReorderingAllowed(true)
    .setCustomAnimations(...)
    .addSharedElement(view, view.getTransitionName())
    .replace(R.id.fragment_container, fragment)
    .addToBackStack(null)
    .commit();
To postpone the enter transition, call
Fragment.postponeEnterTransition()
in the entering fragment's onViewCreated() method:
Kotlin
class FragmentB : Fragment() {
    override fun onViewCreated(view: View, savedInstanceState: Bundle?) {
        ...
        postponeEnterTransition()
    }
}
Java
public class FragmentB extends Fragment {
    @Override
    public void onViewCreated(@NonNull View view, Bundle savedInstanceState) {
        ...
        postponeEnterTransition();
    }
}
Once you've loaded the data and are ready to start the transition, call
Fragment.startPostponedEnterTransition().
The following example uses the
Glide library to load an image
into a shared ImageView, postponing the corresponding transition until image
loading has completed.
Kotlin
class FragmentB : Fragment() {
    override fun onViewCreated(view: View, savedInstanceState: Bundle?) {
        ...
        Glide.with(this)
            .load(url)
            .listener(object : RequestListener<Drawable> {
                override fun onLoadFailed(...): Boolean {
                    startPostponedEnterTransition()
                    return false
                }

                override fun onResourceReady(...): Boolean {
                    startPostponedEnterTransition()
                    return false
                }
            })
            .into(headerImage)
    }
}
Java
public class FragmentB extends Fragment {
    @Override
    public void onViewCreated(@NonNull View view, Bundle savedInstanceState) {
        ...
        Glide.with(this)
            .load(url)
            .listener(new RequestListener<Drawable>() {
                @Override
                public boolean onLoadFailed(...) {
                    startPostponedEnterTransition();
                    return false;
                }

                @Override
                public boolean onResourceReady(...) {
                    startPostponedEnterTransition();
                    return false;
                }
            })
            .into(headerImage)
    }
}
When dealing with cases such as a user's slow internet connection, you might
need the postponed transition to start after a certain amount of time rather
than waiting for all of the data to load. For these situations, you can
instead call
Fragment.postponeEnterTransition(long, TimeUnit)
in the entering fragment's onViewCreated() method, passing in the duration
and the unit of time. The postponed then automatically starts once the
specified time has elapsed.
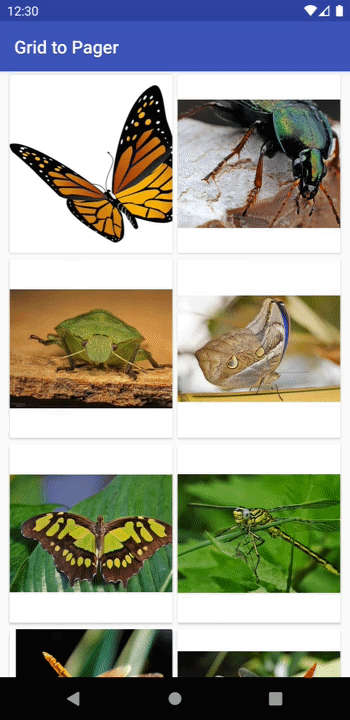
Use shared element transitions with a RecyclerView
Postponed enter transitions should not start until all views in the entering
fragment have been measured and laid out. When using a
RecyclerView, you must wait
for any data to load and for the RecyclerView items to be ready to draw
before starting the transition. Here's an example:
Kotlin
class FragmentA : Fragment() {
    override fun onViewCreated(view: View, savedInstanceState: Bundle?) {
        postponeEnterTransition()

        // Wait for the data to load
        viewModel.data.observe(viewLifecycleOwner) {
            // Set the data on the RecyclerView adapter
            adapter.setData(it)
            // Start the transition once all views have been
            // measured and laid out
            (view.parent as? ViewGroup)?.doOnPreDraw {
                startPostponedEnterTransition()
            }
        }
    }
}
Java
public class FragmentA extends Fragment {
    @Override
    public void onViewCreated(@NonNull View view, Bundle savedInstanceState) {
        postponeEnterTransition();

        final ViewGroup parentView = (ViewGroup) view.getParent();
        // Wait for the data to load
        viewModel.getData()
            .observe(getViewLifecycleOwner(), new Observer<List<String>>() {
                @Override
                public void onChanged(List<String> list) {
                    // Set the data on the RecyclerView adapter
                    adapter.setData(it);
                    // Start the transition once all views have been
                    // measured and laid out
                    parentView.getViewTreeObserver()
                        .addOnPreDrawListener(new ViewTreeObserver.OnPreDrawListener() {
                            @Override
                            public boolean onPreDraw(){
                                parentView.getViewTreeObserver()
                                        .removeOnPreDrawListener(this);
                                startPostponedEnterTransition();
                                return true;
                            }
                    });
                }
        });
    }
}
Notice that a
ViewTreeObserver.OnPreDrawListener
is set on the parent of the fragment view. This is to ensure that all of the
fragment's views have been measured and laid out and are therefore ready to
be drawn before beginning the postponed enter transition.
Another point to consider when using shared element transitions with a
RecyclerView is that you cannot set the transition name in the
RecyclerView item's XML layout because an arbitrary number of items share
that layout. A unique transition name must be assigned so that the
transition animation uses the correct view.
You can give each item's shared element a unique transition name by
assigning them when the ViewHolder is bound. For example, if the data for
each item includes a unique ID, it could be used as the transition name, as
shown in the following example:
Kotlin
class ExampleViewHolder(itemView: View) : RecyclerView.ViewHolder(itemView) {
    val image = itemView.findViewById<ImageView>(R.id.item_image)

    fun bind(id: String) {
        ViewCompat.setTransitionName(image, id)
        ...
    }
}
Java
public class ExampleViewHolder extends RecyclerView.ViewHolder {
    private final ImageView image;

    ExampleViewHolder(View itemView) {
        super(itemView);
        image = itemView.findViewById(R.id.item_image);
    }

    public void bind(String id) {
        ViewCompat.setTransitionName(image, id);
        ...
    }
}
Additional resources
To learn more about fragment transitions, see the following additional resources.