
대화상자 는 사용자에게 결정을 내리거나 추가 정보를 입력하라는 메시지를 표시하는 작은 창입니다. 대화상자는 화면을 가득 채우지 않으며 보통은 사용자가 다음으로 계속 진행하기 전에 조치를 취해야 하는 모달 이벤트에 사용됩니다.

Dialog
클래스는 대화상자의 기본 클래스이지만 Dialog
를 직접 인스턴스화하지 마세요. 대신 다음 서브클래스 중 하나를 사용하세요.
AlertDialog- 제목 한 개, 버튼 최대 세 개, 선택 가능한 항목 목록 또는 맞춤 레이아웃 한 개를 표시할 수 있는 대화상자입니다.
DatePickerDialog또는TimePickerDialog- 미리 정의된 UI가 있는 대화상자이며, 사용자가 날짜 또는 시간을 선택할 수 있습니다.
이 클래스는 대화상자의 스타일과 구조를 정의합니다. 또한 대화상자의 컨테이너로 DialogFragment가 필요합니다. DialogFragment 클래스는
대화상자를 만들고 외형을 관리하는 데 필요한 모든 컨트롤을 제공합니다.
Dialog 객체의 메서드를 호출하는 대신
대화상자를 관리하는 데 DialogFragment를 사용하면 사용자가 뒤로 버튼을 탭하거나 화면을 돌리는 것과 같은 수명 주기 이벤트를 올바르게 처리할 수 있습니다. DialogFragment 클래스를 사용하면 대화상자의 UI를 더 큰 UI에 삽입할 수 있는 구성요소로 재사용할 수도 있습니다. 이는 기존의
Fragment와 동일합니다(예: 대화상자 UI를 큰 화면과 작은 화면에서 서로 다르게 표시하기를 원하는 경우).
이 문서의 다음 섹션에서는 DialogFragment를 AlertDialog 객체와 함께 조합하여 사용하는 방법을 설명합니다. 날짜 또는 시간 선택 도구를 생성하고자 하는 경우에는
앱에 선택 도구 추가를
참고하세요.
대화상자 프래그먼트 만들기
맞춤
레이아웃과
Material Design
대화상자에서 설명한 것을 포함하여 대단히 다양한 대화상자 디자인을 만들 수 있습니다. DialogFragment를 확장하고
AlertDialog를
onCreateDialog()
콜백 메서드에서 생성하면 됩니다.
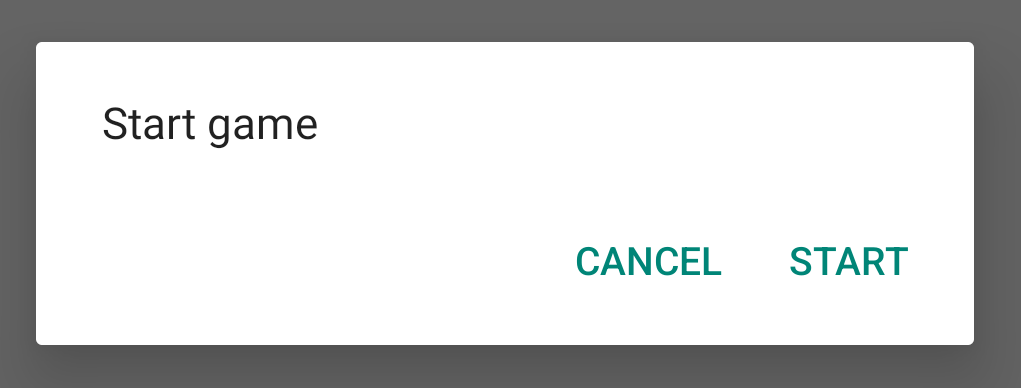
예를 들어 다음은 DialogFragment 내에서 관리되는 기본 AlertDialog입니다.
Kotlin
class StartGameDialogFragment : DialogFragment() {
    override fun onCreateDialog(savedInstanceState: Bundle?): Dialog {
        return activity?.let {
            // Use the Builder class for convenient dialog construction.
            val builder = AlertDialog.Builder(it)
            builder.setMessage("Start game")
                .setPositiveButton("Start") { dialog, id ->
                    // START THE GAME!
                }
                .setNegativeButton("Cancel") { dialog, id ->
                    // User cancelled the dialog.
                }
            // Create the AlertDialog object and return it.
            builder.create()
        } ?: throw IllegalStateException("Activity cannot be null")
    }
}

class OldXmlActivity : AppCompatActivity() {
    override fun onCreate(savedInstanceState: Bundle?) {
        super.onCreate(savedInstanceState)
        setContentView(R.layout.activity_old_xml)

        StartGameDialogFragment().show(supportFragmentManager, "GAME_DIALOG")
    }
}
자바
public class StartGameDialogFragment extends DialogFragment {
    @Override
    public Dialog onCreateDialog(Bundle savedInstanceState) {
        // Use the Builder class for convenient dialog construction.
        AlertDialog.Builder builder = new AlertDialog.Builder(getActivity());
        builder.setMessage(R.string.dialog_start_game)
               .setPositiveButton(R.string.start, new DialogInterface.OnClickListener() {
                   public void onClick(DialogInterface dialog, int id) {
                       // START THE GAME!
                   }
               })
               .setNegativeButton(R.string.cancel, new DialogInterface.OnClickListener() {
                   public void onClick(DialogInterface dialog, int id) {
                       // User cancels the dialog.
                   }
               });
        // Create the AlertDialog object and return it.
        return builder.create();
    }
}
// ...

StartGameDialogFragment().show(supportFragmentManager, "GAME_DIALOG");
이 클래스의 인스턴스를 생성하고 이 객체에서 show()를 호출하면 대화상자는 다음 그림처럼 나타납니다.
다음 섹션에서는 AlertDialog.Builder API를 사용하여 대화상자를 생성하는 방법을 좀 더 자세히 설명합니다.
대화상자의 복잡한 정도에 따라 여러 가지 다양한 콜백 메서드를 DialogFragment에서 구현할 수 있습니다. 그중에는 기본적인 프래그먼트 수명 주기 메서드도 포함됩니다.
알림 대화상자 빌드
AlertDialog 클래스를 사용하면 여러 가지 대화상자 디자인을 빌드할 수 있으며, 대개 이 대화상자 클래스만 있으면 되는 경우가 많습니다. 다음 그림과 같이 알림 대화상자에는 세 가지 영역이 있습니다.
- 제목: 선택사항이며 콘텐츠 영역에 상세한 메시지, 목록 또는 맞춤 레이아웃이 채워져 있는 경우에만 사용됩니다. 단순한 메시지 또는 질문을 나타내야 하는 경우 제목은 없어도 됩니다.
- 콘텐츠 영역: 메시지, 목록 또는 다른 맞춤 레이아웃을 표시할 수 있습니다.
- 작업 버튼: 대화상자 하나에 작업 버튼이 최대 세 개까지 있을 수 있습니다.
AlertDialog.Builder 클래스가 맞춤 레이아웃을 포함하여 이와 같은 종류의 콘텐츠가 있는 AlertDialog를 생성할 수 있는 API를 제공합니다.
AlertDialog를 빌드하려면 다음 단계를 따르세요.
Kotlin
val builder: AlertDialog.Builder = AlertDialog.Builder(context)
builder
    .setMessage("I am the message")
    .setTitle("I am the title")

val dialog: AlertDialog = builder.create()
dialog.show()
자바
// 1. Instantiate an AlertDialog.Builder with its constructor.
AlertDialog.Builder builder = new AlertDialog.Builder(getActivity());

// 2. Chain together various setter methods to set the dialog characteristics.
builder.setMessage(R.string.dialog_message)
       .setTitle(R.string.dialog_title);

// 3. Get the AlertDialog.
AlertDialog dialog = builder.create();
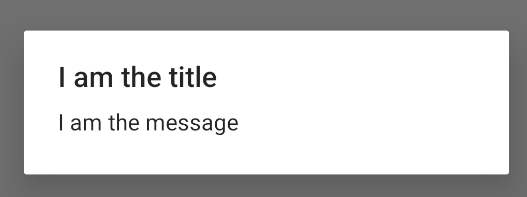
이전 코드 스니펫은 다음 대화상자를 생성합니다.
버튼 추가
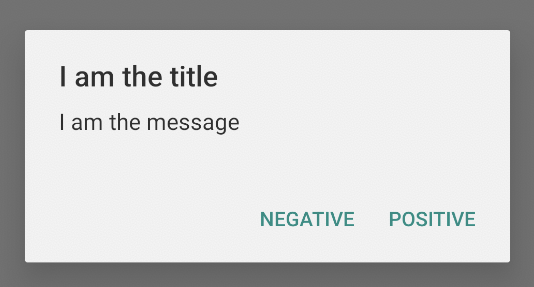
그림 2와 같은 작업 버튼을 추가하려면 setPositiveButton() 및 setNegativeButton() 메서드를 호출하면 됩니다.
Kotlin
val builder: AlertDialog.Builder = AlertDialog.Builder(context)
builder
    .setMessage("I am the message")
    .setTitle("I am the title")
    .setPositiveButton("Positive") { dialog, which ->
        // Do something.
    }
    .setNegativeButton("Negative") { dialog, which ->
        // Do something else.
    }

val dialog: AlertDialog = builder.create()
dialog.show()
자바
AlertDialog.Builder builder = new AlertDialog.Builder(getActivity());
// Add the buttons.
builder.setPositiveButton(R.string.ok, new DialogInterface.OnClickListener() {
           public void onClick(DialogInterface dialog, int id) {
               // User taps OK button.
           }
       });
builder.setNegativeButton(R.string.cancel, new DialogInterface.OnClickListener() {
           public void onClick(DialogInterface dialog, int id) {
               // User cancels the dialog.
           }
       });
// Set other dialog properties.
...

// Create the AlertDialog.
AlertDialog dialog = builder.create();
set...Button() 메서드에는 버튼의 제목이 필요하고(문자열 리소스가 제공), 사용자가 버튼을 탭했을 때 실행할 작업을 정의하는 DialogInterface.OnClickListener가 필요합니다.
추가할 수 있는 작업 버튼은 다음 세 가지입니다.
- 긍정적: 작업을 수락하고 계속 진행하는 데 사용해야 합니다( "OK" 작업).
- 부정적: 작업을 취소하는 데 사용해야 합니다.
- 중립적: 사용자가 작업을 계속하고 싶지 않지만 취소하고 싶지도 않은 경우에 사용해야 합니다. 긍정적 버튼과 부정적 버튼 사이에 나타납니다. 예를 들어 '나중에 알림 '과 같은 작업이 있습니다.
AlertDialog에는 각 버튼 유형을 하나씩만 추가할 수 있습니다. 예를 들어 '긍정적' 버튼이 두 개 이상 있으면 안 됩니다.
이전 코드 스니펫은 다음과 같은 알림 대화상자를 제공합니다.
목록 추가
AlertDialog API와 함께 사용 가능한 목록은 세 가지 종류가 있습니다.
- 일반적인 단일 선택 목록
- 지속적인 단일 선택 목록 (라디오 버튼)
- 지속적인 다중 선택 목록 (체크박스)
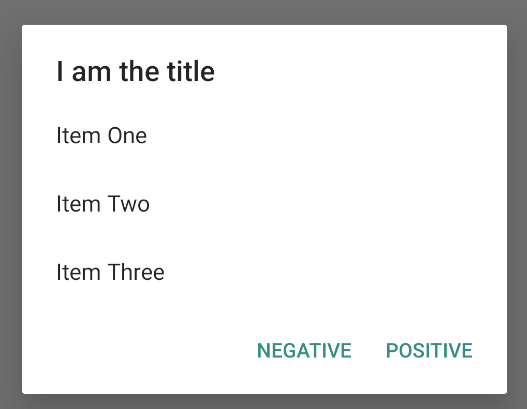
그림 5와 같은 단일 선택 목록을 생성하려면 setItems() 메서드를 사용하면 됩니다.
Kotlin
val builder: AlertDialog.Builder = AlertDialog.Builder(context)
builder
    .setTitle("I am the title")
    .setPositiveButton("Positive") { dialog, which ->
        // Do something.
    }
    .setNegativeButton("Negative") { dialog, which ->
        // Do something else.
    }
    .setItems(arrayOf("Item One", "Item Two", "Item Three")) { dialog, which ->
        // Do something on item tapped.
    }

val dialog: AlertDialog = builder.create()
dialog.show()
자바
@Override
public Dialog onCreateDialog(Bundle savedInstanceState) {
    AlertDialog.Builder builder = new AlertDialog.Builder(getActivity());
    builder.setTitle(R.string.pick_color)
           .setItems(R.array.colors_array, new DialogInterface.OnClickListener() {
               public void onClick(DialogInterface dialog, int which) {
               // The 'which' argument contains the index position of the selected item.
           }
    });
    return builder.create();
}
이 코드 스니펫은 다음과 같은 대화상자를 생성합니다.
목록은 대화상자의 콘텐츠 영역에 나타나므로 대화상자는 메시지와 목록을 둘 다 표시할 수는 없습니다. 대화상자에는 setTitle()로 제목을 설정해야 합니다.
목록의 항목을 지정하려면 setItems()를 호출하고 배열을 전달합니다. 또는 setAdapter()를 사용하여 목록을 지정할 수 있습니다.
이렇게 하면 동적 데이터가 있는 목록(예: 데이터베이스에서 가져온 것)을 ListAdapter로 지원할 수 있습니다.
ListAdapter로 목록을 지원하기로 선택하는 경우에는 언제나 Loader를 사용해야 콘텐츠가 비동기식으로 로드됩니다. 어댑터로 레이아웃 빌드하기 및 로더에 더욱 자세히 설명되어 있습니다.
지속적 다중 선택 또는 단일 선택 목록 추가
다중 선택 항목 목록 (체크박스)을 추가하거나 단일 선택 목록(라디오 버튼)을 추가하려면, 각각 setMultiChoiceItems() 또는 setSingleChoiceItems() 메서드를 사용합니다.
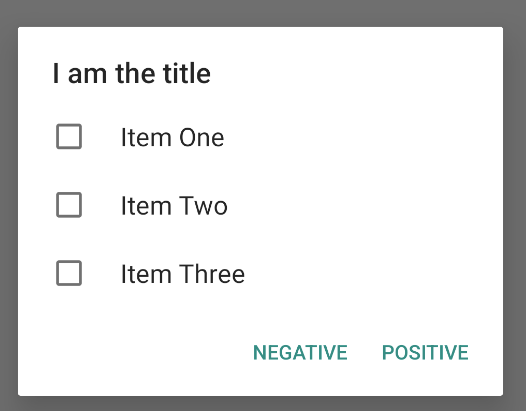
예를 들어 다음은 그림 6과 같은 다중 선택 목록을 생성하는 방법입니다. 이것은 선택한 항목을 ArrayList에 저장합니다.
Kotlin
val builder: AlertDialog.Builder = AlertDialog.Builder(context)
builder
    .setTitle("I am the title")
    .setPositiveButton("Positive") { dialog, which ->
        // Do something.
    }
    .setNegativeButton("Negative") { dialog, which ->
        // Do something else.
    }
    .setMultiChoiceItems(
        arrayOf("Item One", "Item Two", "Item Three"), null) { dialog, which, isChecked ->
        // Do something.
    }

val dialog: AlertDialog = builder.create()
dialog.show()
자바
@Override
public Dialog onCreateDialog(Bundle savedInstanceState) {
    selectedItems = new ArrayList();  // Where we track the selected items
    AlertDialog.Builder builder = new AlertDialog.Builder(getActivity());
    // Set the dialog title.
    builder.setTitle(R.string.pick_toppings)
    // Specify the list array, the items to be selected by default (null for
    // none), and the listener through which to receive callbacks when items
    // are selected.
           .setMultiChoiceItems(R.array.toppings, null,
                      new DialogInterface.OnMultiChoiceClickListener() {
               @Override
               public void onClick(DialogInterface dialog, int which,
                       boolean isChecked) {
                   if (isChecked) {
                       // If the user checks the item, add it to the selected
                       // items.
                       selectedItems.add(which);
                   } else if (selectedItems.contains(which)) {
                       // If the item is already in the array, remove it.
                       selectedItems.remove(which);
                   }
               }
           })
    // Set the action buttons
           .setPositiveButton(R.string.ok, new DialogInterface.OnClickListener() {
               @Override
               public void onClick(DialogInterface dialog, int id) {
                   // User taps OK, so save the selectedItems results
                   // somewhere or return them to the component that opens the
                   // dialog.
                   ...
               }
           })
           .setNegativeButton(R.string.cancel, new DialogInterface.OnClickListener() {
               @Override
               public void onClick(DialogInterface dialog, int id) {
                   ...
               }
           });

    return builder.create();
}
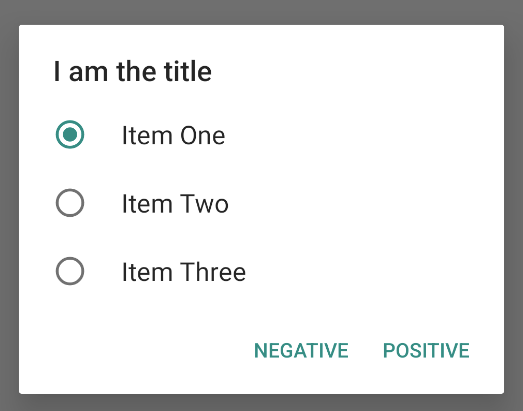
단일 선택 알림 대화상자는 다음과 같이 가져올 수 있습니다.
Kotlin
val builder: AlertDialog.Builder = AlertDialog.Builder(context)
builder
    .setTitle("I am the title")
    .setPositiveButton("Positive") { dialog, which ->
        // Do something.
    }
    .setNegativeButton("Negative") { dialog, which ->
        // Do something else.
    }
    .setSingleChoiceItems(
        arrayOf("Item One", "Item Two", "Item Three"), 0
    ) { dialog, which ->
        // Do something.
    }

val dialog: AlertDialog = builder.create()
dialog.show()
자바
        String[] choices = {"Item One", "Item Two", "Item Three"};

        AlertDialog.Builder builder = AlertDialog.Builder(context);
        builder
                .setTitle("I am the title")
                .setPositiveButton("Positive", (dialog, which) -> {

                })
                .setNegativeButton("Negative", (dialog, which) -> {

                })
                .setSingleChoiceItems(choices, 0, (dialog, which) -> {

                });

        AlertDialog dialog = builder.create();
        dialog.show();
이 경우 다음 예가 생성됩니다.
맞춤 레이아웃 만들기
대화상자의 맞춤 레이아웃을 원하는 경우, 레이아웃을 생성하고
AlertDialog에 추가하려면
setView()
를 호출하여 AlertDialog.Builder 객체에 추가합니다.
기본적으로 맞춤 레이아웃이 대화상자 창을 가득 채우지만 AlertDialog.Builder 메서드를 사용하여 버튼과 제목을 추가할 수 있습니다.
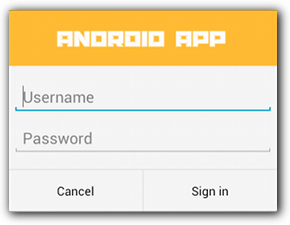
예를 들어 다음은 이전 맞춤 대화상자 레이아웃의 레이아웃 파일입니다.
res/layout/dialog_signin.xml
<LinearLayout xmlns:android="http://schemas.android.com/apk/res/android"
    android:orientation="vertical"
    android:layout_width="wrap_content"
    android:layout_height="wrap_content">
    <ImageView
        android:src="@drawable/header_logo"
        android:layout_width="match_parent"
        android:layout_height="64dp"
        android:scaleType="center"
        android:background="#FFFFBB33"
        android:contentDescription="@string/app_name" />
    <EditText
        android:id="@+id/username"
        android:inputType="textEmailAddress"
        android:layout_width="match_parent"
        android:layout_height="wrap_content"
        android:layout_marginTop="16dp"
        android:layout_marginLeft="4dp"
        android:layout_marginRight="4dp"
        android:layout_marginBottom="4dp"
        android:hint="@string/username" />
    <EditText
        android:id="@+id/password"
        android:inputType="textPassword"
        android:layout_width="match_parent"
        android:layout_height="wrap_content"
        android:layout_marginTop="4dp"
        android:layout_marginLeft="4dp"
        android:layout_marginRight="4dp"
        android:layout_marginBottom="16dp"
        android:fontFamily="sans-serif"
        android:hint="@string/password"/>
</LinearLayout>
DialogFragment에서 레이아웃을 확장하려면
LayoutInflater
로
getLayoutInflater()
를 가져와서
inflate()를 호출합니다.
첫 번째 매개변수는 레이아웃 리소스 ID이고 두 번째 매개변수는 레이아웃의 상위 뷰입니다. 그런 다음 setView()를 호출하여 대화상자에 레이아웃을 넣습니다. 예를 들면 다음과 같습니다.
Kotlin
override fun onCreateDialog(savedInstanceState: Bundle?): Dialog {
    return activity?.let {
        val builder = AlertDialog.Builder(it)
        // Get the layout inflater.
        val inflater = requireActivity().layoutInflater;

        // Inflate and set the layout for the dialog.
        // Pass null as the parent view because it's going in the dialog
        // layout.
        builder.setView(inflater.inflate(R.layout.dialog_signin, null))
                // Add action buttons.
                .setPositiveButton(R.string.signin,
                        DialogInterface.OnClickListener { dialog, id ->
                            // Sign in the user.
                        })
                .setNegativeButton(R.string.cancel,
                        DialogInterface.OnClickListener { dialog, id ->
                            getDialog().cancel()
                        })
        builder.create()
    } ?: throw IllegalStateException("Activity cannot be null")
}
자바
@Override
public Dialog onCreateDialog(Bundle savedInstanceState) {
    AlertDialog.Builder builder = new AlertDialog.Builder(getActivity());
    // Get the layout inflater.
    LayoutInflater inflater = requireActivity().getLayoutInflater();

    // Inflate and set the layout for the dialog.
    // Pass null as the parent view because it's going in the dialog layout.
    builder.setView(inflater.inflate(R.layout.dialog_signin, null))
    // Add action buttons
           .setPositiveButton(R.string.signin, new DialogInterface.OnClickListener() {
               @Override
               public void onClick(DialogInterface dialog, int id) {
                   // Sign in the user.
               }
           })
           .setNegativeButton(R.string.cancel, new DialogInterface.OnClickListener() {
               public void onClick(DialogInterface dialog, int id) {
                   LoginDialogFragment.this.getDialog().cancel();
               }
           });
    return builder.create();
}
맞춤 대화상자를 원하는 경우 Dialog API를 사용하는 대신 Activity를 대화상자로 대신 표시할 수 있습니다. 활동을 하나 생성한 다음,
그 테마를
Theme.Holo.Dialog
에 있는
<activity>
매니페스트 요소로 설정하면 됩니다.
<activity android:theme="@android:style/Theme.Holo.Dialog" >
이제 활동이 대화상자를 전체 화면이 아니라 대화상자 창으로 표시합니다.
이벤트를 대화상자의 호스트에 다시 전달
사용자가 대화상자의 작업 버튼 중 하나를 탭하거나 목록에서 항목을 하나 선택하면, DialogFragment가 필요한 작업을 알아서 실행할 수도 있지만 개발자는 대화상자를 여는 활동 또는 프래그먼트에 이벤트를 직접 전달하고 싶은 경우가 많습니다. 이를 위해서 각 클릭 이벤트 유형의 메서드로 인터페이스를 정의합니다. 그런 다음, 대화상자에서 작업 이벤트를 수신할 호스트 구성요소에 인터페이스를 구현합니다.
예를 들어 다음은 인터페이스를 정의하는 DialogFragment입니다. 이 인터페이스를 통해 이벤트를 호스트 활동에 다시 전달합니다.
Kotlin
class NoticeDialogFragment : DialogFragment() {
    // Use this instance of the interface to deliver action events.
    internal lateinit var listener: NoticeDialogListener

    // The activity that creates an instance of this dialog fragment must
    // implement this interface to receive event callbacks. Each method passes
    // the DialogFragment in case the host needs to query it.
    interface NoticeDialogListener {
        fun onDialogPositiveClick(dialog: DialogFragment)
        fun onDialogNegativeClick(dialog: DialogFragment)
    }

    // Override the Fragment.onAttach() method to instantiate the
    // NoticeDialogListener.
    override fun onAttach(context: Context) {
        super.onAttach(context)
        // Verify that the host activity implements the callback interface.
        try {
            // Instantiate the NoticeDialogListener so you can send events to
            // the host.
            listener = context as NoticeDialogListener
        } catch (e: ClassCastException) {
            // The activity doesn't implement the interface. Throw exception.
            throw ClassCastException((context.toString() +
                    " must implement NoticeDialogListener"))
        }
    }
}
자바
public class NoticeDialogFragment extends DialogFragment {

    // The activity that creates an instance of this dialog fragment must
    // implement this interface to receive event callbacks. Each method passes
    // the DialogFragment in case the host needs to query it.
    public interface NoticeDialogListener {
        public void onDialogPositiveClick(DialogFragment dialog);
        public void onDialogNegativeClick(DialogFragment dialog);
    }

    // Use this instance of the interface to deliver action events.
    NoticeDialogListener listener;

    // Override the Fragment.onAttach() method to instantiate the
    // NoticeDialogListener.
    @Override
    public void onAttach(Context context) {
        super.onAttach(context);
        // Verify that the host activity implements the callback interface.
        try {
            // Instantiate the NoticeDialogListener so you can send events to
            // the host.
            listener = (NoticeDialogListener) context;
        } catch (ClassCastException e) {
            // The activity doesn't implement the interface. Throw exception.
            throw new ClassCastException(activity.toString()
                    + " must implement NoticeDialogListener");
        }
    }
    ...
}
대화상자를 호스팅하는 활동은 대화상자 프래그먼트의 생성자를 사용하여 대화상자의 인스턴스를 생성하고 NoticeDialogListener 인터페이스 구현을 통해 대화상자의 이벤트를 수신합니다.
Kotlin
class MainActivity : FragmentActivity(),
        NoticeDialogFragment.NoticeDialogListener {

    fun showNoticeDialog() {
        // Create an instance of the dialog fragment and show it.
        val dialog = NoticeDialogFragment()
        dialog.show(supportFragmentManager, "NoticeDialogFragment")
    }

    // The dialog fragment receives a reference to this Activity through the
    // Fragment.onAttach() callback, which it uses to call the following
    // methods defined by the NoticeDialogFragment.NoticeDialogListener
    // interface.
    override fun onDialogPositiveClick(dialog: DialogFragment) {
        // User taps the dialog's positive button.
    }

    override fun onDialogNegativeClick(dialog: DialogFragment) {
        // User taps the dialog's negative button.
    }
}
자바
public class MainActivity extends FragmentActivity
                          implements NoticeDialogFragment.NoticeDialogListener{
    ...
    public void showNoticeDialog() {
        // Create an instance of the dialog fragment and show it.
        DialogFragment dialog = new NoticeDialogFragment();
        dialog.show(getSupportFragmentManager(), "NoticeDialogFragment");
    }

    // The dialog fragment receives a reference to this Activity through the
    // Fragment.onAttach() callback, which it uses to call the following
    // methods defined by the NoticeDialogFragment.NoticeDialogListener
    // interface.
    @Override
    public void onDialogPositiveClick(DialogFragment dialog) {
        // User taps the dialog's positive button.
        ...
    }

    @Override
    public void onDialogNegativeClick(DialogFragment dialog) {
        // User taps the dialog's negative button.
        ...
    }
}
호스트 활동에서 NoticeDialogListener를 구현하므로(이전 예에서 표시된 onAttach() 콜백 메서드가 강제로 실행) 대화상자 프래그먼트는 인터페이스 콜백 메서드를 사용하여 활동에 클릭 이벤트를 전달할 수 있습니다.
Kotlin
    override fun onCreateDialog(savedInstanceState: Bundle): Dialog {
        return activity?.let {
            // Build the dialog and set up the button click handlers.
            val builder = AlertDialog.Builder(it)

            builder.setMessage(R.string.dialog_start_game)
                    .setPositiveButton(R.string.start,
                            DialogInterface.OnClickListener { dialog, id ->
                                // Send the positive button event back to the
                                // host activity.
                                listener.onDialogPositiveClick(this)
                            })
                    .setNegativeButton(R.string.cancel,
                            DialogInterface.OnClickListener { dialog, id ->
                                // Send the negative button event back to the
                                // host activity.
                                listener.onDialogNegativeClick(this)
                            })

            builder.create()
        } ?: throw IllegalStateException("Activity cannot be null")
    }
자바
public class NoticeDialogFragment extends DialogFragment {
    ...
    @Override
    public Dialog onCreateDialog(Bundle savedInstanceState) {
        // Build the dialog and set up the button click handlers.
        AlertDialog.Builder builder = new AlertDialog.Builder(getActivity());
        builder.setMessage(R.string.dialog_start_game)
               .setPositiveButton(R.string.start, new DialogInterface.OnClickListener() {
                   public void onClick(DialogInterface dialog, int id) {
                       // Send the positive button event back to the host activity.
                       listener.onDialogPositiveClick(NoticeDialogFragment.this);
                   }
               })
               .setNegativeButton(R.string.cancel, new DialogInterface.OnClickListener() {
                   public void onClick(DialogInterface dialog, int id) {
                       // Send the negative button event back to the host activity.
                       listener.onDialogNegativeClick(NoticeDialogFragment.this);
                   }
               });
        return builder.create();
    }
}
대화상자 표시
대화상자를 표시하고자 하는 경우, DialogFragment의 인스턴스를 생성한 다음 show()를 호출하여 FragmentManager와 대화상자 프래그먼트의 태그 이름을 전달합니다.
FragmentManager는
getSupportFragmentManager()
에서
FragmentActivity
를 호출하거나
getParentFragmentManager()
에서 Fragment를 호출하여 가져올 수 있습니다. 다음 예시를 참조하세요.
Kotlin
fun confirmStartGame() {
    val newFragment = StartGameDialogFragment()
    newFragment.show(supportFragmentManager, "game")
}
자바
public void confirmStartGame() {
    DialogFragment newFragment = new StartGameDialogFragment();
    newFragment.show(getSupportFragmentManager(), "game");
}
두 번째 인수 "game"은 시스템이 필요에 따라 프래그먼트의 상태를 저장하고 복원하는 데 사용하는 고유한 태그 이름입니다. 이 태그를 사용하면 findFragmentByTag()를 호출하여 프래그먼트 핸들을 가져올 수 있습니다.
대화상자를 전체 화면으로 또는 삽입된 프래그먼트로 표시
어떤 상황에서는 UI 디자인의 한 조각을 대화상자로 나타내지만 어떤 상황에서는 전체 화면이나 삽입된 프래그먼트로 나타내도록 하고 싶을 수 있습니다. 기기의 화면 크기에 따라 다르게 표시되도록 하고 싶을 수도 있습니다.
DialogFragment 클래스에서 이런 유연성을 제공하는 것은
삽입 가능한 Fragment 역할을 할 수 있기 때문입니다.
그러나 이 경우에는 AlertDialog.Builder 또는 다른
Dialog 객체를 사용하여 대화상자를 빌드하면 안 됩니다. DialogFragment를 삽입 가능한 상태로 만들려면, 레이아웃 안에 있는 대화상자의 UI를 정의해야 합니다. 그런 다음 레이아웃을 onCreateView() 콜백에 로드합니다.
다음은 대화상자 또는 삽입 가능한 프래그먼트 중 어느 쪽으로든 표시될 수 있는 DialogFragment의 예시입니다(purchase_items.xml이라는 레이아웃 사용).
Kotlin
class CustomDialogFragment : DialogFragment() {

    // The system calls this to get the DialogFragment's layout, regardless of
    // whether it's being displayed as a dialog or an embedded fragment.
    override fun onCreateView(
            inflater: LayoutInflater,
            container: ViewGroup?,
            savedInstanceState: Bundle?
    ): View {
        // Inflate the layout to use as a dialog or embedded fragment.
        return inflater.inflate(R.layout.purchase_items, container, false)
    }

    // The system calls this only when creating the layout in a dialog.
    override fun onCreateDialog(savedInstanceState: Bundle): Dialog {
        // The only reason you might override this method when using
        // onCreateView() is to modify the dialog characteristics. For example,
        // the dialog includes a title by default, but your custom layout might
        // not need it. Here, you can remove the dialog title, but you must
        // call the superclass to get the Dialog.
        val dialog = super.onCreateDialog(savedInstanceState)
        dialog.requestWindowFeature(Window.FEATURE_NO_TITLE)
        return dialog
    }
}
자바
public class CustomDialogFragment extends DialogFragment {
    // The system calls this to get the DialogFragment's layout, regardless of
    // whether it's being displayed as a dialog or an embedded fragment.
    @Override
    public View onCreateView(LayoutInflater inflater, ViewGroup container,
            Bundle savedInstanceState) {
        // Inflate the layout to use as a dialog or embedded fragment.
        return inflater.inflate(R.layout.purchase_items, container, false);
    }

    // The system calls this only when creating the layout in a dialog.
    @Override
    public Dialog onCreateDialog(Bundle savedInstanceState) {
        // The only reason you might override this method when using
        // onCreateView() is to modify the dialog characteristics. For example,
        // the dialog includes a title by default, but your custom layout might
        // not need it. Here, you can remove the dialog title, but you must
        // call the superclass to get the Dialog.
        Dialog dialog = super.onCreateDialog(savedInstanceState);
        dialog.requestWindowFeature(Window.FEATURE_NO_TITLE);
        return dialog;
    }
}
다음 예에서는 프래그먼트를 대화상자로 표시할지 전체 화면 UI로 표시할지 화면 크기를 근거로 결정합니다.
Kotlin
fun showDialog() {
    val fragmentManager = supportFragmentManager
    val newFragment = CustomDialogFragment()
    if (isLargeLayout) {
        // The device is using a large layout, so show the fragment as a
        // dialog.
        newFragment.show(fragmentManager, "dialog")
    } else {
        // The device is smaller, so show the fragment fullscreen.
        val transaction = fragmentManager.beginTransaction()
        // For a polished look, specify a transition animation.
        transaction.setTransition(FragmentTransaction.TRANSIT_FRAGMENT_OPEN)
        // To make it fullscreen, use the 'content' root view as the container
        // for the fragment, which is always the root view for the activity.
        transaction
                .add(android.R.id.content, newFragment)
                .addToBackStack(null)
                .commit()
    }
}
자바
public void showDialog() {
    FragmentManager fragmentManager = getSupportFragmentManager();
    CustomDialogFragment newFragment = new CustomDialogFragment();

    if (isLargeLayout) {
        // The device is using a large layout, so show the fragment as a
        // dialog.
        newFragment.show(fragmentManager, "dialog");
    } else {
        // The device is smaller, so show the fragment fullscreen.
        FragmentTransaction transaction = fragmentManager.beginTransaction();
        // For a polished look, specify a transition animation.
        transaction.setTransition(FragmentTransaction.TRANSIT_FRAGMENT_OPEN);
        // To make it fullscreen, use the 'content' root view as the container
        // for the fragment, which is always the root view for the activity.
        transaction.add(android.R.id.content, newFragment)
                   .addToBackStack(null).commit();
    }
}
프래그먼트 트랜잭션 실행에 관한 자세한 내용은 프래그먼트를 참고하세요.
이 예시에서는 mIsLargeLayout 부울이 현재 기기가 앱의 큰 레이아웃 디자인을 써야 할지 여부를 나타냅니다(따라서 이 프래그먼트를 전체 화면이 아니라 대화상자로 표시). 이런 종류의
부울을 설정하는 가장 좋은 방법은
부울 리소스
값을 여러 가지 화면 크기에 관한
대체
리소스 값으로 선언하는 것입니다. 예를 들어 다음은 여러 가지 화면 크기에 관한 두 가지 버전의 부울 리소스입니다.
res/values/bools.xml
<!-- Default boolean values -->
<resources>
    <bool name="large_layout">false</bool>
</resources>
res/values-large/bools.xml
<!-- Large screen boolean values -->
<resources>
    <bool name="large_layout">true</bool>
</resources>
그러면 활동의 onCreate() 메서드 중에 mIsLargeLayout 값을 초기화할 수 있습니다. 다음 예시를 참고하세요.
Kotlin
override fun onCreate(savedInstanceState: Bundle?) {
    super.onCreate(savedInstanceState)
    setContentView(R.layout.activity_main)

    isLargeLayout = resources.getBoolean(R.bool.large_layout)
}
자바
boolean isLargeLayout;

@Override
public void onCreate(Bundle savedInstanceState) {
    super.onCreate(savedInstanceState);
    setContentView(R.layout.activity_main);

    isLargeLayout = getResources().getBoolean(R.bool.large_layout);
}
활동을 큰 화면에 대화상자로 표시
작은 화면의 경우 대화상자를 전체 화면 UI로 표시하는 대신, 큰 화면에 있을 때에는 Activity를 대화상자로 표시함으로써 같은 결과를 얻을 수 있습니다. 어느 방식을 사용할 것인지는 앱 디자인에 따라 달라지지만, 활동을 대화상자로 표시하면 앱이 작은 화면용으로 디자인된 상태에서 태블릿에서의 환경을 개선하기 위해 일시적인 활동을 대화상자로 표시하는 경우에 유용할 때가 많습니다.
큰 화면의 경우 활동을 대화상자로만 표시하려면, Theme.Holo.DialogWhenLarge
테마를 <activity> 매니페스트 요소에 적용하면 됩니다.
<activity android:theme="@android:style/Theme.Holo.DialogWhenLarge" >
활동을 여러 가지 테마로 스타일링하는 방법에 관한 자세한 내용은 스타일 및 테마를 참고하세요.
대화상자 닫기
사용자가 AlertDialog.Builder로 생성한 작업 버튼을 탭하면 시스템이 대화상자를 대신 닫습니다.
시스템은 사용자가 대화상자 목록에서 항목을 탭하는 경우에도 대화상자를 닫습니다. 다만 목록이 라디오 버튼이나 체크박스를 사용하는 경우에는 예외입니다. 그렇지 않으면 대화상자를 수동으로 닫을 수도 있습니다. DialogFragment에서 dismiss()를 호출하면 됩니다.
대화상자가 사라질 때 특정 작업을 실행해야 하는 경우, DialogFragment에서 onDismiss() 메서드를 구현하면 됩니다.
또한 대화상자를 취소 할 수도 있습니다. 이것은 사용자가 작업을 완료하지 않고 대화상자를 떠난다는 것을 나타내는 특수 이벤트입니다. 사용자가 뒤로 버튼을 탭하거나 대화상자 영역 밖의 화면을 탭하는 경우 또는 개발자가 Dialog에서 cancel()을 명시적으로 호출하는 경우(예: 대화상자의 '취소' 버튼에 대한 응답으로)에 발생합니다.
이전 예시에 나타난 바와 같이 취소 이벤트에 응답하려면 DialogFragment 클래스에서 onCancel()을 구현하면 됩니다.