
Profile-Guided Optimization support was introduced in AGDE version 22.2.71.
Locating the PGO settings
Open your project settings from Solution Explorer.
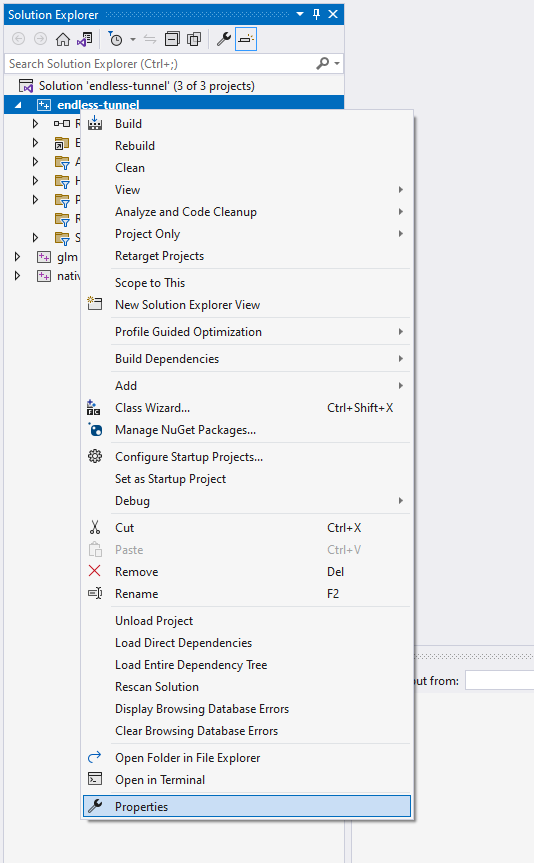
Figure 1: The Visual Studio Solution Explorer window.
Make sure that your Platform is set to an Android configuration (for example, Android-arm64-v8a).
In the left-hand panel, select Configuration Properties > General. Look for the property group called PGO.
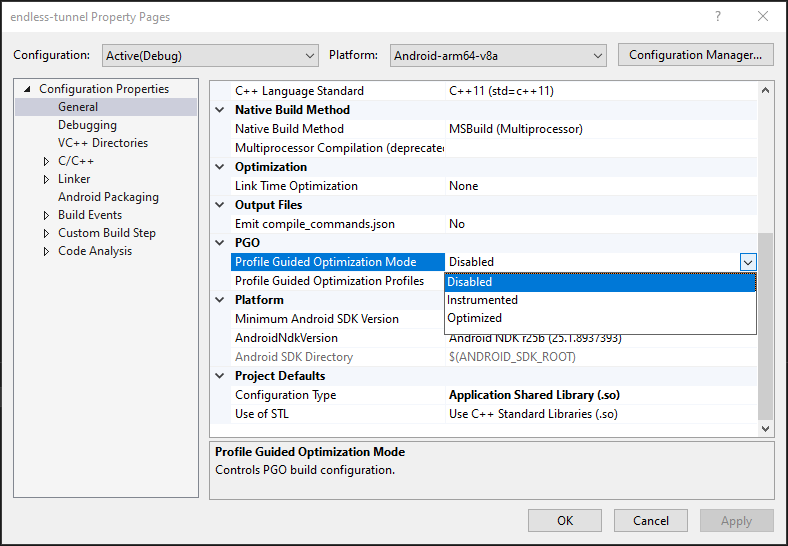
Figure 2: The Project Properties dialog.
Enable PGO-Instrumented Builds in the Project
Add a new configuration called Instrumented to your project. This is based on the configuration you use during development for testing, which should be your traditional optimized build (you can still have additional debugging features enabled as long as you preserve the compiler optimization settings).
Click on Configuration Manager… in the Property page dialog.

Figure 3: The Configuration Manager dialog.
In the Configuration Manager dialog, select the Active solution configuration drop-down and choose <New…>.
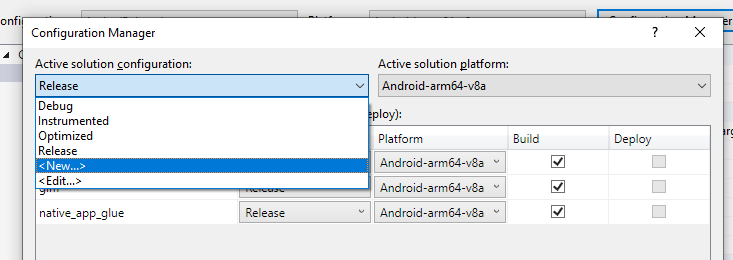
Figure 4: Creating a New build configuration.
… and create a new PGO-Instrumented configuration.
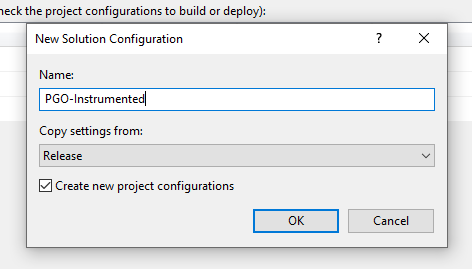
Figure 5: The New Solution Configuration dialog.
To enable building in PGO-Instrumented mode, so that you can generate a profile for your game, select Instrumented from the list of options for the Profile-Guided Optimization Mode setting.
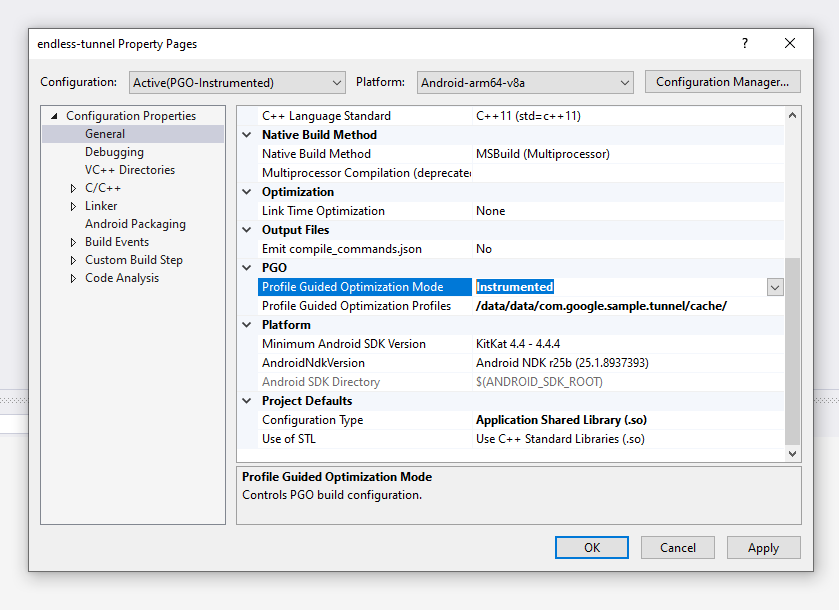
Figure 6: The Project Properties dialog, highlighting the PGO settings.
For the Profile Guided Optimization Profiles setting, enter the path to the
folder to write the raw output profile data file to on your Android device.
Typically this value should be something like /data/data/<package
name>/cache/ – where <package name> is the full package name of your
APK – for example, com.google.sample.tunnel.
For more in-depth information about how this works, see the Clang documentation.
Writing PGO-Instrumented profile data to your device
PGO data is usually written to the device by the PGO instrumentation system when a process exits. On Android, apps don't exit – they're always terminated. This means the default "write to disk" functionality never triggers, requiring your app to write PGO data manually.
Your app you should explicitly call __llvm_profile_write_file to write out the
profile data. This symbol is only available when building a PGO-instrumented
build. To make this easier, we recommend using the following pattern when
forward declaring __llvm_profile_write_file.
#ifdef PGO_INSTRUMENT
extern "C" int __llvm_profile_write_file(void);
#else
extern "C" int __llvm_profile_write_file(void) { return 0; }
#endif
Calling this function writes the profile data to the folder that you specified earlier.
Performing a profile run
To generate the profile, you run your APK built with PGO-instrumentation on the
target device. After you have exercised the code to your satisfaction, and have
triggered the call to the __llvm_profile_write_file function, your app will
write the profile data to storage.
At this point, copy the profiles back off the device for use by the compiler.
Preparing profile data for use by the compiler
When used in isolation, the command-line tool llvm-profdata that ships as part
of Clang/LLVM in the Android NDK is used to prepare profile data files for use
by the compiler during profile-guided optimization of a build.
AGDE performs this step automatically for you by merging together any profile data files you have added to your project, and consuming them when the Profile-Guided Optimization Mode setting in the project property pages is set to Optimized.
Building your project with Profile-Guided Optimization enabled
Now that you have captured your profile(s), and added it to your project, the compiler can use that data to fine-tune the optimization of your build.
Create a new project configuration for your PGO-Optimized Build so that you only build in this mode when it's needed.
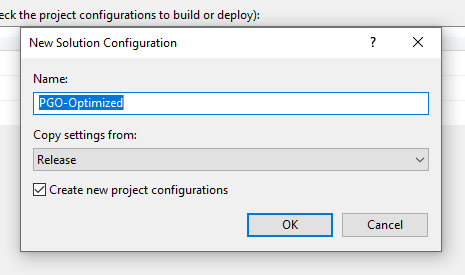
Figure 7: Creating a new PGO-Optimized Build configuration.
Set the Profile-Guided Optimization Mode setting in the project property pages to Optimized.
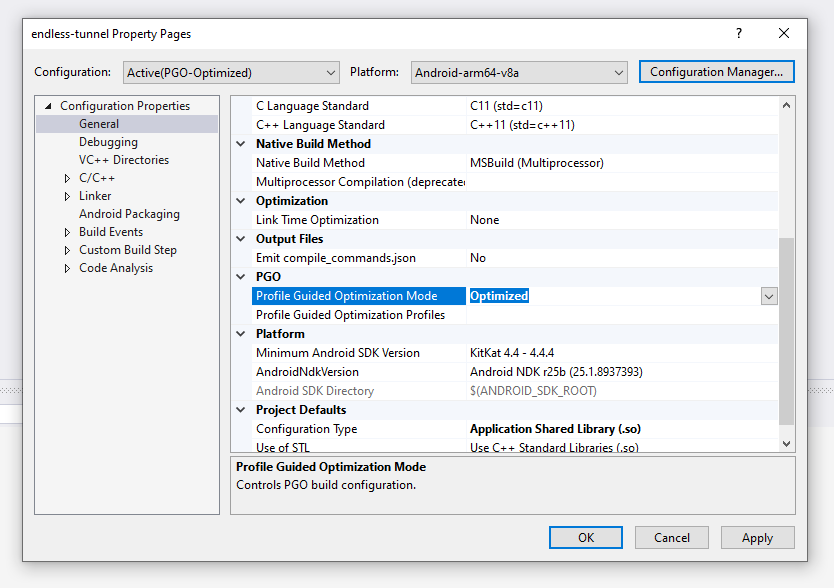
Figure 8: Setting the PGO Optimization mode to Optimized.
Copy the files from the device and add them to your project in the Solution Explorer. These profile data files are picked up by the compiler the next time you build your PGO-Optimized configuration, and used to tune how the compiler optimizes your code.
You can copy the profile data files into your project from the device using ADB, or by using the Android Device Explorer.
Using Profile-Guided Optimization outside of AGDE
If you are using a build system that is not supported by AGDE you may need to
edit your build directly. Clang's
documentation
covers the necessary switches – -fprofile-generate, and
-fprofile-use.
If you are using a middleware engine for your game, consult the documentation for your engine to see how to enable PGO (if it is supported).