This guide will cover the following steps:
- Selecting a version and release of Godot.
- Downloading and installing Godot.
- Configuring Godot for Android development.
- Configuring your system for C# development and export (Mono release of Godot only).
Select a version
Use the latest stable release of Godot when possible. For Android development, use version 3.3 or higher.
Download and run Godot
Visit the Godot download page to download the game engine for your preferred environment.
Godot offers two releases on its download page: standard and Mono. Either may be used to develop for Android. The Mono release is required for C# development.
Godot is distributed as a standalone application. It does not require an installation process; after extracting the download archive, you can run it as-is.
Configure Android support
Configure the Android Studio SDK settings
- If you haven’t already done so, download and install the latest stable release of Android Studio.
- Launch Android Studio.
- In the Welcome to Android Studio window, open the Configure dropdown menu and select SDK Manager.
- At the top of the window, make a note of the Android SDK Location on your computer. You will need to specify that location in Godot editor.
- In the SDK Platforms tab, find the list entry for Android 11.0 R. Check the item if it is unchecked.
- In the SDK Tools tab, find the list items for NDK (Side by side), Android SDK Command-line Tools, and CMake. Check them if they are unchecked.
- If any list items have their status set to Update Available, enable their check box to update to the latest version.
- Click the OK button. Confirm the download and accept the license agreements to complete the installation.
Create a debug keystore
Android apps must be digitally signed
to run on a device. For local testing, a debug keystore file may be used to sign
apps. Android Studio will automatically create a default debug keystore. If you
have previously built apps using a debug configuration with Android Studio, a
debug.keystore file should be located in the following directory:
- Microsoft Windows:
C:\Users\$username\.android\debug.keystore - Linux/macOS:
~\.android\debug.keystore
If the debug.keystore file does not exist, create one by performing the
following steps:
- Launch Android Studio.
- In the Welcome to Android Studio window, select the Import an Android Code Sample option.
- Select the Ndk -> Hello GL2 sample from the list and click the Next button.
- Choose a location for the project and click the Finish button.
- Wait for the project to load and sync with Gradle, then select Build -> Make Project from the Android Studio menu bar.
- Wait for the build to finish, then verify a
debug.keystorefile was created in the appropriate directory.
Set the Android SDK and debug keystore location in Godot editor
- Launch the Godot editor.
- Create or open a project.
- Select Editor -> Editor Settings… from the Editor menu bar.
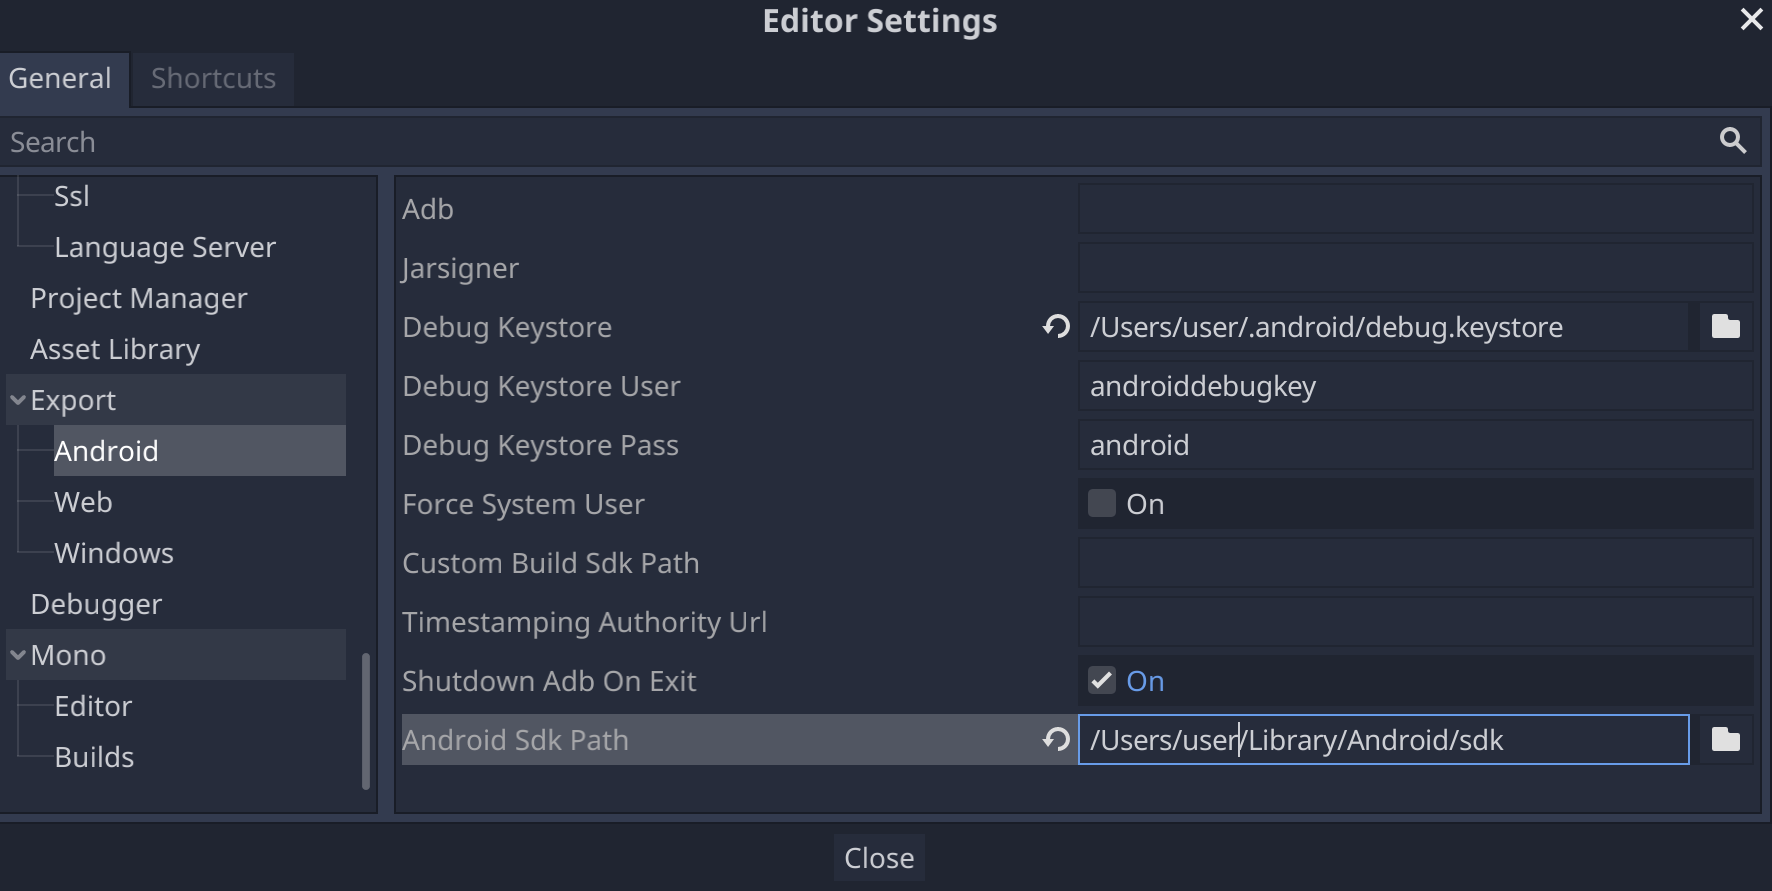
- In the Editor Settings window, select the Export -> Android item in the left panel.
- In the right panel, go to the text box for Android Sdk Path and enter the path to the Android SDK.
- In the text box for Debug Keystore enter the path to the
debug.keystorefile.

Set up Mono
Install MSBuild
The Mono release of Godot requires MSBuild to build and export projects that use C#. To install MSBuild:
Linux and macOS
Microsoft Windows
- Install Microsoft Visual Studio or Microsoft Visual Studio Build Tools. When you run the installer, ensure you have the .NET Framework 4.5 targeting pack selected for installation.
Configure a C# editor
Godot has very limited support for editing C# code. Using an external editor for C# files is strongly recommended. Godot supports the following C# editors:
- Microsoft Visual Studio/Visual Studio for Mac
- Microsoft Visual Studio Code
- JetBrains Rider
- MonoDevelop
To configure an external C# editor, open a project in the Godot editor and perform the following steps:
- Select Editor -> Editor Settings… from the editor menu bar.
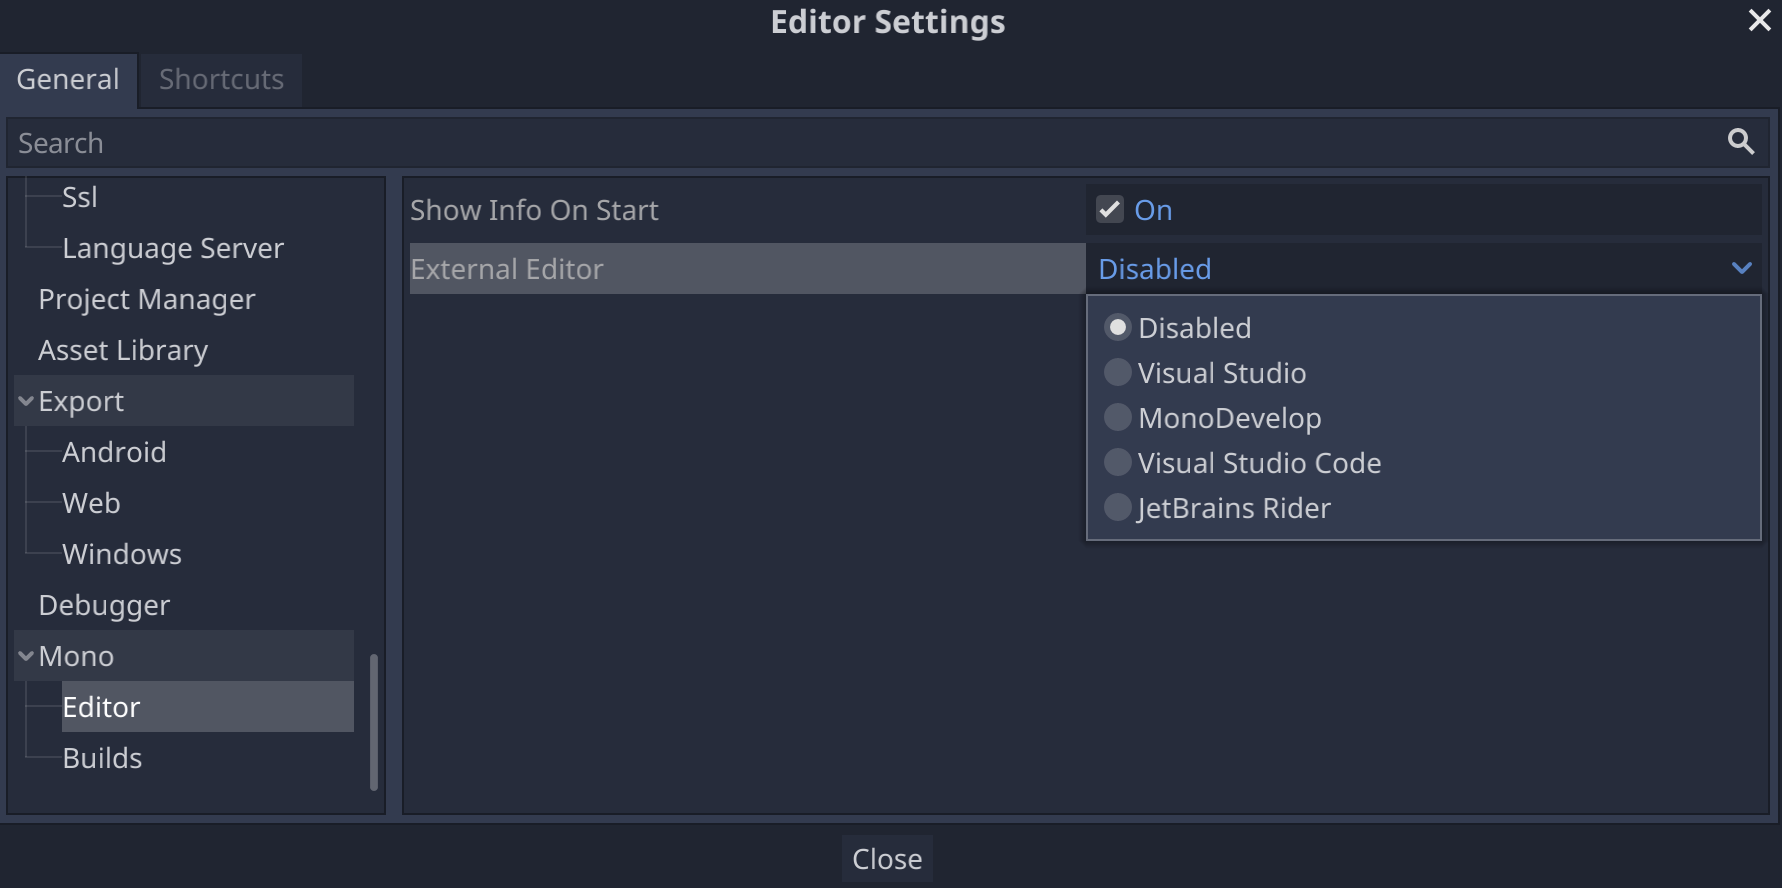
- In the Editor Settings window, select the Mono -> Editor item in the left panel.
- Choose the desired editor from the External Editor dropdown menu.

C# editor plugins for Godot
- C# Tools for Godot: A plugin for Microsoft Visual Studio Code that adds C# debugging support and partial code completion features.
- JetBrains Rider plugin: Adds C# debugging support.
