
Model Context Protocol (MCP) is an open standard that lets developers build secure, two-way connections between AI assistants and data sources or tools.
Starting with Unreal Engine 5.8, integrating Unreal's MCP server with Google's Antigravity allows an AI agent in the IDE to interact directly with the Unreal Editor. This integration lets the agent seamlessly execute editor operations to streamline your game development workflow.
Set up Unreal MCP for Antigravity IDE
Open the Unreal Editor, go to Edit > Plugins, and enable the Unreal MCP and All Toolsets plugins. Depending on your workflow, you can activate additional plugins.

Figure 1. Enabling Unreal MCP plugin. 
Figure 2. Applying All Toolsets plugin. Go to Edit > Editor Preferences, locate the General - Model Context Protocol settings, and enable Auto Start Server.
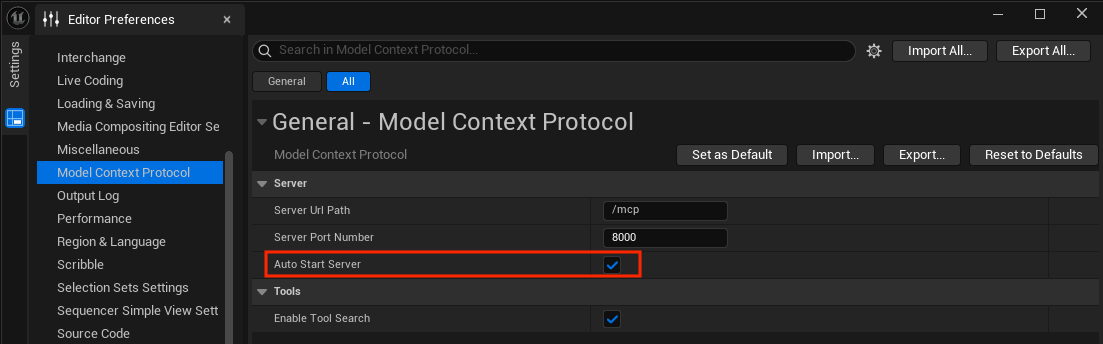
Figure 3. Activating Auto Start Server. To start the MCP server, restart the Unreal Editor, or in the editor console, enter the
ModelContextProtocol.StartServercommand.Install Antigravity IDE, and sign in with your Google Account.
In the Antigravity IDE, open the Agent window, click Additional Options (the three-dot menu), and select MCP Servers > Manage MCP Servers > View raw config.
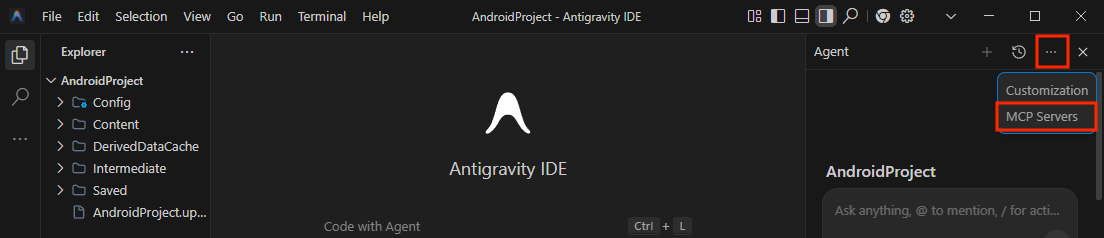
Figure 4. Navigating to MCP Servers. 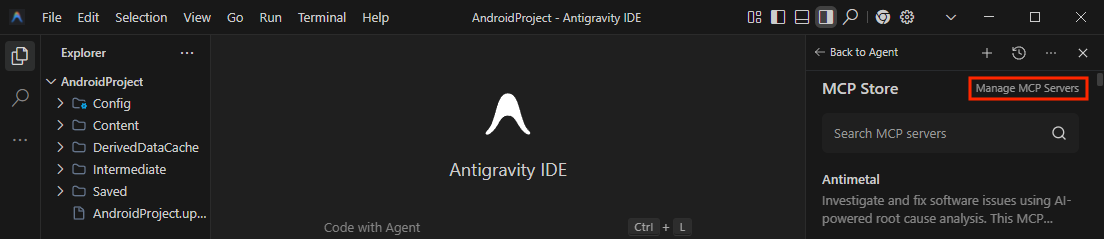
Figure 5. Selecting Manage MCP Servers. 
Figure 6. Clicking View raw config button. Add this configuration to
mcp_config.json, replacing[YOUR_PORT]with your Unreal Editor port:{ "mcpServers":{ "unreal-mcp":{ "serverUrl":"http://127.0.0.1:[YOUR_PORT]/mcp" } } }
Figure 7. Configuring the Unreal MCP server.
Verify setup with an example
Here's an example of using Gemini within the Antigravity IDE to add a 3D sphere to the scene.
In the Antigravity IDE, open the Agent window and enter a prompt to add a 3D sphere to your scene.
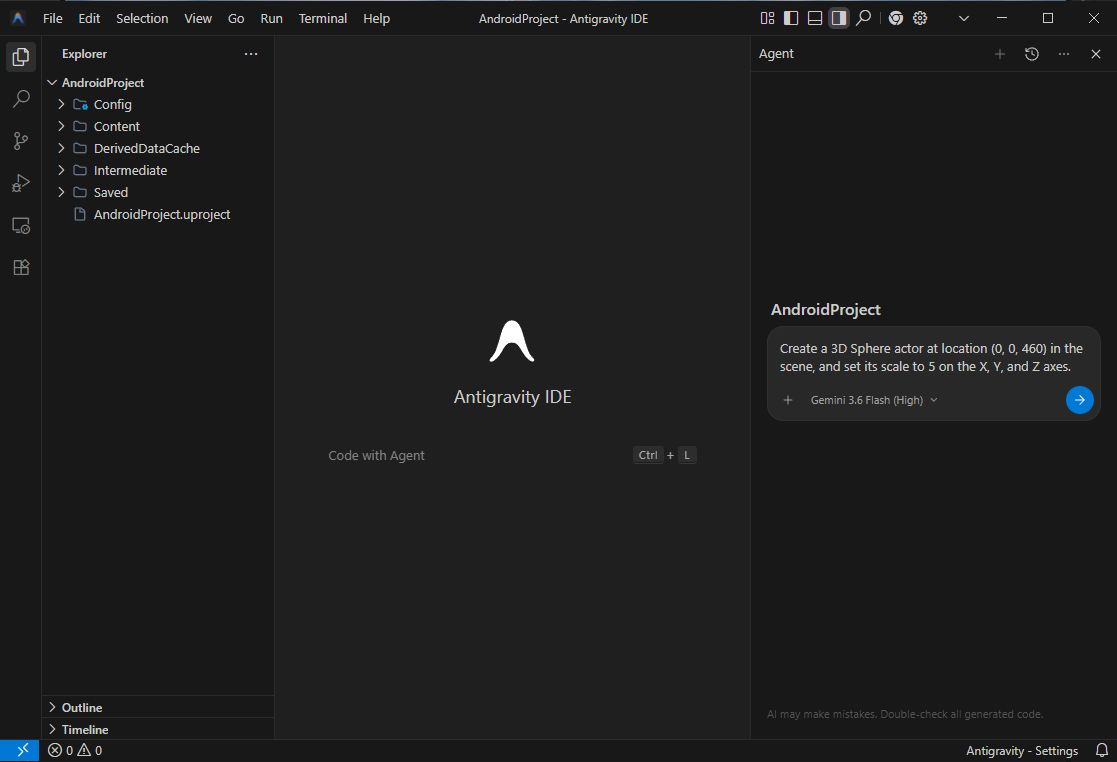
Figure 8. Prompting the AI agent to add a sphere. In the Unreal Editor, confirm that the sphere is in the scene.
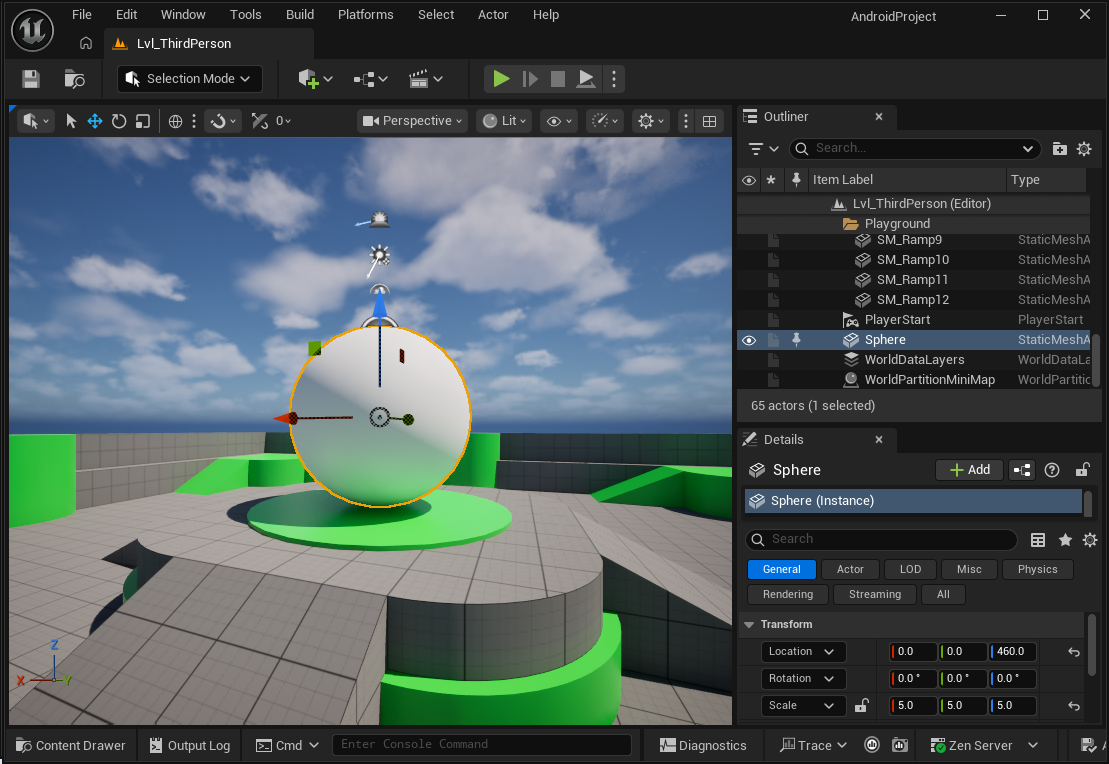
Figure 9. Sphere added to the Unreal Editor scene.